
Summary of Contents for SnapAV WPS-ACC-PTZ-CTRL
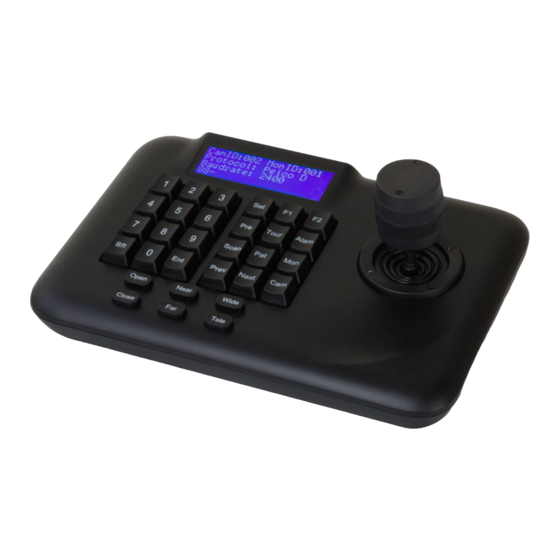
- Page 1 WPS-ACC-PTZ-CTRL Keyboard Controller User’s Manual Tour Alam Scan Prev Next Open Near Wide Close Tele...
- Page 2 Overview The WPS-ACC-PTZ-CTRL controller uses standard protocols to let you control your surveillance cameras as well as your system’s DVRs. In addition, if your cameras are equipped with pan/tilt/zoom (PTZ) functionality, this controller gives you total control over their operation.
-
Page 3: Table Of Contents
Safety Instructions • Read all instructions and abide by all warnings in this manual. • Keep this manual for future reference. • Do not install this unit near any heat sources such as radiators, heat registers, stoves, amplifiers, or other equipment that produces heat. Contents Connecting the PTZ Keyboard Controller . -
Page 4: Connecting The Ptz Keyboard Controller
Connecting the PTZ Keyboard Controller This keyboard controller uses any one of three different interfaces to control your peripheral equipment: RS-422, RS-485, and RJ45. RS-485 Interface The RS-485 port connects the keyboard controller to the PTZ camera to allow direct control of camera’s operation. The keyboard controller can link the same DVR to several PTZ cameras. -
Page 5: Rs-422 Interface
RS-422 Interface If needed, the RS-422 may be used to connect the PTZ keyboard controller to a matrix. Please see your matrix documentation for installation instructions. RJ45 Interface RJ45 is also useful for matrix connections. The maximum communication distance over an RJ45 connection is 25 feet. Please see your matrix documentation for installation instructions. -
Page 6: Connecting The Controller To Several Devices
Connecting the Controller to Several Devices Using the RS-485 interface, the PTZ controller can connect to an array of PTZ cameras and DVRs. For ease of use in a system that contains a single DVR and several PTZ cameras, set the device ID of the DVR to 0. Set the device IDs of each attached PTZ camera equal to the channel on the DVR that the camera is connected to. -
Page 8: Using Your Ptz Keyboard Controller
Using Your PTZ Keyboard Controller This controller is designed to provide intuitive control of your PTZ cameras. Tour Alam Scan Prev Next Open Near Wide Close Tele Powering the Keyboard When the controller is plugged in (or powered up), the controller initializes. IMPORTANT: While the keyboard is initializing, leave the joystick in the center. -
Page 9: Using The Joystick
During normal operation, the controller’s the LCD is backlit. After 5 seconds of inactivity, the LCD illumination shuts off automatically. Touching any control powers the LCD illumination again. Using the Joystick On the PTZ keyboard controller, the joystick has 2 functions: •... -
Page 10: Ptz Camera Lens Control
PTZ Camera Lens Control To zoom the selected camera in, press the Tele button on the keyboard. To zoom the selected camera out, press the Wide button on the keyboard. To focus the camera on a distant object, press the Far button on the keyboard. To focus on an object close at hand, press the Near button. -
Page 11: Setting Up The Ptz Keyboard Controller
Setting Up the PTZ Keyboard Controller Press and hold the Set button until you see the main menu options displayed on the LCD. You can press any numerical key to select a menu option and jump into its submenu. You can also move the joystick up and down to highlight a menu item, and then move the joystick to the right to select that item and move to its submenu. -
Page 12: Keyboard Setup Menu
Keyboard Setup Menu To access these commands, Press and hold Set to enter the main menu, then select 1. Keyboard setup. These menu items allow you to set and view the keyboard parameters. Set KB (Keyboard) Parameters Menu This menu lets you designate the various parameters used by your keyboard. Set the Controller’s Unique ID From the Keyboard setup menu, choose: 1. -
Page 13: About Keyboard Menu
Enable/Disable Multiple Keyboards Multi-keyboard Connection state setting From the Keyboard setup menu, choose: 1. Set KB Parameter 4. Mul_KB:OFF When you select this menu item, the highlight moves to the word OFF. Move the joystick up or down to toggle between ON (multiple keyboards allowed in the system) and OFF (only one keyboard allowed). -
Page 14: Dome Setup Menu
Dome Setup Menu To access these commands, Press and hold Set to enter the main menu, then select 2. Dome setup. These menu items allow you to set and view the parameters of the various cameras attached to the system. IMPORTANT: This section of the manual is written to the specifications of the WPS-500-PTZ-A and the WPS-750-PTZ-A camera models. -
Page 15: Set Dome Pattern Menu
Set Dome Pattern Menu A pattern is a regular system of movement that a camera uses to cover a wide area. Wirepath PTZ cameras (WPS-750-PTZ-A and WPS-500-PTZ-A) support up to three patterns. Selecting a Pattern to Edit From the Dome Setup menu, choose: 3. -
Page 16: Protocol Select Menu
Protocol Select Menu This menu lets you select the protocols being used by your system. Matrix Menu This lets you review the protocol for your surveillance matrix. Dome Menu This lets you choose which protocol your controller uses when in direct control of a PTZ camera. -
Page 17: Rs-485 Bus
RS-485 Bus This section presents various technical details of the system. RS-485 Bus As required by the RS-485 standards, the RS-485 bus uses half-duplexed data transmission cables with impedance of 120 Ω. The maximum load on the bus is 32 devices, including the PTZ keyboard controller and any peripheral equipment like DVRs. -
Page 18: Keyboard Shortcuts
Keyboard Shortcuts Below is a list of keyboard shortcuts available with this controller. Keystrokes are separated by a + sign. For example, “Set + Ent” means to press the Set key and then the Ent key (do not press them both at the same time). The symbol [##] means to enter a numeric value. -
Page 19: Menu Map
Menu Map 1. Set KB ID 2. Set baudrate 3. Joy_calibrate 1. Set KB Parameter 4. Multi keyboard status: 2. About keyboard [Shows specifications] 1. Save preset 2. Show preset 3. Clear preset 1. Keyboard setup 1. Set dome preset 2. -
Page 20: Support
Support Need Help? Contact Tech Support! If you need further clarifcation, please call tech support at 800.838.5052, or email support@SNAPAV.com. For other information, instructional videos, support documentation, or ideas, visit our website and view your item’s product page at www.SNAPAV.com.
Need help?
Do you have a question about the WPS-ACC-PTZ-CTRL and is the answer not in the manual?
Questions and answers