Advertisement
Quick Links
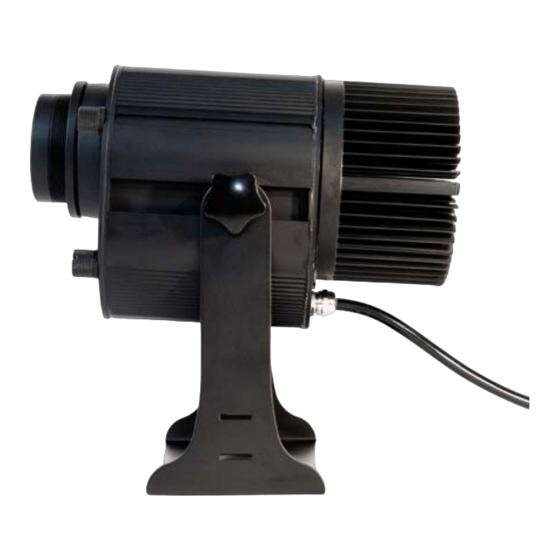
iPro 60E/80E/100E/150E LED
Outdoor Gobo Projector
Instruction/User Manual and Specifications
Package Contents
Projector, optical lens and cable with standard 110 Volt plug.
Description
iPro "E" LED projectors are rated IP-65 for outdoor use. To project
an image, a high resolution glass or metal gobo is required. To
order a gobo, e-mail the artwork of the desired image to
UseLight.com. Line-art or vector files are acceptable, as are pixel
files (e.g. .JPEG, .PNG, .TIFF, .PDF, etc.) 300 dpi or better.
Safety Information
•
For indoor or outdoor use.
•
Prevent direct eye exposure to the light source as it may lead
to injury or blindness.
•
The projector may generate heat. Please use caution when
handling or touching the unit during and after operation.
•
Only use power sources that comply with local electrical and
building codes and have proper grounding.
Gobo Specifications
•
Outer diameter (OD) - 37.5 mm
•
Inner or image diameter (ID) - 25 mm
•
Gobo thickness: Up to 3 mm
Info@
1
Advertisement

Summary of Contents for Image Projection Pro 60E
- Page 1 iPro 60E/80E/100E/150E LED Outdoor Gobo Projector Instruction/User Manual and Specifications Package Contents Projector, optical lens and cable with standard 110 Volt plug. Description iPro “E” LED projectors are rated IP-65 for outdoor use. To project an image, a high resolution glass or metal gobo is required. To order a gobo, e-mail the artwork of the desired image to Info@ UseLight.com.
- Page 2 Projector Specifications Gobo Installation Model: iPro-60E iPro-80E iPro-100E iPro-150E and Exchange Voltage: 110 to 277 V* 110 to 277 V* 110 to 277 V* 110 to 277 V* Lamp 60 W 80 W 100 W 150 W (LED) Rated Frequency: 50/60 Hz 50/60 Hz 50/60 Hz...
- Page 3 Adjusting the Image Focus Once the gobo is succesfully installed and the front plate cover is reattached, rotate the lens clockwise or counter-clockwise until the image is in focus. Once the image is in focus, turn the lock ring clockwise until the rubber gasket is slightly compressed.