Table of Contents
Advertisement
Quick Links
Advertisement
Table of Contents

Summary of Contents for Aeffe KEELCRAB PRO
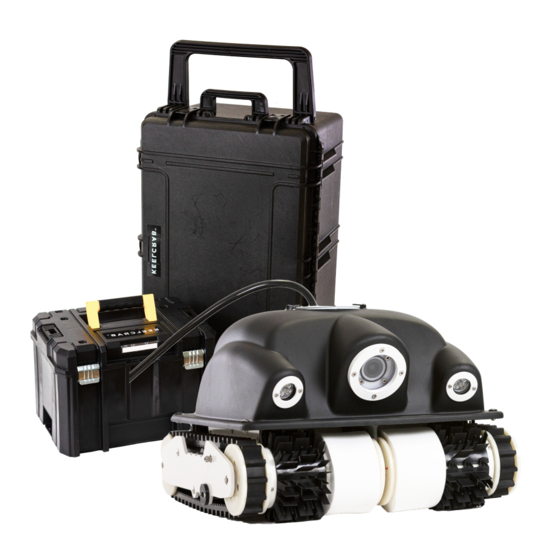
- Page 1 KEELCRAB PRO Maintenance User's Manual Features Tutorial Before the drone utilization read DRONE carefully the informations contained in this paper and consult the tutorials on our website. Assistance Keelcrab.com © Aeffe srl, All the rights reserved 2022...
- Page 2 Performance improvement The system allows optimal performance and reduces the effort of the mechanical and engine components of your boat. Keelcrab PRO 2022 Iis developed to maintain with standard brush and to clean with motorized vertical brush. Hull inspection Thanks to the camera and LEDs, Keelcrab also allows you to monitor and inspect the physical state of the hull in perfect safety.
-
Page 3: Table Of Contents
INDEX 1.KEELCRAB PRO®..............2.IMPORTANT MAINTENANCE NOTICE........3.USE OF KEELCRAB PRO............... 4.REMOTE CONTROL................ 5.FLOATING LINE................6.HYDROSTATIC STRUCTURE..............7.INCLINATION OF THE CAMERA............8.WI-FI CONNECTIVITY................9.ORDINARY MAINTENANCE................15 9.1 Motorized vertical brush Replacement ................ -
Page 4: Index
INDEX 9.2 Brush Replacement................9.3 Keelcrab Bag Replacement............... 9.3 Keelcrab Bag Mounting................9.4 Propeller Cleaning................... 9.5 Rubber Brush Replacement................9.6 PVA-Wall Grip Sponges Replacement..............9.7 Floating Disc Replacement..................10.EXTRAORDINARY MAINTENANCE............ -
Page 5: Keelcrab Pro
INDICATIONS ON USE Optimal temperature for use: from 5 ° to 35 ° C. Maximum depth of use tested by Aeffe ltd: up to 10 meters. Suggested maintenance / ordinary service(suggested): 350 hours of use. Second maintenance, extraordinary service (mandatory): 500 hours of... -
Page 6: Important Maintenance Notice
2.IMPORTANT MAINTENANCE NOTICE Aeffe ltd is not responsible for any damage or injury that occurs at any time and caused by poor maintenance. To extend the life of the drone, the following maintenance operations must be performed regularly: 1. Before and after each cleaning cycle, rinse the drone, brushes with fresh (unsalted) water, the internal section, the wall grip sponges, the shaft and the propeller. - Page 7 2.IMPORTANT MAINTENANCE NOTICE IMPORTANT: In case of non-execution of the ordinary maintenance as mentioned in the previous points, Aeffe ltd will not be held responsible for any future damage or injury to consumables as well as mechanical, electronic or power elements.
-
Page 8: Use Of Keelcrab Pro
3.USE OF KEELCRAB PRO® Choose brush considering the hull condition: standard brush are developed for hull maintenance, in case you need to clean and HOW DRONE WORKS remove not only the first layer of vegetation, but also the first formation of barnacles, we suggest you to install motorized vertical brush. -
Page 9: Remote Control
4.REMOTE CONTROLLER 1) ON/OFF Display Turn on the display after connecting the remote control cable to the electronics box. IMPORTANT: the new remote controller devices do not have ON/OFF display. The drone is ready to work once you you switch ON the electronic box. -
Page 10: Floating Line
4.REMOTE CONTROLLER 4) Diagnostic indicator light The following alarms are indicated by priority: Power supply specifications out of range: flashing 8 times, repeats every 6 seconds. Communication failure alarm with the remote control: flashes 7 times, repeats every 5 seconds. Engine hour counter alarm (limit of 500 hours reached): flashing 6 times, repeats every 5 seconds. - Page 11 5.FLOATING WATERLINES To optimize the cleaning of the waterline, proceed as follows: Lead the robot towards the waterline; Using the lateral movement buttons (right / left), command the robot to proceed along the waterline until the cleaning operation is completed; When diving with the robot suggested to go "back"...
- Page 12 6.CAMERA INCLINATION 1) Use an Allen wrench (Φ3 mm) to unscrew or tighten the screws of the ring nut of the cam (especially by acting on the one placed higher and the 2 lateral) until it matches the inclination of the desired visibility.
-
Page 13: Hydrostatic Structure
7.HIDROSTATIC STRUCTURE A kit of spare floating discs is supplied in order to be able to replace or adjust the hydrostatic set-up of the drone. If one realizes the lack of buoyancy thrust (with the engine off) of the drone, you add to the individual rollers (in all 4 and in a balanced way in order not to vary the buoyancy thrust on one side only) one disc of floating material at a time. -
Page 14: Wi-Fi Connectivity
8- WIFI CONNECTIVITY 1) Download WIFIAV-HD application from Play Store or Apple Store. 2) Open the settings of your device by selecting the generated wi-fi network. WIFI network name: KEELCRAB 3) Connect by entering the password: KEELCRAB 4) Open the application on your device. -
Page 15: Ordinary Maintenance
9.ORDINARY MAINTENANCE Read all the instructions carefully for correct periodic maintenance of the following mechanical components: Motorized vertical brush Brush Propeller Natural rubber brush Wall-Grip Floating Disc IMPORTANT: In in each pdf manual you will find clickable images with links to the video tutorial. -
Page 16: Motorized Vertical Brush Replacement
9.1 Motorized vertical brush Replacement Motorized vertical brush is composed by two inset discs with a diameter of 160 mm each, moved by a dedicated DC motor. WATCH VERTICAL BRUSH Available in two different levels of abrasion: nylon 0,70 mm and REPLACEMENT TUTORIAL stainless steel 0,15 mm. -
Page 17: Brush Replacement
9.2 Brush Replacement Note: a Φ4 mm hex wrench (Allen wrench) is required. 1) Completely loosen both screws (right and left side) and remove the brush body. WATCH BRUSH REPLACEMENT TUTORIAL 2) Remove the belts connected to the ends of the brushes. 3) Before installing the new brush, return the toothed drive belt to the pulley and then check that the device rotates correctly (look at picture 3). - Page 18 9.2 Brush Replacement...
-
Page 19: Keelcrab Bag Replacement
9.3 Bag Replacement 1. Open the two filter locks before removing the filter holder. 2. After placing the filter holder rods in a vertical position, remove the WATCH BAG REPLACEMENT valve (see figure 2). TUTORIAL 3. Empty the bag and clean it, or replace it. 4. - Page 20 9.3 Bag Replacement...
-
Page 21: Keelcrab Bag Mounting
9.4 Bag Mounting 1. Unscrew washer and self-blocking from inox T bracket. 2. Place the inox T bracket as in figure 2. WATCH BAG MOUNTING TUTORIAL 3. Screw manually washer and self-blocking. 4. Tighten self-blocking using 7/16 wrench and philips-drill bit as in figure 4. - Page 22 9.4 Bag Mounting...
-
Page 23: Propeller Cleaning
9.5 Propeller Cleaning 1. Remove the propeller section cover after placing the latches in an upright position. 2. Unscrew the screw at the head of the propeller (use a Phillips WATCH PROPELLER MAINTENANCE screwdriver). TUTORIAL 3. Remove the propeller by storing the direction of extraction (part gleaned downwards). - Page 24 9.5 Propeller Cleaning...
-
Page 25: Rubber Brush Replacement
9.6 Rubber Brush Replacement 1. Remove the three joints of the rubber brushes one at a time by bringing one end upwards and keeping the other end fixed and firm. WATCH BLACK RUBBER REPLACEMENT 2. Remove the rubber brush. 3. Insert the new rubber brush. 4. - Page 26 9.6 Rubber Brush Replacement...
-
Page 27: Pva-Wall Grip Sponges Replacement
9.7 PVA-Wall Grip Sponges Replacement 1. Unscrew the side screws of the rollers at the same time (left and right) with a flat screwdriver and then remove screws and washers. WATCH WALL GRIP REPLACEMENT TUTORIAL 2. Widen the space between the roller and carter to facilitate removal. (be careful not to lose the plastic spacer). - Page 28 9.7 PVA-Wall Grip Sponges Replacement...
- Page 29 9.7 PVA-Wall Grip Sponges Replacement 8. Insert the new PVA-Wall grip. WATCH WALL GRIP REPLACEMENT TUTORIAL 9. Insert rubber brushes. 10. Place the rollers on the central frame stop. 11. Insert the drive belts and natural rubber brushes previously removed. 12. Position the spacers of the shaft between the output of the shaft and the side covers 13.
- Page 30 9.7 PVA-Wall Grip Sponges Replacement...
-
Page 31: Floating Disc Replacement
9.8 Floating Disc Replacement 1. Remove rubber brush. 2. Move the white separator. WATCH FLOATING DISC REPLACEMENT 3. Recover the disc to be replaced: you can use the screwdriver as in figure 3. 4. Remove the floating disc: position the disc so that the dark mark is pointed toward the operator as in figure 4. - Page 32 9.8 Floating Disc Replacement...
-
Page 33: Extraordinary Maintenance
10.EXTRAORDINARY MAINTENANCE Aeffe ltd provides a customer support service in case of malfunction (read the warranty certificate for all information). In specific cases, only after the approval of Aeffe ltd,the customer can request a remote assistant and manage a replacementof the following:... - Page 34 Product compliant with EU regulations Aeffe Srl Via Rezzonico, 39 22100 - Como - Italy VAT no.: 03385790138 Mail: info@keelcrab.com WWW.KEELCRAB.COM © Aeffe srl, All the rights reserved 2022...
Need help?
Do you have a question about the KEELCRAB PRO and is the answer not in the manual?
Questions and answers