Table of Contents
Advertisement
Advertisement
Table of Contents

Summary of Contents for SANICA FIJI
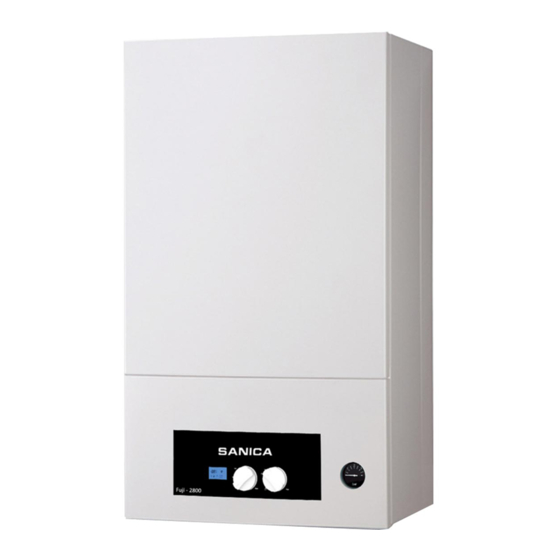
- Page 1 FIJI 24 - 28 KW HERMETIC CONVENTIONAL BOILER INSTALLATION AND USER MANUAL...
-
Page 2: Table Of Contents
TABLE OF CONTENTS 1-INTRODUCTION ..................... 3 2-USER WARNINGS ....................3 3-EXCLUSION OF WARRANTY ................... 4 4-STARTING THE BOILER ................... 4 5-DAILY USAGE OF THE BOILER ................5 6-FILLING BOILER WITH WATER ................6 8-BOILER MAINTENANCE ..................7 9-INSTALLATION INSTRUCTIONS ................8 10-BOILER DIMENSIONS ................... -
Page 3: 1-Introduction
SANICA FIJI 24kW - 28kW hermetic conventional combi boilers are designed and produced to serve according to the need for hot tap water and heating, using natural gas fuel. -
Page 4: 3-Exclusion Of Warranty
Make sure that children do not play with the device. 3-EXCLUSION OF WARRANTY The warranty given by SANICA does not cover the malfunctions arising from the abnormal use of the device and the following situations: Malfunctions in devices not first started by SANICA authorized services. -
Page 5: 5-Daily Usage Of The Boiler
Adjust the temperature adjustment knobs to the desired temperature and ensure the reflection of the device. WARNING: When the device is started for the first time, until the air in the gas pipe is expelled, the device may fail several times with ignition errors. In this case turn the on / off switch to off position and wait for 3 seconds to turn your device on again. -
Page 6: 6-Filling Boiler With Water
e - Pump blockage protection and frost protection are active in the winter position. WARNING: When the device starts to operate (when the burner ignites) sign is displayed on the screen during the burning period. 6-FILLING BOILER WITH WATER Water supply is made from the filling valve shown in Figure 3 located at the bottom of the device. -
Page 7: 8-Boiler Maintenance
7-TURNING OFF THE BOILER In order to turn off device you need to turn turn the button to the off position. the pump blocking safety is active, the frost When the device is turned off, protection is not active and there is an electric current in the device. In order to cut off the electric current, electricity must be cut off from the main fuse. -
Page 8: 9-Installation Instructions
9-INSTALLATION INSTRUCTIONS Boiler packaging content; boiler support styrofoam, assembly hanger equipment, user manual, warranty certificate and service booklet. The places where the device will be mounted should be selected by checking the conditions determined by TSE and authorized gas organizations. Mounting hanging equipment must be securely mounted on the wall to carry the weight of the boiler. -
Page 9: 10-Boiler Dimensions
10. BOILER DIMENSIONS Combi boiler dimensions are as in Figure 6. Figure 6 a Figure 6 b (Side) (Front) 11-FLUE CONNECTION The accessories provided by the manufacturer must be used in the device. Attention should be paid to the condition of the flue connection in the selection of the place where the device will be mounted. - Page 10 Horizontally connected flue connections should be mounted downward with a slope of 1%. If the device is installed in attics, the chimney should be at least 40 cm above the roof. In these cases, it should be insulated with fire resistant material. The maximum chimney length of the device is 3 m.
- Page 11 Şekil 10 WARNING: A fan throttle washer that comes out of the package should be used for horizontal and vertical extension flue connections. PRODUCT CHIMNEY SIZE(m) WASHER (mm) Ø45 Ø43 FIJI 24 KW Ø41 Ø48 Ø46 FIJI 28 KW Ø44...
-
Page 12: 12-Electrical Connection
12. ELECTRICAL CONNECTION The device must be connected to the energy source with grounding line. The device must be connected to a 220 ~ 230 V monophase grounded electrical line with a 2 A. V-Automat fuse. 13. CIRCUIT SCHEME AND ROOM THERMOSTAT For the room thermostat connection, the short circuit connection shown in Figure 12 is removed on the card and the room thermostat connection cables are installed instead. -
Page 13: 14-Malfunction Codes
14. MALFUNCTION CODES The device indicates some malfunctions and warnings to the user on the LCD screen. (Figure 13) In this case, if the fault warning cannot be resolved by performing the specified action, the failure related to the device should be resolved by calling the nearest authorized service. -
Page 14: 15-Technical Features
15. TECHNICAL FEATURES SANICA FIJI HERMETIC COMBI TECHNICAL FEATURES CONVENTIONAL COMBI MODELS FIJI 24 FIJI 28 Heating Circuit Heat Power Max 27,5 Heating Circuit Heat Load Max 25,9 29,5 Heating Circuit Heat Power Min 11,1 Heating Circuit Max Pressure Minimum Water Pressure... - Page 15 This document is for informational purposes only. SANICA reserves the right to make changes in its products, user and assembly manuals for development / improvement purposes without prior notice.
Need help?
Do you have a question about the FIJI and is the answer not in the manual?
Questions and answers