Table of Contents
Advertisement
Quick Links
RVsecure Motorhome Installation Manual – PlatinumX MH
This installation guide assumes that you already have experience in RV installations. Installing any system in any vehicle requires
a level of knowledge of your vehicles electrical systems prior to starting. If in doubt please have a professional installer complete
the installation for you.
Tools you will require
•
Electric Drill
12mm drill bit
•
8~8.5mm drill bit
•
Automotive crimpers
•
Phillips head screw driver
•
Flat screwdriver
•
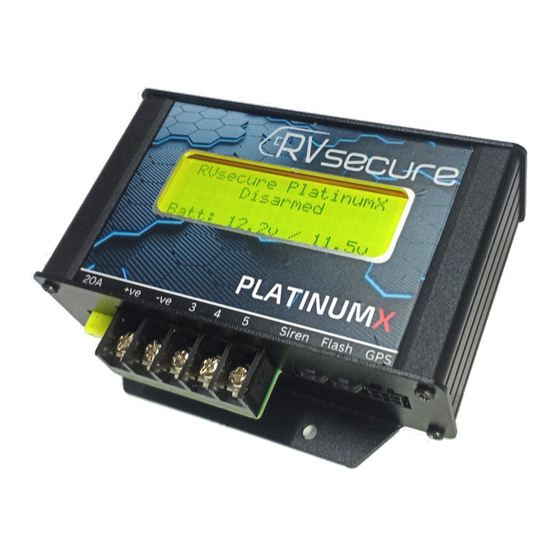
Mounting the Control unit
The control unit can be mounted in any location within the vehicle and with any physical orientation as long as one face is aligned in
the direction of tow. It is a good idea to firstly check the cable length for the strobe (if not using extensions) and decide both the
strobe and control unit positions based on this and the ability to run the cable. Also ensure that you have the ability to run cables to
and from the control unit as required.
The Control unit is attached with 4x suitable screws on the end plates. Mounting the control unit outside or to the underside of the
vehicle is not recommended.
Installing the PIR
The RV PIR can be mounted in a variety of positions due to its unique ability to work through multiple planes. It is good practice to
firstly test the operation of the PIR in the chosen position before a final decision is made to install, ensuring suitable operation.
To install the PIR
1. Open the battery compartment at the rear and install the batteries
2. Mount the bracket in the chosen position
3. Clip the PIR on the bracket
4. When ready, power up, add sensor to control unit and then test.
Installing the Strobe
The strobe is an external blue warning strobe and comes as a "plug n play" unit. Once installed simply plug it in to the control unit.
1. Drill an 12mm hole to allow for the cable and plug to run through
2. When in position, drill the holes for the two fixing screws
3. Apply silicone sealant to the rear of the strobe and then mount and screw the strobe to the wall
4. Apply silicone sealant around where the surround meets the wall to ensure it is water tight
5. Plug the strobe into the control unit
Strobe extensions (3m and 5m) are available if required.
As with any external item fitted to an RV, be generous with the amount of silicone applied to ensure it is water tight. All external
fixings / silicone's should be inspected bi annually at a minimum to ensure there continued function and water seal.
Other consumable items that may be required
•
Silicone suitable for outdoor exposure
Cable ties
•
Screws
•
Cable/connectors for the brake circuit
•
5A inline fuses and holders
•
rvsecure.com.au
Made in Australia
Advertisement
Table of Contents

Related Manuals for RVsecure PlatinumX MH


Summary of Contents for RVsecure PlatinumX MH
- Page 1 RVsecure Motorhome Installation Manual – PlatinumX MH This installation guide assumes that you already have experience in RV installations. Installing any system in any vehicle requires a level of knowledge of your vehicles electrical systems prior to starting. If in doubt please have a professional installer complete the installation for you.
- Page 2 • tech7/RVsecure accepts no liability for damage done either to the unit itself, its sub components or to the vehicle due to owners incorrect wiring. If in doubt please consult a professional.
- Page 3 Wiring Diagram rvsecure.com.au Made in Australia...
Need help?
Do you have a question about the PlatinumX MH and is the answer not in the manual?
Questions and answers