
Subscribe to Our Youtube Channel
Related Manuals for California Instruments P Series


Summary of Contents for California Instruments P Series
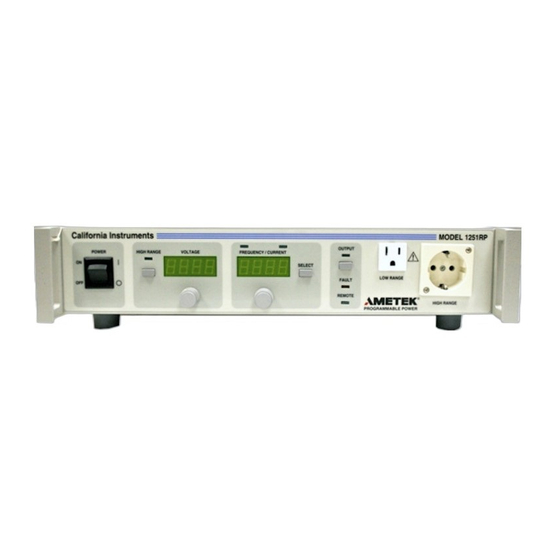
- Page 1 PGUI or PGUI32 TRAINING MANUAL P Series, RP Series Graphical User Interface Software 1251RP Programmable AC Source Revision: Date: June 24, 1998...
- Page 2 PGUI / PGUI32 Training Manual...
-
Page 3: Table Of Contents
PGUI / PGUI32 Training Manual Table of Contents 1. Introduction...............................5 1.1 Program Purpose ............................5 1.2 Training Manual Purpose ..........................5 1.3 Requirements...............................6 2. PGUI Installation ..............................9 ® 2.1 Windows 95 Installation procedure......................9 ® 2.2 Windows 3.1 Installation procedure......................13 3. PGUI Main Window ............................15 3.1 Steady State Control..........................16 3.2 Front Panel Lock ............................17 3.3 Status Bar ..............................17... - Page 4 PGUI / PGUI32 Training Manual...
-
Page 5: Introduction
PGUI / PGUI32 Training Manual Introduction This training manual was designed to help a new user of California Instruments‘ P or RP Series AC power sources become familiar with the operation of the PGUI / PGUI32 Graphical User Interface software. This program is included with the interface option for this product line. -
Page 6: Requirements
You can check your version by selecting the Help About menu which will show you the program’s release number. The latest version is available from California Instruments’ website at www.calinst.com. This manual was created using PGUI version 2.12 / PGUI32 version 1.00. - Page 7 PGUI / PGUI32 Training Manual Figure 2 Version information PGUI 16 bit Figure 1 Version information PGUI32 32 bit • Supported AC Sources. Supported models are : P Series RP Series 1001P 801RP 1251P 1251RP 2001RP (PGUI32 only) If you do not have one of these units connected to your PC or have a suitable interface in your PC yet, you can still proceed with this training session as the PGUI program will operate fully in simulation mode.
- Page 8 PGUI / PGUI32 Training Manual...
-
Page 9: Pgui Installation
PGUI / PGUI32 Training Manual PGUI Installation ® This section covers installation of the AC source control software under Window 95 . If you are ® ® using Windows 3.1 or Windows for Workgroups 3.11 , the installation procedure is very similar except you use the Program Manager’s File, Run menu to start the SETUP program located on the installation disk. - Page 10 PGUI / PGUI32 Training Manual ® Double click on the Add/Remove Programs icon to launch the Windows 95 Add/Remove Programs property dialog. Click on the Install button located in the top right corner of this dialog box. Insert the first installation disk in drive A and click on the Next button at the bottom of the dialog box.
- Page 11 PGUI / PGUI32 Training Manual The program will locate the SETUP.EXE program on the first distribution disk and ask for confirmation. Click on Finish to start the installation process. The setup program will now run and display a dialog box that shows the default directory for the AC source control software which is PGUI on the current drive.
- Page 12 PGUI / PGUI32 Training Manual 10. If you do want to install the program, click on Install System. A dialog box will appear next that shows the default directory for the AC Source Control software which is PGUI on the current drive. At this time you can accept the default directory by clicking on the OK button or enter a different directory.
-
Page 13: Windows 3.1 Installation Procedure
PGUI / PGUI32 Training Manual 13. Upon completion of the installation process, a message appears instructing you to register your software with California Instruments. Since products are often shipped to a company address with no reference to the end-user, California Instruments may not have your exact address or email address. - Page 14 PGUI / PGUI32 Training Manual...
-
Page 15: Pgui Main Window
PGUI / PGUI32 Training Manual PGUI Main Window ® The PGUI program is started by double clicking on the PGUI icon under Windows 3.1 or selecting ® the PGUI program from the Windows 95 Start Menu, Programs. Each time the program is started, it will try to connect to the AC Source if it was connected at the time the program was closed. -
Page 16: Steady State Control
PGUI / PGUI32 Training Manual 3.1 Steady State Control The main window provides a virtual front panel used to control the AC source from the PC. It has controls for all steady state parameters. 1. Use the Frequency slider to change the frequency between it lowest and highest value. -
Page 17: Front Panel Lock
PGUI / PGUI32 Training Manual 9. The Steady State control panel should now look as shown below. The Steady State control panel is always available and all other functions of the program can be accessed from its menu to tool bar. 3.2 Front Panel Lock The front panel lock check box located in the lower left corner of the Main window is only useful when an AC source is connected to the PC. -
Page 18: Command Menu
PGUI / PGUI32 Training Manual 3.4 Command Menu The command menu contains all the menus available for the PGUI program. From these menu’s, you can access all other screens in the PGUI. We will cover the individual menus and their purpose in the next chapter. -
Page 19: System Menu
PGUI / PGUI32 Training Manual System Menu The System menu provides access to some key screens that allow you to configure the PGUI to work the way you want. This relates in particular to the interface settings when you have an AC source connected. - Page 20 COM port settings are incorrect, you will not be able to communicate with the AC source and an error message will appear. Note that the P Series does not offer an IEEE-488 interface so you have to use RS232C. The RP Series offers both interfaces.
-
Page 21: Configuration Settings
PGUI / PGUI32 Training Manual 4.2 Configuration Settings The Configuration sub-menu in the System menu brings up a dialog box that shows all the hardware limits and options for the connected AC source. These settings are determined by the AC Source configuration and cannot be changed by the user. -
Page 22: Power-On Settings
PGUI / PGUI32 Training Manual 4.3 Power-On Settings The AC Source initialization system allows you to specify the way the AC source is programmed at power up. Unlike regular test equipment, AC sources typically don’t retain their last setting when a unit is turned off. -
Page 23: Measurements
PGUI / PGUI32 Training Manual 5. Measurements Measurements can be used to obtain information on load conditions. The PGUI can obtain all available measurement from the AC Source. The AC Source measurements are shown on the right hand side of the main Steady State Control window. 5.1 Enable and Disable Measurements The P and RP Series provide feedback on output voltage and rms current. -
Page 24: Recording Measurement Data To Disk
PGUI / PGUI32 Training Manual 5.2 Recording Measurement Data to disk. Measurements can also be logged to disk for use in other programs. The measurement data files are comma delimited (Comma Separated Value) so they can be imported in a spreadsheet immediately. Before selecting data logging, you should set up the correct file mode and file name. - Page 25 PGUI / PGUI32 Training Manual 9. Next we need to close the data file by turning off the data logging mode. Pull down the Measurement menu and select the Data Log File... sub menu. This should bring up the Data File Setup window. Turn off the check mark in the lower right corner to cancel the data logging mode.
- Page 26 PGUI / PGUI32 Training Manual...
-
Page 27: Transient Programming
PGUI / PGUI32 Training Manual Transient Programming Transients are a powerful feature of California Instruments AC Sources. To get the most out of the AC Source and PGUI program, it helps to understand how the PGUI implements transient programming. The California Instruments’ P Series and RP Series do not have transient generation capabilities built into the AC Source controller. - Page 28 PGUI / PGUI32 Training Manual will get an error when you try to execute the transient list. The AC Source does not automatically switch range to accommodate a higher voltage as this would cause the output to be dropped temporarily. 8.
-
Page 29: Frequency Transients
PGUI / PGUI32 Training Manual 6.2 Frequency Transients Frequency transients only affect the output frequency. Exercise: 1. Clear the existing transient program by clicking on the Clear button located in the lower right corner of the Transient screen. When asked, confirm the clear operation. -
Page 30: Voltage And Frequency Transient
PGUI / PGUI32 Training Manual 6.3 Voltage and Frequency Transient The Voltage and Frequency transient is convenient if you want to change both parameters at the same time. Exercise: 1. Clear the transient list using the Clear button. Confirm this operation when prompted. -
Page 31: Data Entry Mode Options
PGUI / PGUI32 Training Manual 6.4 Data Entry Mode Options The PGUI supports several data entry modes to facilitate transient program development. Specifically, the following modes are available: • Absolute data entry mode (default mode). Data entered in the data entry grid represents actual voltage and frequency values. -
Page 32: Saving Transient Programs
PGUI / PGUI32 Training Manual 6.5 Saving Transient programs Transient programs can be saved to disk for later recall. This allows you to create a library of commonly used test programs. The transient program information is stored in ASCII text files with a TLS extension. -
Page 33: Ac Source Setup Files
PGUI / PGUI32 Training Manual 7. AC Source Setup Files Setup files are used to store AC Source Front panel settings. Only steady state information is contained in these files. All other information is retained in the non-volatile memory of the AC Source controller. -
Page 34: Recalling Front Panel Setups
PGUI / PGUI32 Training Manual 7.2 Recalling front panel setups Next we need to clear the present Steady State settings to make sure the setup file can be used to restore them. 1. Change the voltage, frequency and voltage range to make sure you’re steady state settings are different from the one you just saved. -
Page 35: Conclusion
PGUI / PGUI32 Training Manual 8. Conclusion This concludes this PGUI / PGUI32 training manual. If you worked your way through all the exercises in this manual, you have seen a good subset of the program’s capabilities. If you want to know more, use the on line help supplied with the program.
Need help?
Do you have a question about the P Series and is the answer not in the manual?
Questions and answers