Advertisement
Quick Links
W E E K LY P R O G R A M T I M E R
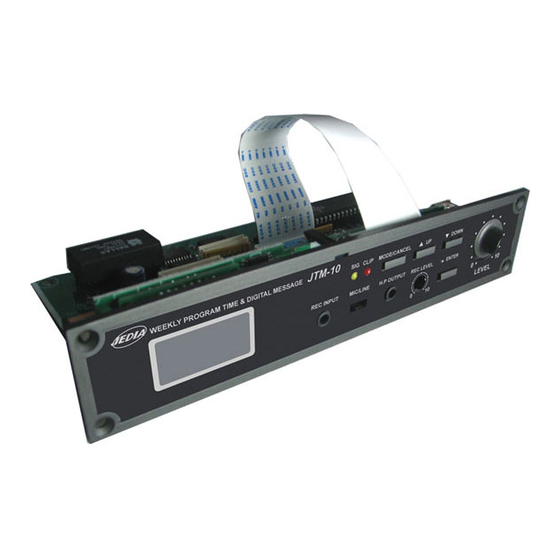
WEEKLY PROGRAM TIMER & DIGITAL MESSAGE
WEEKLY PROGRAM TIMER
& DIGITAL MESSAGE
Electronic recorder which can be linked to JPA(JPS)-Series
Mixing amplifier.
High sound quality by 4 bit ADPCM sound LSI using
16kHz sampling frequency.
Data storage for MAX 60days(built in back-up battery)
MAX 6 message bank for recording and playing that has
individual recording time.
Expendale recording time MAX 32Mbit
- Base recording time : 4min 28sec(16Mbit)
- MAX recording time : 8min 56sec(32Mbit)
Repeat, Automatic announcement for Emergency, Remote
control.
D I G I T A L M E S S A G E
JTM-10
SIG
CLIP
MODE/CANCEL
UP
REC INPUT
MIC/LINE
H.P OUTPUT
REC LEVEL
0
10
&
DOWN
ENTER
0
10
LEVEL
JTM-10
Advertisement

Summary of Contents for Jedia JTM-10
- Page 1 W E E K LY P R O G R A M T I M E R & D I G I T A L M E S S A G E JTM-10 WEEKLY PROGRAM TIMER & DIGITAL MESSAGE CLIP...
- Page 2 AUTION AVIS SAFETY INSTRUCTIONS (안전사항) FEATURES (특징) RONT PANEL CONTROLS (전면 기능) EAR PANEL CONTROLS (후면 기능) ODE AND FUNCTION (모드 및 기능 설명) EMO (메모) JTM-10 WEEKLY PROGRAM TIMER & DIGITAL MESSAGE CLIP MODE/CANCEL DOWN REC INPUT MIC/LINE H.P OUTPUT...
- Page 3 FEATURES 특 징 Can record a message maximum 8 minutes by 8KHz의 샘플링 주파수를 사용하는 최대 8분간 녹음 및 using 8KHz sampling Frequency. 재생이 가능하다. Possible to storage data semipermanently due 백업 밧데리를 사용 하지 않으므로 반영구적인 데이터 to no use of back-up battery. 보존...
- Page 4 RONT PANEL CONTROLS (전면 기능) JTM-10 WEEKLY PROGRAM TIMER & DIGITAL MESSAGE CLIP MODE/CANCEL DOWN REC INPUT MIC/LINE H.P OUTPUT REC LEVEL ENTER LEVEL 1. LCD Indicator 1. 상태 표시창(LCD) Display Operating and Setting status. 동작 상태 및 설정 상태를 표시하는 LCD 입니다.
- Page 5 원격제어를 위한 콘넥터 입니다. If you connect it with AS801 of JRR-10, you can JRR-10과 연결시 : JRR-10의 AS801 콘텍터와 연결하면 ● ● control JTM-10 with JRC-10. JRC-10으로 원격제어가 가능 합니다. 후면판넬에 연결시 : 엑세서리 콘텍터를 후념판의 BLANK ● 4. POWER 판넬을...
- Page 6 ODE AND FUNCTION (모드 및 기능 설명) Mode Set Time Week Set Reserved Channel Number of Repeat Reserve CH:01 00 Time Set 01:01 02 Reserved Time : Minute Number of Selected Voice Hour : 00 Time Set message Tues Min : 00 Wednes Hour : 23 Thurs...
- Page 7 1. Turn On the main power of JPA-SERIES With a 2. 모듈의 LCD에 요일과 시간이 나타날때 까지 기다린다. built-in JTM-10 Module. 3. JTM-10 모듈이 장착된 장비의 출력 상태를 셋팅 한다. 2. Wait until show the Days and Time on the LCD of (지역 선택 및 볼륨 등) the Module.
- Page 8 Voice 06 and connect with E/M Con. 메시지를 녹음 하고 E/M CON을 연결 하여 주십시오. 7. In case of using the JTM-10 with a built-in 7. JTM-10 모듈을 JPA-1120B/1240B에 장착해 사용 할 JPA-1120B/1240B, all speaker zones are automatically 경우...
- Page 11 WEEKLY PROGRAM TIMER JTM-10 & DIGITAL MESSAGE 4M-OP...

Need help?
Do you have a question about the JTM-10 and is the answer not in the manual?
Questions and answers