
Related Manuals for Avipas AV-1180


Summary of Contents for Avipas AV-1180
- Page 1 Model: AV-1180 HD Video Conferencing Camera User Manual V1.1 Please read this user manual thoroughly before using. www.avipas.com...
- Page 2 Preface Thanks for using this HD Video Conferencing Camera. This manual introduces the functions, installation process and operation of the HD camera. Prior to installation and usage, please read the manual thoroughly. Precautions This product can only be used in the specified conditions in order to avoid any damage to the camera: Do not subject the camera to rain or moisture.
- Page 3 Electrical Safety: Electric Safety Installation and operation must accord with electric safety standard. Use caution to transport Avoid stress, vibration or soakage in transport, storage and installation. Polarity of power supply The power supply of this product is +12V, the max electrical current is 2A. Polarity of the power supply plug is shown in the drawing below.
-
Page 4: Table Of Contents
Content Introduction ......................................1 1.1 Product Schematic 1.2 Product Overview 1.3 Rear Panel Diagram 1.4 Bracket Installation 1.5 Accessory 1.6 Product Feature 1.7 Technical Specification IR Remote Control....................................8 2.1 IR Remote Control Key 2.2 OSD Menu Setting Network Connection ..................................133 3.1 Connection Method 3.2 Camera's Physical Address 3.3 Access Camera via IP 3.4 Web Interface... -
Page 5: Introduction
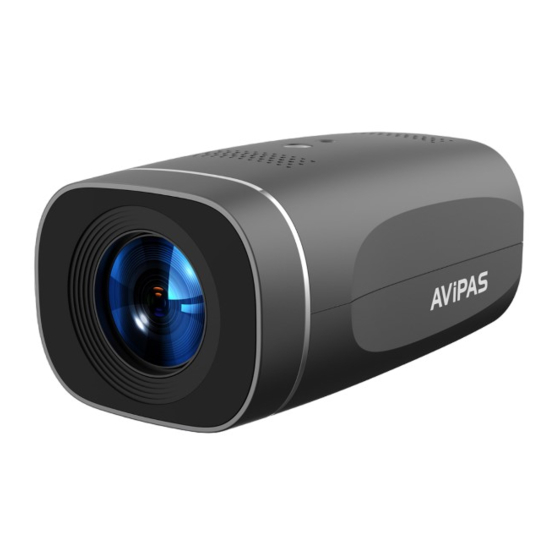
Introduction 1.1 Product Schematic Fig 1.1 Product Schematic Description : 1. Lens 5. ¼ -20 female thread Screw 9. DC12V Power Input Socket 6. USB2.0 Type-A Port 10. RJ45 Network Connection Port 2. Infrared Receiver 3. Indicator Light 7. RS485 Phoenix Connector 11. -
Page 6: Product Overview
1.2 Product Overview... -
Page 7: Rear Panel Diagram
1.3 Rear Panel Diagram The external interfaces of this product including: USB2.0, SDI, line-in, ethernet port, RS485, DC12V power supply, power switch. The rear panel diagram is shown in below:... -
Page 8: Bracket Installation
1.4 Bracket Installation Steps of Wall Mount Installation 1.5 Accessory When unpacked, check if all supplied accessories are included: Table 1.5 Included Accessories Power adapter USB2.0 Cable... -
Page 9: Product Feature
Included Accessory User manual IR Remote Controller Optional Wall Mount Bracket 1.6 Product Feature Full HD Resolution: 1/2.8” 2.07M effective pixel SONY CMOS sensor, delivery the image resolution at 1080P with frame rate up to 60fps. Optical Zoom Lens: 10x optical zoom, 5x digital zoom with 60.9° horizontal wide field of view. ... - Page 10 H.265:1920*1080/1280*720 /1024*768 /1024*576/960*540/800*600/720*576/720*480/704*576/640*480 /640*360 /352*288/320*240/320*180/176*144P30; YUY2:800*448 P15; 640*480/640*360 /432*240/320*180/P30 Minimum Illumination 0.05Lux (F1.8, AGC ON) Digital Noise Reduction 2D﹠3D Digital Noise Reduction White Balance Auto / Manual/ One Push Focus Auto/Manual/One Push Exposure Mode Auto/Manual/Shutter Priority/Aperture Priority/Brightness Priority Aperture Auto/Manual Shutter Speed 1/25s~1/10000s Backlight Compensation...
- Page 11 Input Voltage DC12V Input <1A Consumption <12W Table 1.7-3 Other Parameter Other Parameter Storage Temperature -10℃~+60℃ 20%~95% Storage Humidity Working Temperature -10℃~+50℃ 20%~80% Working Humidity Dimension 149.7(L)mm×78.3mm(W)×65.9mm(D) Environment Indoors...
-
Page 12: Ir Remote Control
IR Remote Control 2.1 IR Remote Control Key 1. Standby Key Press and hold the key for 3 seconds to enter standby mode. Press and hold the key for 3 seconds to back to normal mode. 2. Camera Select Section Select the camera address which wants to be controlled (The camera will be set to address #1 in default.) 3. -
Page 13: Osd Menu Setting
【*】+【#】+ Manual:IP/user name/password restore 【#】+【#】+【0】 : Switch video format to 1080P60 to default 【*】+【#】+【6】 :Restore factory default 【#】+【#】+【1】 : Switch video format to 1080P50 【*】+【#】+【9】 :Vertically flip image 【#】+【#】+【2】 : Switch video format to 1080I60 【#】+【#】+【3】 : Switch video format to 1080I50 【#】+【#】+【4】... - Page 14 BLC: ON/OFF for options (only available in auto mode) SETUP =============== Anti-Flicker: OFF/ 50Hz/ 60Hz for options (only available in Auto/ Iris priority/ Brightness priority Image Style Default modes) Protocol Auto Gain limit: 0~15 (only available in Auto/ Iris priority Visca Address /Brightness priority mode) PELCO-P Address...
- Page 15 Image AF-Zone: Up/ Middle/ Down Move the pointer to the [IMAGE] in the Menu, AF-Sensitivity: High/ Middle/ Low press the [HOME] and enter the image setting Noise Reduction page as below: Move the pointer to the [NOISE REDUCTION] in the Menu, press [HOME] and enter the noise IMAGE reduction setting page as below: ===============...
- Page 16 VERSION RESTORE DEFAULT ================ ================ Restore Default? Camera Version 1.0.0 2022-8-12 AF Version 1.0.2 2022-7-21 [↑↓]Select [← →]Change Value [Menu]Back [Home]OK [Menu]Back Restore default: Yes/ No Camera Version: Display camera version information AF Version: Display AF version information Restore Default Move the pointer to the [RESTORE DEFAULT] in the Main Menu, press [HOME] and enter the setting page as below:...
-
Page 17: Network Connection
NETWORK CONNECTION 3.1 Connection Method Direct Connection: Connect the camera with computer via Cat5/Cat6 Ethernet cable. Connection to LAN : Connect camera and computer to the same local LAN (router or switcher) via Cat5/Cat6 Ethernet cables 3.2 Camera’s Physical Address (MAC address) User can also use the Command Prompt or Terminal to verify network connection and the device’s physical address. -
Page 19: Web Interface
Note: In order to access camera via IP, make sure that your computer is in the same network segment range as the camera IP address. The device will not be accessible if the segment is not consistent. For example: AV-1180 camera’s IP address (default) is 192.168.5.163, then your computer IP address should be in this range... - Page 20 Audio Configure Enable option : Choose to enable the audio or disable. Encode Type : AAC (default), MP3, G.711A Sampling Rate : 16000, 32000, 44100(default), 48000 Sampling Bits: 16bits (default) Bit Rate: 32K, 64K (default),48K, 96K,128K Channel type: mono (default), stereo Input Volume: Set the input volume (default 2, 1-10 optional) Please click “Save”...
- Page 21 User: Set the username Password: Set the password. Please click “Save” button after changes and reboot the camera to apply new settings. For more information about live streaming, please refer to www.avipas.com -> Support -> “How-to Material”. Multicast/Unicast Main/Sub Stream: On/off Protocol: RTP multicast, TS multicast, UDP unicast, TCP unicast Address: Default 224.1.2.3.
- Page 22 Focus Mode: Auto(default), Manual and One Push Focus range: Center(default), Top, Bottom and All Focus Sensitivity: Low(default), High, Middle B)Exposure:Exposure mode, exposure compensation, back light compensation, anti-flicker, gain limit, wide dynamic, shutter speed, aperture value and brightness can be set. Exposure Mode:Set the exposure mode (the default automatic, manual, shutter priority, aperture priority, Brightness priority).
- Page 23 Gamma: Gamma value setting (default, 0.45, 0.50, 0.55, 0.63 optional). Dynamic Contrast: Set the dynamic contrast (default off, 1~8 optional) Black and white mode: Set black and white mode (default color, black/white optional). Flip Horizontal: Set Flip Horizontal (default Off, On optional). Flip Vertical: Set Auto flip (default Off, On optional).
- Page 24 Onvif port:Set Onvif port, the device will restart automatically after changed (default 2000, 0-65535 optional) Soap port:Set Soap port (default 1936, 0-65535 optional) Rtmp port:Set RTMP port (default 1935, 0-65535 optional) Rtsp port:Set RTSP port, the device will restart automatically after changed (default 554, 0-65535 optional). Visca port:Set Visca port, the device will restart automatically after changed (default 1259,0-65535 optional).
- Page 25 After successfully update, device will automatically reboot. Note: Please make sure that the device is powered on and network are stable. Otherwise, the upgrade process may interrupt or fail. For more firmware upgrade information, please check www.avipas.com or contact with...
- Page 26 After the version upgrade is completed, please restore the camera to factory default settings. In order to do that, user may: a, restore the factory default through web configuration; b, restore the factory default value through the OSD menu;...
-
Page 27: Serial Port Communication Control
Serial Port Communication Control In normal working state, user can control the camera through RS485 (VISCA IN) cable. The parameter of RS485 is list as below: Baud rate: 2400/4800/9600/115200/second Start Bit : 1 bit ; Data Bit : 8 bit ; Stop Bit :... - Page 28 Command Function Command Package Remark Stop 8x 01 04 08 00 FF Far (Standard) 8x 01 04 08 02 FF Near (Standard) 8x 01 04 08 03 FF Far (Variable) 8x 01 04 08 2p FF p = 0(low) - 7(high) Near (Variable) 8x 01 04 08 3p FF CAM _Focus...
- Page 29 Command Function Command Package Remark Full Auto 8x 01 04 39 00 FF Automatic Exposure mode Manual 8x 01 04 39 03 FF Manual Control mode Shutter Priority Automatic Exposure CAM_AE Shutter priority 8x 01 04 39 0A FF mode Iris priority 8x 01 04 39 0B FF Iris Priority Automatic Exposure mode...
- Page 30 Command Function Command Package Remark p = 0 – 4 0:Default 1:0.45 CAM_Gamma 8x 01 04 5B 0p FF 2:0.50 3:0.55 4:0.63 8x 01 04 23 00 FF CAM_Flicker 50HZ 8x 01 04 23 01 FF 50HZ 60HZ 8x 01 04 23 02 FF 60HZ Reset 8x 01 04 02 00 FF...
- Page 31 Command Function Command Package Remark Flip-H 8x 01 04 A4 01 FF Flip-V 8x 01 04 A4 02 FF Flip-HV 8x 01 04 A4 03 FF P: 0~E Video format 0:1080P60 8:720P30 1:1080P50 9:720P25 2:1080i60 A:1080P59.94 Set Camera CAM_VideoSystem 8x 01 06 35 00 0p FF 3:1080i50 B:1080i59.94 video system 4:720P60 C:720P59.94...
- Page 32 Command Command Return Package Remark Package CAM_BGainInq 8x 09 04 44 FF y0 50 00 00 0p 0q FF pq: B Gain y0 50 00 FF Full Auto y0 50 03 FF Manual CAM_AEModeInq 8x 09 04 39 FF y0 50 0A FF Shutter priority y0 50 0B FF Iris priority...
- Page 33 Command Command Return Package Remark Package CAM_ColorSaturation p: Color Gain setting 0h (60%) to Eh 8x 09 04 49 FF y0 50 00 00 00 0p FF (130%) CAM_IDInq 8x 09 04 22 FF y0 50 0p FF p: Gamma ID y0 50 02 FF IR_ReceiveInq 8x 09 06 08 FF...
-
Page 34: Pelco-D Protocol Command List
Command Command Return Package Remark Package B:1080i59.94 C:720P59.94 D:1080P29.97 E:720P29.97 Note: [x] in the above table represents the address of the device to be operated, [y]= [x + 8]. 4.2 Pelco-D Protocol Command List Function Byte1 Byte2 Byte3 Byte4 Byte5 Byte6 Byte7 Zoom In... -
Page 35: Maintenance And Troubleshooting
Maintenance and Troubleshooting 5.1 Camera Maintenance 1. If the camera will not be used for a long time, please turn off the power. 2. Use soft cloth or lotion-free tissue to clean the camera body. 3. Use soft dry lint-free cloth to clean the lens. If the camera is very dirty, clean it with a diluted neutral detergent. Do not use any type of solvent or harsh detergent, which may damage the surface. - Page 36 3. Check whether the computer has added a network segment and the network segment is consistent with the IP address of the device 4. Open Command Prompt or Terminal, enter "ping 192.168.5.163" and press the Enter to display the connection information shown in Figure 6-1 below:...
- Page 37 This Limited Warranty does not cover problems including but not limited to: improper handling, malfunction or damage not resulting from defects in material. To receive warranty service, please contact AVIPAS Inc. first. We will decide whether a repair or replacement is needed and will advise you of the cost of such repair or replacement.
Need help?
Do you have a question about the AV-1180 and is the answer not in the manual?
Questions and answers