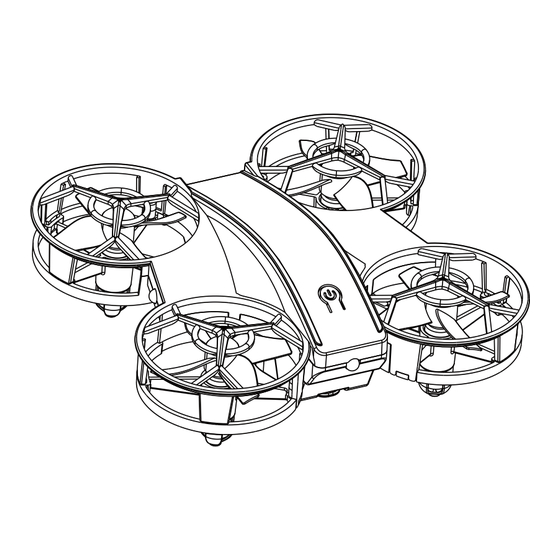
Summary of Contents for INKPOT INKPOT-I06
- Page 1 AGE 14+ INKPOT-I06 2.4G REMOTE CONTROL DRONE *Please read this manual carefully before operation and keep it properly for future reference. After-sales email:inkpot-us@outlook.com...
-
Page 2: Table Of Contents
One Key Landing/Emergency Stop Function Enabled in Level 2 How to Activate Operation Level 2 Self Rotation Functions Enabled in Level 3 How to Activate Level 3 Speed Switch 360° Flip & Roll Headless Mode 11-12 Battery Instructions Trouble Shooting inkpot-us@outlook.com... -
Page 3: Package List
Package List AGE 14+ INKPOT-I06 2.4G REMOTE CONTROL DRONE *Please read this manual carefully before operation and keep it properly for future reference. After-sales email:inkpot-us@outlook.com Spare Screwdriver Spare Battery Charging ①Connect the USB charger with adapter (output: 5V/0.5~2.0A), LED on the charger glows red;... -
Page 4: Battery Installation
②Do not mix old and new batteries; ③Never use different types of batteries together. 2. How to Install/Uninstall Drone Battery ①Slide the battery’s rear (the side without holder) in the battery slot, then press the head down to install the battery. inkpot-us@outlook.com... -
Page 5: Know Your Drone
②Keep pushing in the holder on the battery and pull the battery up to take it out. Know Your Drone Propeller B Upper Shell Power Switch Propeller A Lower Shell Battery inkpot-us@outlook.com... -
Page 6: Flight Environment
Place the drone on flat surface before taking off. Notes: Never take off on rugged surface. inkpot-us@outlook.com... -
Page 7: Know The Remote Controller
Short press: Speed Switch Short press: Light Switch Long press: Fine-tuning Mode Short press: Flip & Roll Long press: Headless Mode Short press: Self Rotation Short press: One Key Start/Landing Power Switch Long press: Emergency Stop Pull the joysticks down-left to re-calibrate inkpot-us@outlook.com... -
Page 8: Functions In Operation Level 1
(3) One Key Start Short press the One Key Start button, propellers on the drone will be unlocked and start spinning. Pull up left throttle to take off. inkpot-us@outlook.com... -
Page 9: Basic Control
Fine-tuning Mode. Tip right joystick to opposite side of the sliding direction to adjust, until the drone appears hovering still. ③The Fine-tuning Mode ends automatically when player stopped operating for more than 2 seconds, or manually by long pressing the Light Switch button again. inkpot-us@outlook.com... -
Page 10: Re-Calibration
(8) Low Power Warning When the drone is in low-power, indicator lights on it will start flashing quickly. Player needs to maneuver the drone back, or it would descend automatically soon when power is extremely low. inkpot-us@outlook.com... -
Page 11: One Key Landing/Emergency Stop
②Turn on the drone and place it on horizontal surface, push the left joystick up and down to pair. Keep Pressing (2) Self rotation Press down the right joystick, the drone will start self rotation. Press again to stop. inkpot-us@outlook.com... -
Page 12: Functions Enabled In Level 3
(2) Speed Switch Short press the Speed Switch to change speed between low, middle and high speed. The remote controller beeps one time when changed to low speed, 2 times in middle speed and 3 times in high speed. inkpot-us@outlook.com -10-... -
Page 13: 360° Flip & Roll
③To quit Headless Mode, keep pressing down the right joystick again until the remote controller stops beeping, and indicator lights on the drone also stop blinking. inkpot-us@outlook.com -11-... - Page 14 REAR REAR FRONT In Headless mode, no matter what direction the drone turns to during flight, its control will always bases on the direction when it was paired. Re-pairing the drone will reset the direction in headless mode inkpot-us@outlook.com -12-...
-
Page 15: Battery Instructions
5.Do not charge battery which not cooled down yet. 6.The charging temperature should be between 0℃ to 40℃. RECYCLING This product contains electronic components and battery. Please dispose it according to the special requirement of your local garbage disposal method. inkpot-us@outlook.com -13-... -
Page 16: Trouble Shooting
2.Out of controllable range, need to make control sure the drone is within 20 meters INKPOT TECHNICAL SUPPORT Dear customer: Thanks for choosing INKPOT products. If there’s any question or problem in use, please contact INKPOT after-sales mailbox for more information. inkpot-us@outlook.com -14-...

Need help?
Do you have a question about the INKPOT-I06 and is the answer not in the manual?
Questions and answers