Table of Contents
Advertisement
Quick Links
Advertisement
Table of Contents

Summary of Contents for Fritsch pulverisette 15
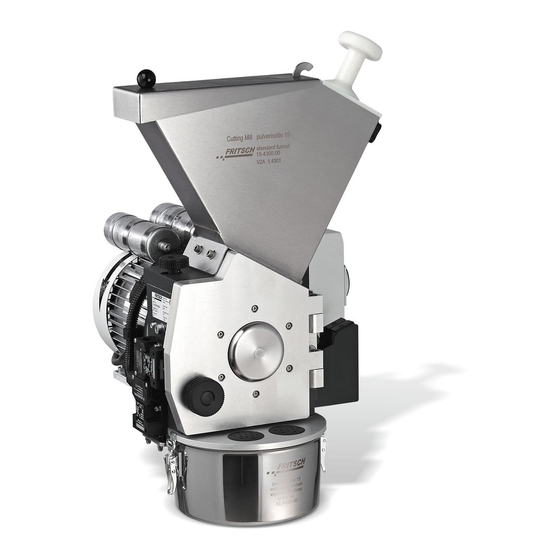
- Page 1 Operating Instructions Cutting Mill „ pulverisette 15 “...
- Page 2 Fritsch GmbH, Laborgerätebau has been certificated by the TÜV- Zertifizierungsgemeinschaft e.V. on June 24, 1994. An audit certificated the accordance of the Fritsch GmbH to the DIN EN ISO 9001. The enclosed declaration of conformity calls the directives which the „pulverisette 15“...
-
Page 3: Table Of Contents
Insert the material to be cut ................12 Cleaning ..................13 Cleaning the mill chamber..............13 Maintenance ................14 Removal and fitting of cutting blades ..........15 6.1.1 Removal and fitting of rotating blades............15 6.1.2 Removal and fitting of fixed blades ..............15 Warranty..................16 Troubleshooting Checklist............16 pulverisette 15... -
Page 4: General Information / Introduction
• The copyright to these technical documents is the property of Fritsch GmbH, Manufacturers of Laboratory Instruments. • These operating instructions are not to be reprinted or copied without the express approval of Fritsch GmbH. • Please study these instructions carefully before attempting to operate the machine. -
Page 5: Explanations Of The Signs At The Instrument And In The Operating Instructions
Attention! Warning against danger spot! Observe operating instructions! Attention! Mains voltage! Attention! Risk of explosion! Attention! Hot surface! Attention! Inflammable substances! Wear protective gloves! Wear ear protectors! Wear eye shield! Do not walk under suspended load! pulverisette 15 page 2... -
Page 6: Brief Description Of The Instrument
1.3.3 Drive Motor Driven by: 1~100/ 120 V Motor or 1~230 V Motor or 3~230/400 V Motor. The machine is driven by a three-phase a.c. motor or an a.c. mo- tor with no mechanical brake. pulverisette 15 page 3... - Page 7 The direction of rotation of the 3-phase motor can be changes by swap- ing two of the leads, L1, L2 and L3 (either at the motor terminals or in the plug). The direction of rotation may only be changed by a trained electri- cian. pulverisette 15 page 4...
-
Page 8: Technical Data
• Thermal protection switch (motor protection switch); ready for operation again automatically after cooling down (a few min- utes). Material • Feed particle size maximum 60 mm • Feed amount maximum 800 ml Final fineness Achievable mean final fineness 0.25-6 mm depending on sieve. pulverisette 15 page 5... -
Page 9: Operating Safety
• Unauthorized modification of the instrument or any part thereof will result in the loss of the conformity to European di- rectives which is asserted by Fritsch and the warranty. • Wear protective gloves while cleaning the cutting chamber. • Wear ear protectors if the noise level is higher than 99dB(A). -
Page 10: Operators
⇒ The mill will not start if the collector is not correctly at- tached. Both switches meet the personal safety requirements The protectective switches do not latch the hopper lid and collec- tor. If the lid is opened or the collector is removed, the motor will stop. pulverisette 15 page 7... -
Page 11: Danger Points
⇒ On turning the switch to Start (I), the motor is switched on and the mill takes up its function. Overload Protection In the event of overloading, a motor current protection switch will switch off (the rotary switch returns to the STOP (0) position). pulverisette 15 page 8... -
Page 12: Installation
• Do not block the ventilation louver at the rear. There is a danger of overheating if the louver is blocked. pulverisette 15 page 9... -
Page 13: Ambience Conditions
Test for Correct Functioning Switch on the machine only when all the work described in section Installation has been done. Switching on: turning the switch to “Start” (1) Switching off: turning the switch to “Stop” (0) pulverisette 15 page 10... -
Page 14: Working With The Cutting Mill
• that the conical guide on the cutting rotor is clean, • that the conical guide in the mill cover is clean. Close the mill cover and screw fast with the knurled knob – the safety switch should be actuated. pulverisette 15 page 11... -
Page 15: Milling Process
Excessive quantities can block the mill. If the mill is blocked, switch it off and clear it of material. Before restarting, check the blade gap (see section 4.1.2 Checking the blade gap). 1, 5, 6 3, 4 pulverisette 15 page 12... -
Page 16: Cleaning
• Open the upper housing halves • Remove the sieve It is recommeded that the cutting chamber is cleaned with a brush and vacuum cleaner or with compressed air. Attention: danger of injury from sharp blades pulverisette 15 page 13... -
Page 17: Maintenance
Check gap Measure every and fixed blades 500 hours Rotary bearings Permanent lubrica- Play 2,000 hours tion Drive motor Permanent lubrica- Play 4,000 hours tion Silicone rubber cover Sealing Distortion and soiling Before each use seal pulverisette 15 page 14... -
Page 18: Removal And Fitting Of Cutting Blades
0.2 – 0.3 mm (80 g/m printing paper folded in two). Attention: After setting the fixed blades, be sure to tighten the fixing screws. After fastening the fixed blades, the remaiing 3 rotating blades are fitted and screwed tight (see above). pulverisette 15 page 15... -
Page 19: Warranty
The warranty card accompanying this instrument must be returned to the manufacturer, duly filled out, in order for the warranty to become effec- tive. We, Fritsch GmbH, Germany, our application technology laboratory and our agent in your country will gladly provide advice and assistance with this instrument.


Need help?
Do you have a question about the pulverisette 15 and is the answer not in the manual?
Questions and answers