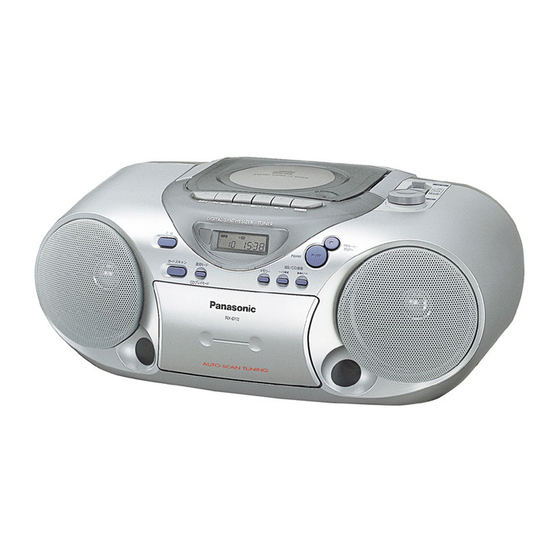
Panasonic RX-D15 Service Manual
Portable stereo cd system
Hide thumbs
Also See for RX-D15:
- Operating instructions manual (9 pages) ,
- Operating instructions manual (8 pages) ,
- Operating instructions manual (9 pages)

Related Manuals for Panasonic RX-D15


Summary of Contents for Panasonic RX-D15
- Page 1 Order No. MD0103043C1 Portable Stereo CD System RX-D15 Color (A) ... Blue Type P ... U.S.A. PC ... Canada Tape Deck: SG20 Mechanism Series Traverse Deck: RAE0152Z-1C Mechanism Series SPECIFICATIONS...
- Page 2 · RADIO Frequency Range 87.9-107.9 MHz (200 kHz steps) 87.5-108.0 MHz (100 kHz steps) 520-1710 kHz (10 kHz steps) Intermediate Frequency 450 kHz 10.7 MHz Sensitivity 46 dB/m/50 mW 15 dB/50 mW · TAPE RECORDER Track System 4 track, 2 channel, stereo Monitor system Variable sound monitor Recording system...
- Page 3 2001 Matsushita Electronics (S) Pte. Ltd. All rights reserved. Unauthorized copying and distribution is a violation of law. 1. Safety Precaution (This “Safety Precaution” is applied only in U.S.A.) 1. Before servicing, unplug the power cord to prevent an electric shock.
- Page 4 4. If the measurement is outside the specified limits, there is a possibility of a shock hazard. The equipment should be repaired and rechecked before it is returned to the customer.
- Page 5 Battery Service Life UM-1 (D-size) Batteries / Approximately 30 hrs of Tape Recording. (EIAJ) / Approximately 16 hrs of Tape Playback. (EIAJ) / Approximately 11.5 hrs of CD Recording. (EIAJ) / Approximately 10.5 hrs of CD Playback. (EIAJ) The battery service life is measured according to the conditions set forth by EIAJ. (Electronic Industries Association of Japan).
- Page 6 1. Turn off the power. 2. Determine the cause of the problem and correct it. 3. Turn on the power once again after one minute. Note: When the protection circuitry functions, the unit will not operate unless the power is first turned off and then on again.
- Page 7 5. Handling Precautions For Traverse Deck The laser diode in the traverse deck (optical pickup) may break down due to potential difference caused by static electricity of clothes or human body. So, be careful of electrostatic breakdown during repair of the traverse deck (optical pickup). - Handling of traverse deck (optical pickup) 1.
- Page 8 2. To prevent the breakdown of the laser diode, an antistatic shorting pin is inserted into the flexible board (FFC board). 3. Take care not to apply excessive stress to the flexible board (FFC board). When removing or connecting the short pin, finish the job in as short time as possible.
- Page 9 6. Precaution of Laser Diode Caution: This unit utilizes a class 1 laser. Invisible laser radiation is emitted from the optical pickup lens. When the unit is turned on: 1. Do not look directly into the pickup lens. 2. Do not use optical instruments to look at the pickup lens.
- Page 10 3. Do not adjust the preset variable resistor on the pickup lens. 4. Do not disassemble the optical pickup unit. 5. If the optical pickup is replaced, use the manufacturer’s specified replacement pickup only. 6. Use of control or adjustments or performance of procedures other than those specified herein may result in hazardous radiation exposure.
- Page 11 8. Self-Diagnostic Functions 8.1. Setting of the Self-Diagnostic Mode 1. Switch the SELECTOR to CD and set to TAPE STOP state. (CD PLAY STOP) 2. Press the /CLEAR for the first two seconds and followed by the FAST FORWARD keys for another two seconds without releasing /CLEAR key, it shall enter into the Self-Diagnostic mode.
- Page 12 3. At the state of [ T ] display, operate as follows: - Open the CD lid and close it right away. - Start recording TAPE, and STOP it at once. 4. Press /CLEAR key. - Self diagnostic results, i.e. the memorized errors during actual operations and the result of above-mentioned operation shall be displayed alternately.
- Page 13 Abnormal Items Error Method of detection Display CLOSE SW abnormal Detect error during closing operation and memorised as an error. REST SW abnormal Under normal operation (Self-Diagnostic Mode inclusive), this error occurs when the REST SW not detected within the specified time (5000 ms) shall be memorised.
- Page 14 ........................P.g.13 2. Installation of the CD Servo P.C.B. after Replacement ....................P.g.14 Warning: This product uses a laser diode. Refer to . 9.1. Checking Procedure for each major P.C.B. 9.1.1. Checking for the Main, Panel, Tuner, Power & Cd Servo P.C.B Step 1: Remove all the screws.
- Page 15 Step 4: Remove all the screws and take out the Remote Sensor Panel. Step 5: Press STOP/EJECT button to release the cassette lid and pull the back cabinet as direction shown. Step 6: Release the connector CP601.
- Page 16 Step 7: Release the connectors CP307 and CS309. Step 8: Pull down all the catches to remove the Panel P.C.B. Step 9: Unscrew all the screws. Remove the Panel P.C.B. Holder. Step 10: Release the connector W301.
- Page 17 Step 11: Remove all the screws. Step 12: Pull the CD unit as direction shown. Step 13: Remove all the screws from Main P.C.B.. Rconnect back all connectors and wires to do the testing. 9.2. Main Component Replacement Procedures...
- Page 18 9.2.1. Replacement of the Traverse Deck Step 2: Desolder the 4 legs of the 2 motors and pull out the Servo P.C.B. Step 3: Widen the 3 bosses with a flat screwdriver and pull out the 3 pins. Then remove the Traverse Deck.
- Page 19 Step 4: Remove the flexible cable CN701. - Removal of the flexible cable. Push the top of the connector in the direction of the arrow 1, and the pull out the flexible cable in the direction of the arrow 2. 9.2.2.
- Page 20 Note : Before installing the CD servo P.C.B., move the optical pickup towards the outer edge from the marking (black triangle). [Otherwise, the detect switch (S701) mounted on the CD servo P.C.B. may be damaged.] 10. Schematic Diagram (All schematic diagrams may be modified at any time with the development of new technology.) Notes: S703 Rest Switch...
- Page 21 No mark ...Playback < > ...FM (( )) ...CD ...AM - Importance safety notice: Components identifed by mark have special characteristics important for safety. Furthermore, special parts which have purposes of fire-retardant (resistors), high-quality sound (capacitors), low-noise (resistors), etc. are used. When replacing any of components, be sure to use only manufacturer’s specified parts shown in the parts list.
- Page 22 13. Troubleshooting Guide...
- Page 23 14. Measurements and Adjustments 14.1. Tuner Section...
- Page 24 READ CAREFULLY BEFORE ATTEMPTING ALIGNMENT 1. Set volume control to maximum. 2. Set power source voltage to 9V. 3. Output of signal generator should be no higher than necessary to obtain an output reading. AM-RF ALIGNMENT Signal Generator or Sweep Radio Dial Indicator (Electronic Adjustment /...
- Page 25 CAUTION : Please remove the screw-locking bond left on the head base when replacing the azimuth screw. After the adjustment, apply screwlock to the azimuth adjusting screw. ( Screw-locking bond: RZZ0L01) TAPE SPEED ALIGNMENT Test Tape Equipment Connection Adjustment Specification Remarks Electronic Counter ATT-111N Headphone Jack (32...
- Page 26 3. Adjust L1001 so that the output frequency is within the standard value. Standard Value : 56kHz ± 7 kHz 14.2. CD Section Alignment is unneccessary for CD section of this unit. 14.2.1. Alignment Points...
- Page 27 15. Type Illustrations of ICs, Transistors & Diodes 16. Terminal Functions of ICs - IC701 (BA6770FS) RF Head Amp...
- Page 37 SCHEMATIC DIAGRAM-1 CD SERVO CIRCUIT : +B SIGNAL LINE : CD SIGNAL LINE R716 R712 Q701 C728 50V2.2 IC701 2SA933SRTA BA6770FS LASER POWER DRIVE RF HEAD AMP IC R710 ((0.12V)) ((1.71V)) R720 ((1.70V)) ((1.26V)) 100K ((1.70V)) R713 ((1.69V)) 220K ((1.70V)) ((0V)) ((0V)) ((0V))
- Page 38 SCHEMATIC DIAGRAM-5 : Rec Signal line DECK CIRCUIT : Playback Signal Line : +B Signal Line R1103 220K R1203 220K IC1001 SW1001 SW1001 IC1001 BA3313L PRE-AMP IC CP1001 R1002 R. BIAS R1101 R1003 C1101 2700P L1001 D1002 Q1001 C1001 2.34V E.HD C1003 3900P...
- Page 39 SCHEMATIC DIAGRAM-6 : Rec Signal line : Playback Signal Line : +B Signal Line REC_IN_L REC_IN_R REC_H PB_OUT_L MAIN CIRCUIT (H305/W305) ON PB_OUT_R SCHEMATIC DIAGRAM-2 7.5V GND(SIGNAL) TAPE_H GND(MOTOR) CP1003 R1105 2.2K C1103 R1104 0.022 6.8K R1006 R108 5.6K SW1002 L310 RM301 R208...
- Page 40 SCHEMATIC DIAGRAM-2 MAIN CIRCUIT : Main Signal line : AM/FM Signal line W303 W303 : CD Signal line S702 : Playback Signal line OP/CL OPEN-SW : Rec Signal line : +B Signal line ((0V)) R788 <0V> (0V) 3.32V ((3.31V)) <3.31V> (3.31V) 3.32V ((3.31V)) R789...
- Page 41 LOUT A_GND ROUT FOR PC ONLY Z701 RSL5280-G BU_3.3V D_GND CS308B CS308A 43 44 45 46 47 48 49 50 ((0V)) 1.65V ((1.66V)) SEG12 R788 <0V> (0V) <1.65V> (1.65V) PIO05 SEG12 (OPN SW) 3.32V ((3.31V)) 1.66V ((1.65V)) SEG11 <3.31V> (3.31V) <1.66V>...
- Page 42 Z701 RSL5280-G R609 1.5K D601 PANEL CIRCUIT KEY_1 C810 1000P SW601 Z702 REMOTE SENSOR AUTO SCAN SW602 XBS/TONE SW603 PLAY MODE SW604 MEMORY SW605 C811 R830 1000P KEY_1 REV SKIP SW606 REM_IN FWD SKIP A3.3V R804 SW607 CD PLAY/PAUSE BU3.3V SW608 CD STOP CD_SEL...
- Page 43 R731 ASSY AGND Q305 KTA12710YTA CURRENT CONTROL SWITCH 3.3V [LD] Q305 3.3V ((3.43V)) ((3.41V)) R321 ((2.58V)) D310 R322 ((0.16V)) R328 Q306 Q306 KTC3199GRTA ((0V)) SWITCH STABILIZER R110 TUNER_LCH TUNER_LCH_1 2.7K TUNER_RCH TUNER_RCH_1 R210 2.7K ROUT T_MUTE T_MUTE TUNER_RCH_1 TAPE_RCH R845 PLL_DO TUNER CIRCUIT SW302...
- Page 44 VREF Q101, 201 KTC3199GRTA SWITCH (TONE CONTROL) Q103, 203 R769 KTC3199GRTA Q305 MUTING SWITCH KTA12710YTA CURRENT CONTROL ((0V)) SWITCH R770 R785 7.5V D301 Q703 Q305 C210 RVD1SS133TA R215 ((3.43V)) ((0.21V)) 4.7K 50V22 R216 C215 R321 Q703, Q704 C327 ((4.13V)) ((0V)) KTC3199GRTA 1000P 50V1P...
- Page 45 C784 0.01 SPEAKER D301 RVD1SS133TA TERMINAL C212 C220 10V470 50V2.2P CP601 ((0V)) R323 1.5K R329 1.5K IC303 IC303 LA4627 R324 C318 POWER 16V22 AMP IC ((0V)) R126 5.6K C112 50V2.2P C116 1000P Headphone L227 R227 R311 L127 R310 R127 3.9K R325 C120 10V470...
- Page 46 SCHEMATIC DIAGRAM-3 : AM Signal line : AM/FM Signal line : FM Signal line TUNER CIRCUIT : +B Signal line : AM OSC Signal line TELESCOPIC ANTENNA 0.022 620P 1000P 1000P SVC384T-AL 50V10 RCVFMA10T01S R6 100K 100K 3.3K 1000P R9 100K 100K 2.2P 1000P...
- Page 47 SCHEMATIC DIAGRAM-4 : AM/FM Signal line : +B Signal line LC72121T PLL IC 50V1 0.01 RLQAR22KT-G 2.2K 4.7K 50V2.2P RLQZP101KT-Y 4.7K 2200P 16V100 0.01 1000P 3.3K C58 1000P 16V100 330P PLLDO PLLDA PLLCLK PLLCE W304 TO MAIN CIRCUIT (W304) ON SCHEMATIC DIAGRAM-2...
- Page 48 Mark Function I RF summing amplifier return input pin O LOOP ON voltage output pin I B+D input pin I A+C input pin I Tracking error bias input pin I Focus bias input pin O Bias amplifier output pin - GND pin I E input pin I F input pin O APC amplifier outpin...
- Page 49 for AGC time constant Mark Function I RF output capacity connection re-input pin O RF summing amplifier output pin - IC702 (BU18527KS) Microprocessor Mark Function FDOUT O Focus drive out JUMPO O Tracking jump out TDOUT O Tracking drive out SDIN I SDIN SDOUT...
- Page 50 Mark Function TBR_ADJ I Track adjustment FBR_ADJ I/O Focus adjustment OPN_SW I/O Open/close switch REST SW I/O CD limit SW input for the most inner point SEL_IN I/O Selector input CD_SEL I/O CD mode select in TAPE_SEL I/O Tape mode select in 35 TUNER_SEL I/O Tuner mode select in I To ground P_CNT...
- Page 51 Mark Function ADPFI I PLL OP amplifer -ve input ADPFO - PLL OP amplifer output AGND - Analog ground RVCO I Pin with VCO oscillation frequency setting resistance I Focus OK output FEIN I Focus error FCAP O Focus LPF capacitor connection O Focus on TEIN...
- Page 52 Mark Function O Motor driver (2) forward - action output O Motor driver (3) reverse - action output O Motor driver (3) forward - action output O Motor driver (4) reverse - action output O Motor driver (4) forward - action output PVCC2 I Power supply (2) for driver...
- Page 53 - Resistance values are in ohms, unless specified otherwise, 1K= 1,000(ohms). - The marking (RTL) indicates that the Retention Time is limited for this item. After the discontinuation of this assembly in production, the item will continue to be available for a specific period of time. The retention period of availability is dependant on the type of assembly, and in accordance with the lows govening part and product retention.
- Page 54 17.1.2. Deck Mechansim Part Lists...
- Page 55 Ref. No. Part No. Part Name & Description Remarks CASSETTE DECK RDV0021 MAIN BELT ‘D’ RMB0109-1 BRAKE SPRING RML0116 BRAKE RBR2CY009 ERASE HEAD RDG0057-1 IDLER GEAR RDG0059 FF RELAY GEAR RDK0005-1 CAM GEAR RDV0006-1 RF BELT RHW16009 CAPSTAN WASHER RMA0109 BACK PLATE RMB0043-1 ROD OPERATION SPRING...
- Page 56 Ref. No. Part No. Part Name & Description Remarks RXR0005 SUPPLY REEL ASSY XTN2+6J BACK PLATE SCREW RHD26002 MOTOR SCREW XTN2+8F R/P SCREW RMG0102-1 MOTOR RUB. CUSHION RFKPXD13PC-A DC MOTOR ASS’Y RMA0108 MOTOR BK XTN26+8J MOTOR BK SCREW RME0098-2 E SLIDE LEVER SPRING RJR0033 EARTH LUG RML0080-1...
- Page 57 17.2.2. Cabinet & CD Loading Machanism Parts List...
- Page 58 Ref. No. Part No. Part Name & Description Remarks CABINET AND CHASSIS EAST10P33A6 SPEAKER RDG0288 DAMPER GEAR REEX0109 PANEL TO MAIN FFC REEX0110 25P CD FFC WIRE REXX0141 TAPE HEAD WIRE REXX0244 SPEAKER WIRE RGKX0075-A CD LID RGKX0076B-A ORNAMENT RFKGXD15PC-A FRONT CABINET ASS’Y RGUX0393-1A OPTN.
- Page 59 Ref. No. Part No. Part Name & Description Remarks TRAVERSE DECK RAE0152Z-1C TRAVERSE 358-1 SHGD113-1 FLOATING CUSHION 358-10 XQS17+A35FZ SCREW 358-2 SNSD38 TRV MOTOR ASS’Y SCREW 358-3 RAF0150A-1 OPTICAL PICKUP 358-4 RDG0247 DRIVE GEAR 358-5 RDG0248 INTERMEDIATE GEAR 358-6 RXQ0339 TRAVERSE MOTOR ASS’Y 358-7 RXQ0304-1...
- Page 60 Ref. No. Part No. Part Name & Description Remarks Q101 KTC3199GRTA TRANSISTOR Q103 KTC3199GRTA TRANSISTOR Q201 KTC3199GRTA TRANSISTOR Q203 KTC3199GRTA TRANSISTOR Q301 KTA1046 TRANSISTOR Q302 KTC3199BLTA TRANSISTOR Q303 KTA12710YTA TRANSISTOR Q304 KTC3199BLTA TRANSISTOR Q305 KTA12710YTA TRANSISTOR Q306 KTC3199GRTA TRANSISTOR Q308 KRA102MTA TRANSISTOR Q701...
- Page 61 Ref. No. Part No. Part Name & Description Remarks S703 RSH1A053-U REST SWITCH SW302 RSS3D006-G SW FUNCTION SW601 EVQ21405R SW AUTO SCAN SW602 EVQPAD05R SW XBS/TONE/HES SW603 EVQ21405R SW PLAY MODE SW604 EVQ21405R SW MEMORY SW605 EVQ21405R SW REV SKIP SW606 EVQ21405R SW FWD SKIP...
- Page 62 Ref. No. Part No. Part Name & Description Remarks CERAMIC FILTERS RLFFETNL04AT FM CF RLFDFT26AT FM DISCRIMINATOR RLFCFA450L4B AM FILTER OSCILLATORS RSXD7M20C01 CRYSTAL OSCILLATOR X801 RSXD75K0E02 CRYSTAL OSCILLATOR X802 RSXZ16M9Z01T CERAMIC OSCILLATOR FUSES F501 XBA1C12NB5H FUSE F502 XBA1C12NB5H FUSE / PC FUSE HOLDERS FH501 RJF0028...
- Page 63 Ref. No. Part No. Part Name & Description Remarks ERDS2TJ332T 3.3K 1/4W ERDS2TJ331T 330 1/4W ERDS2TJ104T 100K 1/4W ERDS2TJ104T 100K 1/4W ERDS2TJ104T 100K 1/4W ERDS2TJ104T 100K 1/4W ERDS2TJ223T 22K 1/4W ERDS2TJ103T 10K 1/4W ERDS2TJ104T 100K 1/4W ERDS2TJ222T 2.2K 1/4W ERDS2TJ472T 4.7K 1/4W ERDS2TJ223T 22K 1/4W...
- Page 64 Ref. No. Part No. Part Name & Description Remarks R222 ERDS2TJ274T 270K 1/4W R223 ERDS2TJ472T 4.7K 1/4W R227 ERDS2TJ181T 180 1/4W R301 ERD2FCVG220T 22 1/4W R310 ERDS2TJ333T 33K 1/4W R311 ERDS2TJ392T 3.9K 1/4W R312 ERDS2TJ222T 2.2K 1/4W R313 ERDS2TJ473T 47K 1/4W R314 ERDS2TJ331T 330 1/4W...
- Page 65 Ref. No. Part No. Part Name & Description Remarks R736 ERDS2TJ153T 15K 1/4W R737 ERDS2TJ102T 1K 1/4W R738 ERDS2TJ303T 30K 1/4W R740 ERDS2TJ103T 10K 1/4W R742 ERDS2TJ155T 1.5M 1/4W R743 ERDS2TJ124T 120K 1/4W R745 ERDS2TJ472T 4.7K 1/4W R746 ERDS2TJ472T 4.7K 1/4W R747 ERDS2TJ472T 4.7K 1/4W...
- Page 66 Ref. No. Part No. Part Name & Description Remarks R1002 ERDS2TJ331T 330 1/4W R1003 ERDS2TJ473T 47K 1/4W R1004 ERDS2TJ8R2T 8.2 1/4W R1005 ERDS2TJ223T 22K 1/4W R1006 ERDS2TJ101T 100 1/4W R1101 ERDS2TJ183T 18K 1/4W R1102 ERDS2TJ272T 2.7K 1/4W R1103 ERDS2TJ224T 220K 1/4W R1104 ERDS2TJ682T 6.8K 1/4W...
- Page 67 Ref. No. Part No. Part Name & Description Remarks ECBT1H101KB5 100P 50V ECBT1H120JC5 12P 50V ECBT1C222KR5 2200P 16V ECBT1H101KB5 100P 50V ECBT1H180JC5 18P 50V ECBT1H101KB5 100P 50V RCE1HM2R2BP 2.2P 50V ECBT1H102KB5 1000P 50V ECFR1C104KR 0.1 16V RCE1HM010BP 1P 50V ECBT1H102KB5 1000P 50V ECBT1H102KB5 1000P 50V...
- Page 68 Ref. No. Part No. Part Name & Description Remarks C301 ECA1EM470B 47 25V C313 ECBT1H561KB5 560P 50V C314 RCE1AM470BP 47P 10V C315 ECBT1H102KB5 1000P 50V C316 ECA1AM101B 100P 10V C317 ECA1CM222EV 2200 16V C318 RCE1CM220BP 22 16V C319 ECBT1H102KB5 1000P 50V C320 RCE1CM220BP 22 16V...
- Page 69 Ref. No. Part No. Part Name & Description Remarks C744 ECBT1E473ZF5 0.047 25V C745 ECBT1H103KB5 0.01 50V C746 ECBT1H103KB5 0.01 50V C747 ECBT1H103KB5 0.01 50V C748 ECQV1H224JZ3 0.22 50V C749 ECBT1H103KB5 0.01 50V C750 ECBT1H102KB5 1000P 50V C751 ECFR1C104KR 0.1 16V C752 ECBT1H333KB5 0.033 50V...
- Page 70 Ref. No. Part No. Part Name & Description Remarks 17.4. Packing Materials & Accessories Parts List Ref. No. Part No. Part Name & Description Remarks PACKING MATERIALS RPGX0718 PACKING CASE [M]P RPGX0719 PACKING CASE [M]PC RPNX0124 POLYFOAM RPH0131 MIRAMAT SHEET ACCESSORIES EUR648258 REMOTE CONTROLLER...
- Page 71 / Printed in Singapore / M010300001FLE/H/C/E/J...
Need help?
Do you have a question about the RX-D15 and is the answer not in the manual?
Questions and answers