Table of Contents
Advertisement
Quick Links
Advertisement
Table of Contents

Related Manuals for Denver ORIENT POWER OPSOLAR 48100PW

Summary of Contents for Denver ORIENT POWER OPSOLAR 48100PW
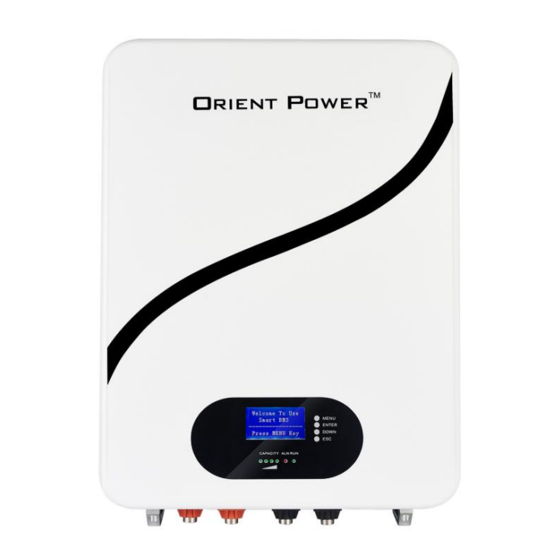
- Page 1 OPSOLAR LIMITED Wall-mounted Battery User Manual www.opsolarbattery.com...
- Page 2 Please comply with warnings operating instructions in this manual strictly. Save this manual properly and read carefully the following instructions before installing the unit. Do not operate this unit before reading through all safety information and operating instructions carefully.
-
Page 4: Table Of Contents
1.SAFETY PRECAUTION ..............................5 1.1 W ..............................5 SING ATTERY 1.2 W ................................6 HILE HARGING 1.3 W ..........................6 ISCHARGING THE ATTERY 2.PARAMETERS OF BATTERY ............................7 2.1 B ..............................7 ASIC LOCK IAGRAM 2.2 B ............................... 8 ATTERY PECIFICATIONS 2.3 P .................................. - Page 5 5. TROUBLESHOOTING ..............................27 6. STORAGE AND MAINTENANCE ..........................28 6.1. S ..................................28 TORAGE 6.2. M ................................28 AINTENANCE 7 PRODUCT RESPONSIBILITIES AND CONSULTING ....................29...
-
Page 6: Safety Precaution
1.Safety Precaution 1.1 When Using Battery Danger of High Voltage: The high voltage power supply offer the equipment power, wet object contact high voltage power supply directly or indirectly , can cause fatal danger. Using a special tool : Working in high voltage and ac power, be sure to use a special tool instead of individual tools. Static‐free:... -
Page 7: While Charging
1.2 While Charging CAUTION The temperature range over which the battery can be charged is 0°C to 45°C. Charging the battery at temperatures outside of this range may cause the battery to become hot or to break. Charging the battery outside of this temperature range may also harm the performance of the battery or reduce the battery’s life expectancy. -
Page 8: Parameters Of Battery
2.Parameters of Battery 2.1 Basic Block Diagram • There are Battery cells and BMS board inside, before connecting the terminal, please read the diagram, and make sure the output is no short or other abnormal connection. -
Page 9: Battery Specifications
2.2 Battery Specifications ELECTRICAL PERFORMANCE Model 48100PW Nominal Voltage 51.2 V Nominal Capacity 100 Ah Energy 5120 Wh Resistance < 50mΩ Self Discharge < 3% Cells 16 x 3.2V 100Ah Cells CHARGE PERFORMANCE Recommended Charge Current 20 A Maximum Charge Current 100 A Recommended Charge Voltage 57.6 V (3.6 V/Cell) -
Page 10: Panel View
Approx. Weight 110 lbs ( 55 Kg ) Terminal Type M8x4 Terminal Torque 106 ~ 132 in-lbs ( 12 ~ 15 N·m ) Case Material Steel Recommended Connection Wire 2 - 6 AWG TEMPERATURE PERFORMANCE Temperature Sensor Quantity 6 pcs Discharge Temperature - 4 ~ 140 °F ( - 20 ~ 60 °C ) Charge Temperature... -
Page 11: General
Run LED Running signal ALM LED Blinking in alarm status State of charge Battery + Positive terminal Battery - Negative terminal POWER BMS on/off Positive isolating On/Off Status indication Reset key Battery address selector 2 loops dry contact RS485A Communication with inverter Communication with inverter RS232 Communication with PC... -
Page 12: Ads (Address)
2.4.3 ADS (Address) Dip switch settings for multiple batteries. While connecting to inverter the master battery address normally set as 1 (or ON OFF OFF OFF), and auxiliary packs set as per below table. 2.4.4 DCT(Dry Contacts) Dry Contacts are mostly unused, but for communication with some non-smart systems please see the table below. -
Page 13: Rs485A&Can (Rj45 Connector)
2.4.5 RS485A&CAN (RJ45 Connector) RS485A and CAN ports are configured to connect with inverter. Some inverter communicate though RS485, and some of the inverter designed to communicate though CAN. Port BMS CAN Port RS485A RJ45 Connector RJ45 Connector Pin No. Definition Definition CANH... -
Page 14: Positive & Negative Terminal
2.4.8 Positive & Negative Terminal Battery has 2 positive terminals, internal connected together. 2 negative terminals, internal connected together. 2.5 Buzzer Operation (Optional) Model Description and Status Fault Buzzing 0.25S per 1Sec Protection Buzzing 0.25S per 2Sec (expect for over-charge protection) Alarm Buzzing 0.25S per 3Sec (expect for over-charge alarm) NOTE: Buzzer function can be set by monitor software, the default is off. -
Page 15: Led Indicators
2.6 LED Indicators LED Indicators: There are 6 LED on front panel to show the battery working status: SOC Indication LED Normal/Alarm/ Pack Remark Status Protection ● ● ● ● ● ● Power Off Sleep All off Normal Flash 1 Standby Standby Indication by SOC... -
Page 16: Display Function Instruction
2.7 Display Function Instruction 2.7.1 Display Rendering 2.7.2 Functional Specifications 2.7.2.1 Main Menu Page Electricity / dormancy activated, will show the welcome screen, press the MENU button to enter the main menu page. As shown in the figure below:... - Page 17 2.7.2.2 Battery Parameters Collection Page When the cursor“》”is point to “Analog Info”,press ENTER key will enter into the page of “Analog Info”,As shown in the figure below: 2.7.2.3 Battery Status Page When the cursor“》”is point to “BMS Status”,press ENTER key will enter into the page of “BMS Status”,As shown in the figure below:...
- Page 18 2.7.2.4 Battery Parameters Setting Page When the cursor“》”is point to “Para Setting”,press ENTER key will enter into the page of “Para Setting”,As shown in the figure below: 2.7.2.5 Battery System Setting Page When the cursor“》”is point to “Sys setting”,press ENTER key will enter into the page of“Sys setting”,As shown in the figure below:...
-
Page 19: Safe Handling Guide
3. Safe handling Guide 3.1 Typical System Diagram 3.2 Tools The following tools are required to install the battery pack: • Cable Lugs • Cut Plier • Crimping Tool • Screw Driver • Drilling Machine NOTE:Use properly insulated tools to prevent accidental electric shock or short circuits. If insulated tools are not available, cover the entire exposed metal surfaces of the available tools, except their tips, with electrical tape. -
Page 20: Installation
3.4 Installation 3.4.1. Installation Location Make sure that the installation location meets the following conditions: • The installation site must be suitable for the size and weight of the battery. • Must be installed on a firm surface to sustain the weight of battery. •... - Page 21 3.4.3 Battery Parallel Connection • Make sure circuit breaker off before wiring: • 48100PW Battery designed for unlimited parallel (a Max 15 parallel if connected communication with inverter). • Equal length lead wires will helpful for load sharing. • A main breaker from Busbar to inverter is recommended for sharing & reducing rush power to battery packs while starting inverter.
-
Page 22: Other Wire Connection
3.4.4 Other Wire Connection Make sure that all the wires connected, then turn on circuit breaker: • Connect to charger: Circuit breaker of battery circuit is set to OFF, connect it to charging supply, and output voltage of charge power supply is set to 56-58.4V (16S LiFePO4 Battery Option). •... -
Page 23: Software & Communication
4. Software & Communication 4.1 USB-RS232-RJ12 Driver Installation To use USB-RS232-RJ12 connect PC and use PC software, a driver should be installed. Follow steps as below(or check online demo video): Download driver from product download tag. Un-Zip Files. ... -
Page 24: Bms & Inverter Communication Setup
4.3 BMS & Inverter Communication Setup 4.3.1 Communicate With PC/Software 4.3.1.1 Single Battery Communicate with PC/Software 4.3.1.2 Batteries Parallel Communicate with PC/Software While battery in parallel communication , dial-up addresses of battery are different. Dial Switch Remark Address bit1 bit2 bit3 bit4 Battery 1... - Page 25 …… …… …… …… …… …… Battery 14 Battery 15 The range of batteries’ address bit1-bit4 is 1-15. Note: Battery internal communication use standard internet cable connect though RS485B & RS485C ports. For example:15 sets batteries in parallel communicated with PC/software as below:...
-
Page 26: Communicate With Inverter (Optional)
4.3.2 Communicate With Inverter (Optional) Step 1: Communication Protocol Select BMS loaded with many brand inverter protocol, select the correct protocol as per inverter used. Different model inverters may use different protocol, detailed setting please check latest published demo videos. Step 2: Connect BMS &... - Page 27 Step 3: ADS Setting The master battery ADS address set to 1 (or ON OFF OFF OFF), slave batteries set as per 4.3.2.2 Step 4: Inverter Setting Inverter battery type select as ‘Li’ Inverter battery communication protocol select as per inverter manual and refer to latest published demo videos.
- Page 28 5. Troubleshooting If the battery does not operate correctly, please solve the problem by using the table below. Symptom Possible cause Remedy All reading 0, and all temperature Anti-Theft Protected Contact Tech support sensors -40 RST Key no response press 0-10s RST Key Damage Contact Tech support No indication and alarm in the...
- Page 29 6. Storage and Maintenance 6.1. Storage Before storing, charge the battery at least 7 hours. Store the Battery covered and upright in a cool, dry location. Recommend long-term storage temperature is 15°C -25°C . During storage, recharge the battery in accordance with the following table: Storage Temperature Recharge Frequency Charging Duration...
- Page 30 7 Product Responsibilities and Consulting 1) We will not be liable for the accidents resulting from operation breaking this specification and user manual. 2) We will not send separate notice, provided that the contents of this specification are changed due to improvement of product quality or technological upgrading; provided that you want to understand the latest information of this product, please contact us.
Need help?
Do you have a question about the ORIENT POWER OPSOLAR 48100PW and is the answer not in the manual?
Questions and answers