Table of Contents
Advertisement
Quick Links
Advertisement
Table of Contents

Related Manuals for AmScope AF408N


Summary of Contents for AmScope AF408N
- Page 1 AF408N 4K Auto-Focus Multi-Function Camera v0.9.20221115...
- Page 2 Other indicators can be a loud buzzing sound or crackling. Contact AmScope to report such behavior. Do not use around flammable liquids or gases. Electric instruments can ignite flammable substances which could result in an explosion or fire.
-
Page 3: Table Of Contents
The Camera Control Toolbar ............................14 Overlay ..........................................15 Auto Focus ..........................................15 Settings ..................................16 Network ..........................................16 Measurement ........................................17 Magnification ........................................18 Image Format ........................................18 Video ............................................. 19 Storage ..........................................19 Language ..........................................20 Miscellaneous ........................................21 amscope.com... -
Page 4: What's In The Box
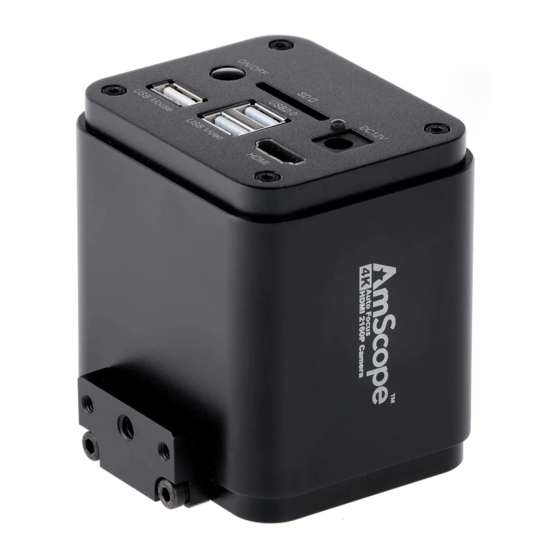
HDMI (video out), USB 2.0 x 2 (PC, external media, wi-fi), USB (mouse), SD Wi-Fi Standard 802.11ac 2.4GHz/5GHz Lens Mount C-Mount Power Requirements DC 12V 1A What’s In The Box The AF408N standard outfits include: • One camera • One USB mouse • One HDMI cable •... -
Page 5: Setup
This will avoid tipping the microscope, and can prevent the camera from rotating. Additionally, a sizing adapter may be needed if the diameter of the lens’ tube does not match the diameter of the port. Some lenses will include sizing adapters such as a 23mm to 30mm adapter. amscope.com... -
Page 6: Stand-Alone Mode
Once the camera is fully booted, you can move the cursor around the screen to activate the on-screen controls. A USB keyboard can be used with the camera to enter text or numeric values when needed. Attach the keyborad to the upper USB port labelled “USB 2.0”. amscope.com... -
Page 7: Using With A Pc
USB 2.0 or USB 3.0 ports. If the camera is not already powered on, press the power button and wait for the power indicator LED to turn solid blue. If the AmScope software has been installed on the com- puter, the camera will be recognized as an imaging device, and can be accessed using the software. -
Page 8: Using On A Network
“AP Mode Failed” will be displayed. Should the connection fail, verify the SSID and password. If the SSID and pass- word are correct, there may be a setting in the network’s hardware or firewall preventing the camera from connecting. amscope.com... -
Page 9: User Interface
“pin” icon will maintain the panel’s visibility, but will prevent other panels from opening. The Virtual Keyboard If not using a hardware keyboard, an on-screen keyboard can be used to enter text or numeric values as needed. Using the mouse’s left button, double-click on a text field to open the virtual keyboard. amscope.com... -
Page 10: The Camera Control Panel
Select when using AC powered illumination with 50Hz to re- move flickering. AC (60Hz) Select when using AC powered illumination with 60Hz to re- move flickering. Default Restore all values in the Camera Control Panel to their default settings. amscope.com... -
Page 11: Image Exposure
To compensate for these variations, digital imaging devices can process images using what is called “white balance.” The white balance process shifts colors based on the color of the light source, with the goal of produc- ing a more neutral white or grey. amscope.com... -
Page 12: The Measurement Toolbar
Show / Hide Measurement Objects Select Measurement Unit Select Magnification (requires calibration process) Object Selector Angle 4-Point Angle Point Arbitrary-Angle Line 3-Point Lines Horizontal Line Vertical Line Parallel 3 Points Vertical Line Rectangle Ellipse 5-Point Ellipse Circle 3-Point Circle Annulus (Concentric Circles) amscope.com... - Page 13 Move Left • Move Right • Adjust Color • Delete When the Pin icon is clicked to lock the Measurement Toolbar, the Camera Control Panel will not be displayed until the Measurement Toolbar is unpinned by clicking the Exit icon amscope.com...
-
Page 14: The Camera Control Toolbar
The Browse tool allows you to view media files recorded by the camera on the inserted SD media. The Settings panel can be used to customize certain display options, manage saved magnification calibrations, choose image formats, and configure the camera for network operation. amscope.com... -
Page 15: Overlay
While in Manual Focus mode, clicking on the One Push AF button will temporarily enable the auto-focus until the image is focused, at which point control will return to the manual mode. The Conj. Cal. button (conjugate calibrate) will return the focal point to the neutral position. amscope.com... -
Page 16: Settings
The camera’s name which will appear on the network. Wi-Fi Frequency Select the wi-fi band: 2.4GHz or 5GHz Channel Select the wi-fi channel to use Password Edit the password other devices will use to connect to the camera SSID Password amscope.com... -
Page 17: Measurement
Sets the shape used at each endpoint of a line. Includes null or rectangle Angle, Point, Line, Parallel Line, Vertical Line, Rectangle, Ellipse, Circle, Annulus, Two Circles, Arc, Text, Polygon, Curve, Scale Bar, Arrow Each shape or element can be customized using attributes such as Line Width and Color amscope.com... -
Page 18: Magnification
Measurement Object Burn In Mode Measurement objects are merged with the image before saving the file. Saving Method Objects can neither be edited nor removed. Layered Mode Measurement objects are saved in a separate layer, and can be edited. amscope.com... -
Page 19: Video
Storage displays the format of any recognized storage media including Secure Digital cards and USB flash drives. If com- patible media is recognized, the media’s file system will be shown, such as FAT32, exFAT, and NTFS. Unformatted cards must be formatted on a computer or other device prior to being used with the camera. amscope.com... -
Page 20: Language
A F4 08 N U ser G uide Language Options include English, Simplified Chinese, Traditional Language setting selects which language will be displayed. Chinese, Korean, Thai, French, German, Japanese, Italian, and Russian. amscope.com... -
Page 21: Miscellaneous
A F4 08 N U ser G uide Miscellaneous Miscellaneous settings include additional helpful settings. amscope.com... - Page 22 Auto Exposure Region Camera Parameters Import Import previously-saved parameters from the SD card Export Export current parameters to the SD card Reset to Factory Restore all parameters to the factory-default values defaults amscope.com...
Need help?
Do you have a question about the AF408N and is the answer not in the manual?
Questions and answers