Table of Contents
Advertisement
Quick Links
Advertisement
Table of Contents
Troubleshooting

Summary of Contents for DishHD 211t
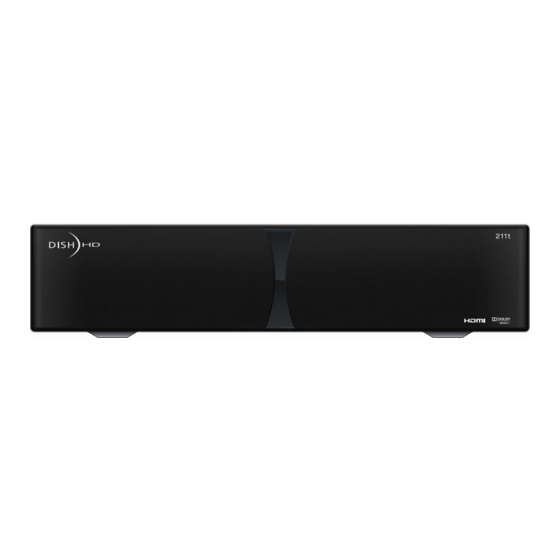
- Page 1 www.DishHDTVChina.com...
- Page 2 Equipment and Software Covered by this User’s Guide This User Guide covers the DishHD 211t STB and software model 211t. This Guide may cover other equipment not listed here. Copyright Notices Copyright ©...
-
Page 3: Table Of Contents
OW TO SE THIS UIDE TV N ..........4 ATCHING TV R ......4 BOUT ATELLITE ECEPTION ........5 OVING SCREEN DishHD 211t ..........7 ..........8 EMOTE ONTROL ............12 RONT ANEL ............12 ANEL ..........13 SING THE ENUS... - Page 4 Table of Contents Finding Programs to Watch ....17 .......... 18 HANGING HANNELS ........ 18 SING THE ROGRAM UIDE ....... 19 SING THE ROWSE ANNER ...... 20 INDING A ROGRAM BY ITS HEME Favorites Lists .........23 ?......24 HAT ARE AVORITES ISTS ..
- Page 5 Table of Contents Digital Video Recording ......35 ........36 IGITAL IDEO ECORDING DVR ......37 ETTING TARTED WITH DVR............39 SING ........... 39 AUSING A ROGRAM ....40 EVERSE ORWARD ....40 OTION AND RAME RAME ......41 ECORDING A ROGRAM ......
- Page 6 Table of Contents Customizing your DishHD 211t ....71 ..72 USTOMIZING THE UIDE AND HANNEL ISTS ........74 HANGING ANGUAGES ......... 75 ETTING UDIO UTPUT ...... 76 ESETTING TO ACTORY EFAULTS HD STB U ....77 CHEDULING PDATES ......78...
-
Page 7: Important Safety Instructions
Important Safety Instructions Read these instructions. Keep these instructions. Heed all warnings. Follow all instructions. Do not use the equipment near water. Clean only with a dry cloth. Do not block any ventilation openings. Install in accordance with the manufacturer’s instructions. Do not install near any heat sources such as radiators, heat registers, stoves, or other devices (including amplifiers) that produce heat. - Page 8 • Increase the separation between the equipment. • Connect the equipment into an outlet on a circuit different from that to which the DishHD set-top box (STB) is connected. • Consult the dealer or an experienced radio/TV technician for help.
- Page 9 Quick Start Guide DishHD 211t Power Turns the DishHD 211t on/off Press this Input button for TV Power Press once for Input. SAT Mode Turns the TV on/off Press and hold Programming required for Recover Page Buttons DishHD STB Menu...
- Page 10 Quick Start Guide Watching Your Satellite Programming You must be in SAT mode Turns the to operate your DishHD DishHD STB STB. Press the SAT On or Off button to enter SAT mode Turns the TV On or Off Easy Ways to Find a Program...
- Page 11 Quick Start Guide Formatting Your TV Screen Press the FORMAT button on your remote to change your picture’s sizing to your preference. See your HDTV ALT AUDIO user’s guide for formatting options available on your HDTV. Return to Satellite Programming Use the INPUT button to return to watching satellite programming if you accidentally change channels or inputs on your TV Press and hold...
- Page 12 Some DishHD STB problems can be resolved by pressing and holding the POWER button on the front of the DishHD STB until the front panel lights go out and come back on. After releasing the POWER button, the DishHD STB returns to normal operation...
- Page 13 Quick Start Guide Connect an External Hard Drive Connect an external hard drive to convert your DishHD STB to a DVR. Visit www.DishHDasia.com for more information on this feature. Feature not available on all models. Digital Video Recorder (DVR) Functions...
- Page 14 Quick Start Guide Notes:...
-
Page 15: Introduction
Introduction Chapter • ELCOME • OW TO SE THIS UIDE TV N • ATCHING TV R • BOUT ATELLITE ECEPTION • OVING NSCREEN... -
Page 16: Welcome
Chapter 1: Introduction gives you a brief overview of your new DishHD 211t. • Chapter 2: DishHD 211t explains the basic features of your system and how to use the remote control, front panel buttons, and back panel connections. •... - Page 17 Introduction How to Use this Guide Guide Conventions • The names of remote control buttons are all uppercase. Example: Press SAT. • On-screen menu options are bold. Example: Select System Setup. • Select instructs you to move the highlight to an on-screen option or choice in a list and press SELECT on the remote control.
-
Page 18: Watching Tv Now
Watching TV Now TV N ATCHING This section shows you the simplest ways to change channels on your DishHD 211t. If you want to know more about watching TV, see Chapter 3: Finding Programs to Watch starting on page 17. -
Page 19: Moving Onscreen Logo
OVING NSCREEN Whenever the DishHD 211t is turned off using the remote control or front panel POWER button, you see the DishHD logo moving around on your TV screen. This feature is included with your DishHD 211t to assure you that you can view programming from your satellite receiver. - Page 20 Chapter 1 Chapter 1 Tips • Always have the latest software—ensure DishHD 211t updates are enabled (see page 77) to keep your program guide and DishHD 211t updated. UESTIONS • How do I find something to watch? Refer to page 4 for ways to view programs. For more information on finding something to watch, see Chapter 3: Finding Programs to Watch.
-
Page 21: Dishhd 211T
DishHD 211t Chapter • EMOTE ONTROL • RONT ANEL • ANEL • SING THE ENUS... -
Page 22: Remote Control
EMOTE ONTROL The remote control gives you easy access to all the features of your DishHD 211t. You can program the remote to control the DishHD 211t and up to three other devices (see page 59). These devices can be a TV, a VCR or DVD player, and another DishHD set-top box (STB). - Page 23 SAT Mode To use the features described in this section, make sure you are in SAT mode by pressing the SAT Mode button. Note: Some features may not be available depending on your DishHD STB. DishHD 211t Power and TV Power...
- Page 24 TV mode by pressing the TV Mode button. Remote programming is required (see Chapter 8). Press this button for TV Mode DishHD STB Power Input and TV Power Switches between Turns the TV on/off TV inputs...
- Page 25 DishHD 211t Remote Control Remote Control Buttons—DVD Mode DVD Mode To use the features described in this section, make sure you are in DVD mode by pressing the DVD Mode button. You can use this mode to operate your VCR instead of a DVD player.
-
Page 26: Front Panel
RONT ANEL Power Turns power Infrared Sensor on/off, press Receives IR Select and hold to reset signals from the Selects DishHD 211t remote control menu items Arrows System Info Change channels Displays up/down, and move System up/down in on-screen Information... -
Page 27: Using The Menus
ENUS The menus make using the DishHD 211t and selecting programs quick and easy. Use the menus to control the DishHD 211t and use its features, such as setting locks, choosing a program, or creating a favorites list. Open and Close Menus You can open the menus in either of two ways: •... - Page 28 List of Choices in the Menus When you make a choice in a list, the DishHD 211t does not apply the change until you select Done. If you do not want to save any changes, select CANCEL to discard all the changes made in the menu.
- Page 29 • Make sure the remote control is in the right mode (see page 59). • Make sure you are pointing the remote directly at the DishHD 211t (or TV, DVD, or VCR player). • Make sure the batteries are good (see page 8).
- Page 30 Chapter 2 Notes OTES...
-
Page 31: Finding Programs To Watch
Finding Programs to Watch Chapter • HANGING HANNELS • SING THE ROGRAM UIDE • SING THE ROWSE ANNER • INDING A ROGRAM BY ITS HEME... -
Page 32: Changing Channels
Chapter 3 Changing Channels HANGING HANNELS Using the Up and Down Arrows While watching TV, press the UP and DOWN ARROWS on your remote control to change channels one channel at a time. You can also change the channels the same way using the UP and DOWN ARROWS on the receiver front panel. -
Page 33: Using The Browse Banner
Finding Programs to Watch Using the Browse Banner • The Program Guide displays programs on now and coming on within the next two days. The guide does not show programs that have ended. Press GUIDE Press SELECT Use the UP and DOWN ARROWS to highlight a program currently broadcasting While using the Program Guide, you can:... -
Page 34: Finding A Program By Its Theme
Highlight a program from the list and press SELECT If you select a program that is on now, the DishHD 211t tunes to that program. If you choose a future program, the Create Timer screen displays. See Chapter 6: Digital Video... - Page 35 – You may have locked or hidden the channels. See Chapter 5: Locks on page 33 for information on locking and unlocking the DishHD 211t. – You may have the wrong list showing in the Program Guide. Press GUIDE to open the Program Guide.
- Page 36 Chapter 3 Notes OTES...
-
Page 37: Favorites Lists
Favorites Lists Chapter • HAT ARE AVORITES ISTS • REATING OR HANGING AVORITES ISTS • AMING AVORITES ISTS • SING AVORITES ISTS... -
Page 38: What Are Favorites Lists
Each Favorites List has a unique color in the Program Guide. You can give each list a name. When you first get the DishHD 211t, the four lists are named List 1, List 2, List 3, and List 4. The lists are empty until you add channels to them. -
Page 39: Naming Favorites Lists
Pressing GUIDE to switch Favorites Lists works only if you have added channels to the Favorites List. If you have not created a Favorites List, pressing GUIDE switches the DishHD 211t between the All Chan and All Sub Lists. •... - Page 40 Chapter 4 Notes OTES...
-
Page 41: Locks
Locks Chapter • HAT ARE OCKS • REATING OR HANGING ATINGS OCKS • REATING OR HANGING HANNEL OCKS • IDING OCKED HANNELS • OCKING OR NLOCKING THE RONT ANEL • REATING OR HANGING A ASSWORD • OCKING AND NLOCKING... -
Page 42: What Are Locks
Locks allow you to password-protect programming based on ratings or on a channel-by- channel basis. The following occurs when you have locked the DishHD 211t: • If you try to access a locked item or open the Locks menu, the DishHD 211t displays a message prompting you to enter the password. •... -
Page 43: Creating Or Changing Ratings Locks
Press MENU and select Locks. If the DishHD 211t is locked, enter the password using the NUMBER PAD. Select OK. Select Ratings Locks. Highlight the least restrictive rating that you want to block. Press SELECT to lock the highlighted rating and all ratings more restrictive than it (for example, locking the PG rating automatically locks the R rating). -
Page 44: Creating Or Changing Channel Locks
Press MENU and select Locks. If the DishHD 211t is locked, enter the password using the NUMBER PAD. Select OK. Select Channel Locks. Highlight and select each channel that you want to lock or unlock. Press UP or DOWN ARROW to highlight the channel. -
Page 45: Iding Ocked Hannels
Yes Press MENU and select Locks. If the DishHD 211t is locked, enter the password using the NUMBER PAD. Select OK. Select Hide Locked to remove locked channels from the channel lists or Show Locked to display locked channels in channel lists. -
Page 46: Locking Or Unlocking The Front Panel
If the DishHD 211t is locked, enter the password using the NUMBER PAD. The DishHD 211t displays stars (*) as you enter the digits of the password. Select OK. Select Front Panel Lock to lock or unlock the front panel. -
Page 47: Locking And Unlocking Your Dish Hd Stb
OCKING AND NLOCKING You must lock the DishHD 211t for any DishHD 211t locks you set to take effect. To lock the DishHD 211t, you must first create a password (see Creating or Changing a Password). Be sure to refer to this section whenever you set any lock on your DishHD 211t. - Page 48 PG rated programs, then all programs with the R ratings are also locked. UESTIONS • Why didn’t a lock I set take effect? You have to lock the DishHD 211t for any lock you set to take effect. See page 33 for details. •...
-
Page 49: Digital Video Recording
Digital Video Recording Chapter • D IGITAL IDEO ECORDING • G ETTING TARTED • U SING • P AUSING A ROGRAM • R EVERSE ORWARD AND SKIP • S OTION AND RAME RAME • R ECORDING A LIVE ROGRAM • P LAYING A ECORDED ROGRAM... -
Page 50: Igital Ideo Ecording
You can take advantage of this feature by adding a USB 2.0 external hard drive to your DishHD 211t so you can now record and store programs. Contact your DishHD retailer for additional information about this service. -
Page 51: Getting Started With Dvr
HDD under 2TB. We recomme nd using hard drives that have an external powe r source. We do not recomm end USB powered hard drives. Connect the external hard drive to the DishHD 211t’s USB 2.0 port. Be sure to follow the hard drive manufacturer’s connection instructions. - Page 52 You can use an external hard drive that has existing material stored on it as long as it meets the requirements listed under Getting Started with DVR. However, it needs to be reformatted when you connect it to your DishHD 211t in order to support the DVR. Reformatting the drive deletes any existing material on it.
-
Page 53: Using Dvr
Using DVR SING The Digital Video Recorder (DVR) features let you watch TV the way you want. You can pause, reverse, or skip back through a program. Then you can continue watching TV. Also, you can record and play back a program with full digital audio and video quality, without using a VCR. -
Page 54: Reverse , Fast Forward , And Skip
Chapter 6 Reverse, Fast Forward, and Skip EVERSE ORWARD This section describes how to use the DVR buttons to move forward and back quickly while you watch TV. Press BACK once to reverse the program 4 times as fast as normal play. Press BACK twice to reverse at 15 times normal speed, three times to reverse at 60 times normal speed, and four times to reverse at 300 times normal speed. -
Page 55: Recording A Live Program
Recording a Live Program ECORDING A ROGRAM Use these steps to record a live program. Keep in mind, if you tune to a program after it starts, you can record only the part of the program after you tune to it. Note: Programs recorded in High Definition (HD) require up to six times more storage space than programs recorded in Standard Definition (SD). -
Page 56: Playing A Recorded Program
ECORDING HILE ATCHING A ECORDED ROGRAM You can set up the DishHD 211t to record one live satellite program while watching a program you’ve already recorded. Press DVR twice and select a recorded program Press GUIDE to open the Program Guide. Find a current program you want to record now. -
Page 57: Deleting Recorded Programs
• Record the Entire Event—The DishHD 211t stops recording at the end of the event. This selection is available only if the DishHD 211t is turned on and tuned to the channel at the beginning of the program. Note: If you tune to a program after it has begun, then you can record only the part of the program after you tuned to it. -
Page 58: Grouping And Sorting Recorded Programs
Chapter 6 Grouping and Sorting Recorded Programs ROUPING AND ORTING ECORDED ROGRAMS Sort Group Press DVR twice Select a group or sort option Press DVR twice (or press DVR and select My Recordings). Choose a group or sort option to help you quickly find the program you want to watch. •... -
Page 59: Removing External Hard Drive
Removing External Hard Drive EMOVING XTERNAL RIVE If you want to remove the external hard drive from the DishHD 211t, complete the following steps. Remove DVR Select Unplug DVR, Dish HD DVR Remove DVR, DishHD 211t restarts Press MENU and... - Page 60 If you selected Yes, a pop-up window displays when it is safe to unplug the external hard drive. Disconnect the external hard drive from the DishHD 211t’s USB port. It takes a few minutes for the DishHD 211t to reset and come back on.
-
Page 61: Timers
Timers Chapter • IMERS • SING THE IMERS • SING THE DAILY SCHEDULE • ETTING P AN UTOMATIC IMER • ETTING ANUAL IMER • DVR T ELETING A IMER • ELETING A IMER... -
Page 62: Imers
DishHD 211t how often you want to record that program. If using a DVD/VCR to record to, be sure to set up the DishHD 211t to control your DVD/VCR. If you do not have an external hard drive attached to your DishHD 211t, then you can use a timer to remind yourself when a program that you want to watch is about to begin. - Page 63 Timers Timers • You can override a specific timer's priority with a one-time skip or by restoring it. Select a timer in the Daily Schedule, then you'll have an option to Skip or Restore for that timer (see page 52). Timer Options The Timer Options screen lets you set the following (not used on all options screens): •...
- Page 64 Note: Pressing INFO about a timer event only works one time. Subsequently pressing INFO results in the usual display of the current program’s information. When the DishHD 211t is Off If the DishHD 211t is off when a timer is scheduled, the DishHD 211t responds accordingly: •...
-
Page 65: Using The Timers List
For Locked Programs—You must enter the DishHD 211t password before you can create an automatic timer. You can create a manual timer for a locked program without entering the password. However, if you do this, when the timer starts the DishHD 211t may display only an error or password entry menu. -
Page 66: Using The Daily Schedule
Chapter 7 Using the Daily Schedule SING THE AILY CHEDULE Note: Use this procedure when you have an external hard drive attached. Daily Schedule Use the arrow keys on your remote control (up, down, left, or right) to select a future program if you want to skip or restore a timer. -
Page 67: Setting U P An Automatic Timer
Timers Setting Up an Automatic Timer ETTING P AN UTOMATIC IMER Find a program to record that starts in the future using the Program Guide or Browse Banner. Select the future event. The Create Timer screen displays. Select one of the Timer Types (see page 48 for more details). Select the Timer Frequency (see page 48 for more details). -
Page 68: Setting U P A Manual Timer
Chapter 7 Setting Up a Manual Timer ETTING ANUAL IMER Select Timers 9-11 Manual Timers Timers Daily Schedule Press MENU and select Daily Schedule Press MENU and select Daily Schedule. Select Timers. Select Manual Timer. Select one of the Timer Types (see page 48 for more details). Select the Timer Frequency (see page 48 for more details). -
Page 69: Deleting Advr Timer
Select Delete. A pop-up window asks you to confirm your choice(s). Select Yes on the pop-up window. The timer(s) you selected are deleted. ELETING A IMER Use this procedure when you are using the Timer feature of the DishHD 211t without an external hard drive attached. Delete Timers... - Page 70 You can protect your recordings as described on page 49. • Where can I go to find out why the DishHD 211t didn’t record something I scheduled? Look at your Daily Schedule and refer to When a Timer Starts a Recording on page 50.
-
Page 71: Remote Control
Remote Control Chapter • HECKING THE EMOTE ONTROL DDRESS • ONFIRMING EMOTE ONTROL PERATION • ONTROLLING THER OMPONENTS • ’ EARNING FROM ANOTHER DEVICE EMOTE ONTROL • ECOVER UTTON • ROGRAMMING TO CONTROL A ECOND HD STB... -
Page 72: Checking The Remote Control Address
Make sure the remote has fresh batteries and is in SAT mode. If the DishHD 211t does not respond to commands from the DishHD remote control, press SYSTEM INFO on the DishHD 211t front panel to display the System Information screen. -
Page 73: Controlling Other Components
Scanning for Device Codes instructions described on page 61. Remote Control Modes Use the remote control’s mode buttons, SAT (DishHD 211t), TV (for a TV), DVD (for a DVD player or VCR), and AUX (“auxiliary,” for a second TV, a DVD player, a VCR, a tuner, or an audio amplifier) to set the remote to the right mode for the device. - Page 74 Chapter 8 Controlling Other Components Combination Devices If you are programming the remote to control a combination device, such as a TV/VCR or a TV/DVD, program the remote control in one mode, and then repeat the procedure in the other mode. For example, to program the remote to control a TV/VCR using code 1939, follow the instructions to program the remote to control the TV using code 1939, and then repeat the instructions for the VCR using the same code.
- Page 75 Remote Control Controlling Other Components If the code does not work, complete steps 3 through 9 with another code from the tables. If necessary, try every code listed for your brand until one works for your device. If you are unable to find a code that works, try the procedure Scanning for Device Codes. Scanning for Device Codes If the code for your device is not listed in the tables starting on page 99, use this procedure to scan the remote control’s memory for the device code.
- Page 76 Chapter 8 Controlling Other Components Reading Out the Device Codes You can find out what device code you’ve set for each remote control mode (TV, DVD, VCR, and AUX) Press and hold the Mode button until all the Mode buttons light up Press POUND twice Watch the Mode button...
- Page 77 Controlling Other Components Learning From Another Device’s Remote Control After you have programmed your DishHD remote to control your equipment in TV, DVD, or AUX modes, you may find not all of the commands used by the equipment’s original remote control function as you expect. The learning function of your DishHD remote control can support these commands.
- Page 78 On the original equipment's remote control, press and hold the button you want learned. If the DishHD remote learns the command, the mode light blinks off and then back on. If the mode light blinks three times or remains lit, the DishHD remote did not learn the command.
- Page 79 On the original equipment's remote control, press and hold the button you want learned. If the DishHD remote learns the command, the mode light blinks off and then back on. If the mode light blinks three times or remains lit, the DishHD remote did not learn the command.
- Page 80 Chapter 8 Controlling Other Components Controlling a Tuner or Amplifier Use the following remote control buttons to operate a tuner or amplifier. Press the AUX mode button to set the remote to AUX mode. Switching Between TV and Tuner/Amplifier Volume Control When you set up the remote to operate your TV, the VOLUME and MUTE buttons adjust the TV volume.
- Page 81 Remote Control Controlling Other Components Press SAT mode button. To confirm the VOLUME buttons are operating the tuner/amplifier’s volume control, press SAT and then try adjusting the volume. Your tuner/amplifier’s volume should change. To Use the TV’s Volume Control Press Press the plus POUND Press and hold the...
-
Page 82: Recover Button
Use RECOVER if you accidentally change the channel or video input on your TV and cannot get the picture back from your DishHD 211t. When you use RECOVER, the remote control sends commands to your TV to change channels or video inputs to try to get you back to watching satellite programming. -
Page 83: Programming To Control A Second Dish Hd Stb
ONTROL A ECOND If you have a second DishHD STB installed, you can use this remote in AUX mode to operate your other STB in addition to operating this STB. When you program the remote to operate the other STB, the remote sends out IR signals to the STB. Due to the nature of IR signals, the remote must be in line of sight to the second STB. - Page 84 Be sure to put the remote control back in SAT mode whenever you’re finished in another mode. UESTIONS My remote doesn’t control my DishHD 211t or other devices. What should I do? • Put the remote control in the correct mode (page 59).
-
Page 85: Customizing Your Dishhd 211T
Customizing your DishHD 211t Chapter • USTOMIZING THE UIDE AND HANNEL ISTS • HANGING ANGUAGES • ETTING UDIO UTPUT • ESETTING TO ACTORY EFAULTS • HD STB U CHEDULING PDATES • ETTING NACTIVITY TANDBY... -
Page 86: Customizing The Guide And Channel Lists
Chapter 9 Customizing the Guide and Channel Lists USTOMIZING THE UIDE AND HANNEL ISTS Changing the Program Guide Order You can set up the Program Guide to list channels in descending order, with the highest channel number at the top, or in ascending order with the highest channel number at the bottom. - Page 87 DishHD 211t Customization Customizing the Guide and Channel Lists Changing the Guide Display The DishHD 211t comes set to display the Program Guide with video in the upper right corner. However, you can change the way the Program Guide displays. Preferences...
-
Page 88: Changing Languages
DishHD 211t. Descriptive audio—not included on all channels and programs—is a feature for the visually impaired that describes what is happening during a program. -
Page 89: Setting U P Audio Output
UDIO UTPUT The DishHD 211t uses HDMI or an optical port for outputting digital audio. The HDMI or optical output can provide two audio data types: Dolby® Digital and Linear PCM (only Dolby Digital can provide full 5.1-channel sound). Dolby Digital gives you the capability to enjoy programs in surround sound. -
Page 90: Resetting To Factory Defaults
Favorite Lists except the All Chan and All Sub lists. If you set any locks on the DishHD 211t and the DishHD 211t is locked, these locks are kept. If the DishHD 211t is unlocked, your locks will be lost. You cannot reset the DishHD 211t to default settings to discard a password you have forgotten. -
Page 91: Scheduling Dishhd Stb Updates
HD STB U CHEDULING PDATES The DishHD 211t comes scheduled to update the Program Guide at 3:00 AM every day. This section describes how to change the Updates settings. Note: This feature does not interfere with any scheduled timers. Time Set... -
Page 92: Setting U P Inactivity Standby
NACTIVITY TANDBY If your DishHD 211t is on for a period of time without any activity (for example, no channel changes), the Inactivity Standby feature turns off the STB so that you always have the latest Program Guide. Enabling this feature is recommended, as it also helps improve the reliability of your STB. - Page 93 DishHD 211t Customization Tips • To take full advantage of Dolby Digital 5.1 surround sound, you need an HDMI or optical cable and a stereo that supports this feature. UESTIONS • Why is my audio in another language? You may have selected an alternate language.
- Page 94 Chapter 9 Notes OTES...
-
Page 95: Connections And Setup
Connections and Setup 10 10 10 10 Chapter • ONNECTING TO A • SING ROUBLESHOOTING OOLS... -
Page 96: Connecting To Atv
HDMI cable to the HDMI input on the HDTV set or monitor. Turn on your DishHD 211t and TV using the front panel buttons. Change your TV to the correct input or source. Consult your HDTV’s user’s guide for assistance. - Page 97 HDTV on page 84. Turn up the volume on your HDTV and confirm you have sound. Refer to Setting Up to Display in HD on page 84 to adjust the DishHD 211t’s HD display settings to match your TV.
- Page 98 Change the TV to display from the HD input you connected in the previous sections. If you can see a picture, you are finished. Repeat steps 4 and 5 until the TV displays video from the DishHD 211t. Setting Up to Display in HD Use the following steps to select the HDTV display format that best matches your TV or monitor.
- Page 99 IDEO connection). Turn on the TV and DishHD 211t to make sure you have a picture. You’ll need to set your TV to a video input or source. Refer to your TV’s user’s guide for more information. Turn up the volume on the TV to make sure you have audio.
-
Page 100: Using Troubleshooting Tools
SING ROUBLESHOOTING OOLS Your DishHD 211t has diagnostic tools that you can use to solve many common problems. Resetting Your DishHD 211t Press and hold the DishHD 211t’s POWER button until the front panel lights blink. Release the POWER button. The DishHD 211t takes several minutes to reset, displays the message “Acquiring Satellite Signal”, may download the Program Guide, and then... -
Page 101: Reference
Reference Reference • ROUBLESHOOTING ABLES • EVICE ODES FOR EMOTE ONTROL... -
Page 102: Troubleshooting Tables
• Try each of the suggested solutions in the What to Do column. Sometimes resetting the DishHD 211t can fix a minor problem. See Resetting to Factory Defaults on page 76. Make sure your TV is tuned to the correct channel or input. Use RECOVER as described on page 68. - Page 103 (for outdoor cables). • If you have authorized the DishHD 211t (added it to your The DishHD 211t may not yet account), wait a few minutes to see if the message is have been electronically linked removed.
- Page 104 LNBF that receives signals from that satellite. Re-aim the dish at the right satellite. It is very important for the DishHD 211t to get the latest The DishHD 211t is downloading software to function properly. The download may take current software.
- Page 105 The channel changes, but the new entering the channel number, or channel is not exactly the channel the channel number you entered • Reset the DishHD 211t using the you entered. may be invalid. instructions on page 76. • If you entered the number for •...
- Page 106 • Make sure the DishHD remote control in the wrong mode. is in the correct mode. For example, if you want to use the DishHD 211t, put the remote control in SAT mode (see Remote Control Modes on page 59).
- Page 107 When you press the DishHD remote control MUTE or VOLUME button, • Maybe you are trying to control • Set up the DishHD remote control to nothing happens. TV volume, but you set up the operate either TV volume or tuner/ remote control to control a amplifier volume, whichever you want.
- Page 108 If you have set up the Program A Favorites List does not show Guide to hide adult channels and Unlock the DishHD 211t for the list to channels that you know you have the DishHD 211t is locked, the show adult channels.
- Page 109 • looks “washed out” or fuzzy. cable sealant. radios, stereos, or TVs). • Check the length of cable between your dish and DishHD 211t. If it is greater than 200 feet, contact the person who installed your system. • Make sure the system is properly grounded.
- Page 110 • The audio connections may • Check the audio connectors and not be properly connected. cables from the DishHD 211t to the The DishHD 211t front panel Power TV or the sound system. light is on and there is a good picture •...
- Page 111 What to Do You set a lock (for example, a lock on You may not have locked the You must lock the DishHD 211t to apply programs by ratings), but the lock DishHD 211t. any lock that you have set.
- Page 112 DishHD 211t. DishHD account and is now being moved to Hard Drive cannot be a DishHD 211t not on that account, it must • An external hard drive can connected to a separate be reformatted before it can be used with only be used on an DishHD account.”...
-
Page 113: Device Codes For Remote Control
Reference Device Codes for Remote Control EVICE ODES FOR EMOTE ONTROL These tables contain the manufacturer codes for programming the remote to control your TV, VCR, DVD player, or audio amplifier. Every attempt has been made to include all codes. If your device brand is not listed or if the codes do not work, the remote control may not operate your device. - Page 114 Reference Device Codes for Remote Control Jinta 0009 0264 0412 0848 1910 Nintaus 0891 Shen Ying 0003 0009 0092 0179 0474 Jinxing 0009 0037 0054 0145 0156 0264 Nordmende 0891 Shencai 0009 0145 0264 0412 0556 0698 0817 0821 1006 1011 1012 NPC 1024 Sheng Chia 0009 0033 0179 0236 0474 1013 1044 1353...
- Page 115 Reference Device Codes for Remote Control Videocon 1540 ESC 0020 Tempest 0020 Videomac 0009 Fujitsu 0000 0045 0052 0366 Tevion 0642 Viewsonic 0864 0885 1742 2111 2277 Fijitsu General 0037 Thomson 0320 2280 2281 Funai 0000 Toshiba 0008 0024 0041 0042 0043 0045 Vision 0032 0264 0474 1826 2305 GE 0035 0060 0226 0240 0320 0760 0066 0067 0210 0212 0366 0384 0608...
- Page 116 Reference Device Codes for Remote Control White Westinghouse 1814 Hong Deng 0542 LG 0741 2189 Yamaha 0176 1176 1276 1331 1375 1376 Idall 0595 Loewe 0539 1476 2061 2406 JVC 0602 Malata 2155 Kebao 0581 Marantz 0539 2414 Kenwood 0604 0605 0606 Mastar 1217 Lingxian 1220 MDS 1111...
- Page 117 Reference Device Codes for Remote Control TV/DVD Combination Codes Programming for combination equipment: Program the remote control in TV mode and then in VCR (or AUX—press 1 before entering the DVD code) mode. The first number is the TV code and the second number is the DVD code.
- Page 118 Reference Notes OTES...
-
Page 119: Appendix
Appendix Appendix • NSTALLING THE UNER... -
Page 120: Installing The Tuner
These steps describe how to install the tuner into the DishHD STB. Note: Ensure that the AC cord is not connected to the DishHD STB or to power. The DishHD STB is sensitive to Electro-Static Discharge (ESD). Wear a grounded protective ESD strap or ground yourself first by touching a grounded metal fixture, such as a metal plumbing fixture, a metal rail- ing, or a structural I-beam, before beginning installation. - Page 121 F-connector. Put the washer and nut in a safe place, since they are needed in step 5. Note: Ensure that the AC cord is not connected to the DishHD STB or to power. The DishHD STB is ESD sensitive. Wear a grounded protective ESD strap or ground yourself by first touching a grounded metal fixutre.
- Page 122 Replace the four screws to the back panel. Replace the four screws, attaching the top cover to the DishHD STB (see Figure 7). Torque these screws to 0.79 +/- 0.05 N-m (7 +/- 0.5 in-lbs). Note: The top cover fits snugly, and when fitting properly, does not need any pressure to line up the holes.
-
Page 123: Index
Index Using 25 Choices 14 Finding Programs Closing 13 Alternate Audio 9, 74 Browse Banner 19 Highlighting Options 13 Audio Amplifier Codes 102 Program Guide 18 Opening 13 Audio Codes 102 Themes 20 Selecting Options 13 Audio Output 75 Troubleshooting 97 Message Numbers 89 Guide 18 Batteries 8... - Page 124 Index Programming to Control a Remote Control 91 Second DishHD STB 69 Resetting Your STB 86 Recorded Events ProgrammingUsing Device Snowy, Blue, or Black Screen 92 Delete 43 Codes Table 60 Timers 95 Fast-Forwarding 40 Reading out Device Codes 62...
- Page 125 Write the following information in the spaces provided below. You may need to provide this information if you call the DishHD Customer Service Center. To get the Conditional Access Numbers, display the System Info screen by pressing MENU-6-1-3 on your DishHD remote control.
- Page 126 1 7 8 8 8 8...
Need help?
Do you have a question about the 211t and is the answer not in the manual?
Questions and answers