Table of Contents
Advertisement
Available languages
Available languages
Quick Links
PROGRAMMABLE
COFFEE MAKER
CAFETERA PROGRAMABLE
THIS MANUAL IS FOR USE WITH ALL
ITEMS WITH THE MODEL NUMBER:
HH-09101042B
ESTE MANUAL DE USUARIO APLICA
PARA TODOS LOS PRODUC TOS CON
EL NÚMERO DE MODELO:
HH-09101042B
READ THIS MANUAL BEFORE USING THE PRODUCT AND SAVE FOR FUTURE REFERENCE
LEA ESTE MANUAL ANTES DE USAR EL ARTEFACTO Y GUÁRDELO PARA REFERENCIA
Advertisement
Table of Contents

Related Manuals for Holstein Housewares HH-09101042B


Summary of Contents for Holstein Housewares HH-09101042B
- Page 1 PROGRAMMABLE COFFEE MAKER CAFETERA PROGRAMABLE THIS MANUAL IS FOR USE WITH ALL ITEMS WITH THE MODEL NUMBER: HH-09101042B ESTE MANUAL DE USUARIO APLICA PARA TODOS LOS PRODUC TOS CON EL NÚMERO DE MODELO: HH-09101042B READ THIS MANUAL BEFORE USING THE PRODUCT AND SAVE FOR FUTURE REFERENCE...
-
Page 2: Important Safeguards
IMPORTANT SAFEGUARDS WHEN USING ELECTRICAL APPLIANCES, BASIC SAFETY PRECAUTIONS SHOULD ALWAYS BE FOLLOWED TO PREVENT THE RISK OF FIRE, ELECTRIC SHOCK, BURNS, OR OTHER INJURIES OR DAMAGES. Read all instructions before using this appliance. Always unplug the appliance from the electrical outlet before relocating, servicing, or cleaning it. - Page 3 To disconnect the appliance from an electrical outlet, pull directly on the plug; DO NOT pull on the power cord. Do NOT put any stress on the power cord where it connects to the appliance, as the power cord could fray and break. 10.
-
Page 4: Extension Cords
must never be used on a range top. Do not put a hot glass container over a wet or cold surface. Do not use a cracked glass container or with weaked handle. Do not clean glass container with cleansers, steel wool pads, or other abrasive material. -
Page 5: Polarized Plug
detachable power-supply cords or extension cords are available and may be used if care is exercised in their use. If a longer detachable power-supply cord or extension cord is used: The marked electrical rating of the cord set or extension cord should be at least as great as the electrical rating of the appliance, and The longer cord should be arranged so that it will not drape over the countertop or tabletop where it can be tripped over, snagged, or pulled... -
Page 6: Using The Appliance
NEVER IMMERSE APPLIANCE OR CORD IN WATER OR ANY OTHER LIQUID. Position the appliance on a stable, dry, level, heat-resistant surface near an electrical outlet. Unroll the electrical cord. Operate this appliance on a separate outlet and circuit from other appliances to avoid overloading the circuit. - Page 7 11. Place the filter basket (14) in its place. (Please make sure it is mounted well). 12. Leave the lid (2) open. 13. Fill carafe (10) with desired amount of water (check the water level indicator (1) on coffee maker). Pour water into the water tank (4). 14.
- Page 8 21. Always turn the coffee maker off and disconnect the power supply when not in use. 22. Note: pay attention to pour the coffee out, otherwise you may be hurt as the temperature of coffee just finished is high. If you do not want the coffee maker to start operation immediately, for example now it is 8:10 am, you hope that the coffee maker will automatically start at 1:00 pm, first follow steps 1 to 7 of above section, and then you can set the automatic start function as follows:...
- Page 9 corner of display. 4) Set the delayed starting time by pressing HOUR and MIN button repetitively, that is 01:00 pm (see Fig. 2). 5) Press the PROG button for the third time, the indicator of AUTO will be illuminated green and the LCD will display the current clock. NOTE: •...
- Page 10 Note: You may cancel the automatic start function by pressing PROG. If you want to change the automatic start time, only following the above 1-4 steps again When the time is due the indicator of AUTO will be off, while the indicator of RUN turn on and the unit starts brewing.
-
Page 11: Specifications
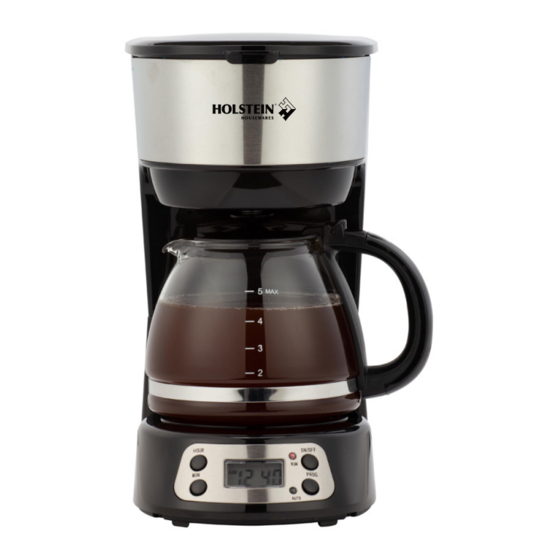
NOTE: • Do not dry inside of water tank (4) with a cloth, as lint may remain. • After cleaning, reassemble coffee maker. CAUTION: DO NOT IMMERSE THE APPLIANCE, THE POWER CORD OR THE PLUG INTO WATER OR ANY LIQUIDS. STORAGE After following the steps of cleaning and maintenance, collect the power cord. - Page 12 PARTS Water-level indicator Shower head Water tank Housing Base Power cord with plug Warming plate Display Panel Carafe Grip handle Carafe lid Drip stop valve Filter basket Permanent filter www.holsteinhousewares.com...
- Page 13 Hazelnut Cof fee Ingredients: 4 cups brewed coffee 1 tbs brown sugar 1/8 tsp ground cinnamon 1/4 cup whipped cream 1 tbs Nutella Steps: Combine freshly brewed coffee, sugar, and cinnamon together. Pour the coffee into your mugs In a small bowl mix the whipped cream and Nutella together Top your coffee with a spoonful.
- Page 14 Caramel Cof fee Ingredients: • 1/2 cup Coconut flavored coffee • 1 1/2 tbs caramel sauce • 2 tbs vanilla syrup • 1 cup milk Steps: • Add 2 tbs of vanilla syrup and 1/2 tbs of caramel sauce to the bottom of the mug.
- Page 15 Chocolate Cookie Cof fee Ingredients: • 1 cup coffee • 2 tbs sugar • 1/2 cup milk • 2 tbs dark chocolate syrup • 8 crumbled oreo cookes • Whipped cream Steps: • Place the coffee, milk, sugar and cookies in the blender. •...
-
Page 16: Importantes Instrucciones De Seguridad
IMPORTANTES INSTRUCCIONES DE SEGURIDAD AL USAR ARTEFACTOS ELÉCTRICOS, SIEMPRE DEBEN TOMARSE PRECAUCIONES BÁSICAS DE SEGURIDAD PARA EVITAR EL RIESGO DE INCENDIO, CHOQUE ELÉCTRICO, QUEMADURAS U OTRAS LESIONES O DAÑOS. Lea todas las instrucciones antes de usar este artefacto. Siempre desenchufe el artefacto del tomacorriente antes de mover o limpiar. - Page 17 Para desconectar el artefacto del tomacorriente, tire directamente del enchufe, NO tire del cordón eléctrico. NO ponga presión sobre el cordón eléctrico donde se conecta al artefacto, ya que el cordón eléctrico podría romperse. 10. NO utilice el artefacto si funciona mal, o si se ha caído o dañado. 11.
-
Page 18: Cables De Extensión
PRECAUCIÓN: Durante los primeros minutos de uso inicial, usted puede notar un poco de humo y/o un olor del artefacto. Esto es normal y desaparecerá. No va a reaparecer después de que el artefacto se haya utilizado un par de veces. ¡CONSERVE ESTAS INSTRUCCIONES! INSTRUCCIONES DE SEGURIDAD ADICIONALES... -
Page 19: Enchufe Polarizado
El cable debe colocarse de forma que no cuelgue para evitar que se pueda tropezar, enredarse o tirar de el accidentalmente (especialmente por niños). • ENCHUFE POLARIZADO Este electrodoméstico tiene un enchufe polarizado (una pata del enchufe es más ancha que la otra). Para reducir el riesgo de descarga eléctrica, este enchufe está... - Page 20 SOLO PARA USO DOMESTICO INSTRUCCIONES DE USO: NOTA: Para limpiar el artefacto de cualquier residuo, llénela hasta la marca de nivel máximo con agua fresca. Lleve a ebullición y vacíe el artefacto por lo menos 2 veces. Utilice este artefacto solamente para hacer café. SOLO PARA USO DOMÉSTICO. Abra la tapa (2) y remueva la cesta del filtro (14).
- Page 21 apagará. El artefacto continuará funcionando una vez que se vuelve a encender / apagar. 11. Retire la jarra para servir cuando finalice la preparación (aproximadamente un minuto después de que el café deje de gotear). Nota: el café que obtenga será menor que el agua que ha agregado, ya que un poco de agua es absorbida por el café...
- Page 22 Nota: el ciclo de tiempo es de 12 horas, 3. Presione el botón PROG una vez más y la palabra TIMER aparecerá en la esquina superior izquierda de la pantalla. 4. Ajuste el tiempo de inicio diferido pulsando repetidamente las teclas HOUR y MIN, es decir, a las 01:00 PM horas (ver Fig.
-
Page 23: Funciones Adicionales
FUNCIONES ADICIONALES: • La función de válvula anti-goteo (13) le permite retirar la jarra (10) durante la infusión para servir una taza de café (vuelva a colocar la jarra (10) inmediata- mente en menos de 30 segundos). LIMPIEZA Y MANTENIMIENTO El mantenimiento adecuado asegurará... -
Page 24: Especificaciones
• No seque el interior de depósito de agua (4) con un paño ya que puede dejar pelusa. • Despues de limpiar, vuelva a montar la cafetera con todas sus partes. PRECAUCIÓN: NO SUMERJA EL ARTEFACTO, EL CABLE O EL ENCHUFE EN AGUA U OTROS LÍQUIDOS. ALMACENAJE Luego de seguir los pasos de limpieza y mantenimiento, recoja el cordón eléctrico. - Page 25 PARTES Nivel de agua Tapa Cabeza de goteo Deposito de agua Armazon Base Cable Electrico Placa Calentadora Panel de Control Jarra Asa de la Jarra Tapa de la jarra Valvula Antigoteo Cesta del filtro Filtro permanente www.holsteinhousewares.com...
- Page 26 Cafe con Caramelo Ingredientes: • 1/2 taza de café con sabor a coco • 1 1/2 cucharada de salsa de caramelo • 2 cucharadas de jarabe de vainilla • 1 taza de leche Pasos: • Añadir 2 cucharadas de jarabe de vainilla y 1/2cucharada de salsa de caramelo en el fondo de la taza.
- Page 27 Cafe con Gal letas de Chocolate Ingredientes: • 1 taza de café • 2 cucharadas de azúcar • 1/2 taza de leche • 2 cucharadas de jarabe de chocolate oscuro • 8 cookes oreo desmenuzadas • crema batida Pasos: • Coloque el café, leche, azúcar y galletas en la licuadora.
- Page 28 Cafe con Avel lanas Ingredientes: • 4 tazas de café • 1 cucharada de azúcar morena • 1/8 cucharadita de canela en polvo • 1/2de taza de crema batida • 1 cucharada de Nutella Pasos: • Combine café recién hecho, el azúcar y la canela. •...
- Page 29 www.holsteinhousewares.com...
-
Page 30: Limited Warranty
HOL- STEIN HOUSEWARES will, at its option, either repair or replace this product found to be defective. HOLSTEIN HOUSEWARES warrants that from the date of purchase, this product will be free from mechanical manufacturing defects for a period of 180 days. -
Page 31: Normal Wear
HOLSTEIN HOUSEWARES or an authorized service center. Further, the warranty does not cover Acts of God, such as fire, flood, hurricanes, and tornadoes. HOLSTEIN HOUSEWARES shall not be liable for any incidental or consequential damages caused by the breach of any express or implied warranty. Except to the... -
Page 32: Garantia Limitada
GARANTIA LIMITADA. HOLSTEIN HOUSEWARES por este medio garantiza, sujeto a los términos y condicio- nes aquí establecidos, que si este producto es defectuoso en concepto de defectos mecánicos o mano de obra de fabricación durante el período de garantía especifica- do, HOLSTEIN HOUSEWARES, a su elección, reparará... - Page 33 HOLSTEIN HOUSEWARES o un centro de servicio autoriza- do. Además, la garantía no cubre Actos de Dios, tales como incendios, inundaciones, huracanes y tornados.
- Page 34 WARNING ELECTRIC SHOCK ADVERTENCIA CHOQUE ELÉCTRICO WARNING TO REDUCE THE RISK OF ELECTRIC SHOCK, NEVER IMMERSE THE BASE, CORD OR PLUG IN WATER OR OTHER LIQUID. THIS APPLIANCE IS EQUIPPED WITH A POLARIZED PLUG (ONE BLADE OF THE PLUG IS WIDER THAN THE OTHER) TO REDUCE THE RISK OF ELECTRIC SHOCK. THIS IS A SECURITY FEATURE.
Need help?
Do you have a question about the HH-09101042B and is the answer not in the manual?
Questions and answers