Table of Contents
Advertisement
Quick Links
Owner's Manual
Mode d'emploi
Manual de instrucciones
Before using the instrument, be sure to read "PRECAUTIONS" on pages 5-9.
Avant d'utiliser l'instrument, lisez attentivement la section « PRÉCAUTIONS D'USAGE » aux pages 5-9.
Antes de utilizar el instrumento, lea las "PRECAUCIONES," en las páginas 5-9.
EN
FR
ES
Advertisement
Table of Contents

Related Manuals for Yamaha VCJ4330


Summary of Contents for Yamaha VCJ4330
- Page 1 Owner’s Manual Mode d’emploi Manual de instrucciones Before using the instrument, be sure to read “PRECAUTIONS” on pages 5-9. Avant d’utiliser l’instrument, lisez attentivement la section « PRÉCAUTIONS D’USAGE » aux pages 5-9. Antes de utilizar el instrumento, lea las “PRECAUCIONES,” en las páginas 5-9.
- Page 2 This product should be used only with the components supplied and never mix different types of batteries. Batteries MUST be or; a cart, rack, or stand that is recommended by Yamaha. If a installed correctly. Mismatches or incorrect installation may result cart, etc., is used, please observe all safety markings and instruc-...
- Page 3 Yamaha Corporation of America or its subsidiaries. tronic devices. Compliance with FCC regulations does not * This applies only to products distributed by Yamaha Corporation of America. (class B) COMPLIANCE INFORMATION STATEMENT (Supplierʼs declaration of conformity procedure)
- Page 4 The model number, serial number, power requirements, etc., may be found on or near the name plate, which is at the bottom of the unit. You should note this serial number in the space provided below and retain this manual as a permanent record of your purchase to aid identification in the event of theft.
- Page 5 AC outlet. Then have the instrument WARNING inspected by qualified Yamaha service personnel. • Never insert or remove an electric plug with Always follow the basic precautions listed wet hands.
- Page 6 • Use the specified USB power adaptor (pages from the instrument.) Then have the device 17, 33) only. Using the wrong adaptor can inspected by Yamaha service personnel. result in damage to the instrument or - The USB cable or plug becomes frayed or overheating.
- Page 7 Yamaha cannot be held responsible for damage caused by improper use or modifications to the instrument, or data that is lost or destroyed.
- Page 8 TV, radio, stereo equipment, mobile phone, or contents in which Yamaha owns copyrights or other electric devices. Otherwise, the with respect to which Yamaha has license to instrument, TV, or radio may generate noise. use others’ copyrights. Due to copyright laws...
- Page 9 • Yamaha does not guarantee all wireless connections between this unit and devices compatible with Bluetooth function. Your particular instrument does not have Bluetooth capability if a “Y” indication is printed on the upper- right corner of the label at the bottom.
- Page 10 Explains how to get started with the instrument and how to use main feature Jam function. MIDI Reference (Online Manual) Contains MIDI-related information for this instrument. To obtain online manual (PDF), access the Yamaha Downloads website, then enter the model name for searching the desired files. Yamaha Downloads https://download.yamaha.com/ Included Accessories •...
-
Page 11: Table Of Contents
Contents Panel Controls ....................12 Setting Up ......................15 Try Playing a Variety of Instrument Voices ............. 20 Enjoy Playing with the Jam Function............... 21 Setting Up for MIDI Operation ................26 Customizing the Settings .................. 28 Backup and Initialization ................... 30 Troubleshooting .................... -
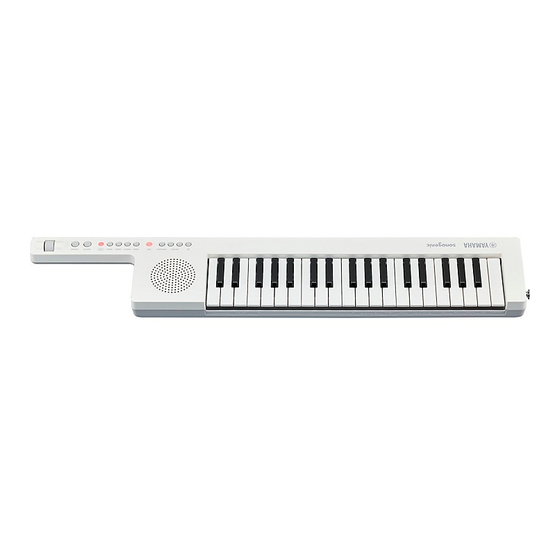
Page 12: Panel Controls
Panel Controls 4 5 6 7 8 9 ) ! 1 [PITCH] bend wheel For adding smooth pitch variations to the notes you play on the keyboard. Roll the wheel toward you to raise the pitch, or away from you to lower it. With the ) [FUNCTION] button, you can change the direction of the pitch bend (page 28). - Page 13 ) [FUNCTION] button For setting various functions. While holding down this button, press the keys corresponding to the function settings you want to change. See page 28 for details on the functions. ! VOLUME [-] button Each button press lowers the overall volume of the instrument. Holding down the button lowers the volume continuously.
- Page 14 Side % [AUX IN] jack For inputting the sound of an audio player and listening to it through the built-in speaker of the instrument (with 3.5 mm, mini stereo phone plug). To adjust the input volume from [AUX IN] jack, adjust the audio playback volume on the audio device.
-
Page 15: Setting Up
Setting Up Attaching the Strap Attach the included strap securely to the strap pins of the instrument as illustrated below. The strap has an adjuster allowing you to adjust it as desired. CAUTION • This strap is designed for use with only this instrument. Do not use for any other purpose. •... - Page 16 Power Requirements This instrument can be powered in one of the two ways listed below. Determine which you intend to use, and follow the instructions for setting up. • Using batteries (sold separately) next section (below) • Using a USB power adaptor or USB mobile battery (sold separately) see page 17 NOTICE •...
- Page 17 NOTICE • Failure to set the battery type may shorten the life of the battery. Make sure to set the battery type correctly. • Connecting or disconnecting the USB cable with batteries installed may turn the power off, resulting in loss of your custom settings data.
- Page 18 Turning on the Power / Setting to Standby Press the [P] (Standby/On) button to turn the power on. 1. Power on Adjust the volume [VAR] lamp The [VAR] lamp is lit in red when the power is on. Adjust the volume as desired while playing the keyboard. If the overall volume is low, or no sound is heard, please confirm “Troubleshooting”...
- Page 19 Enabling / Disabling Auto Power Off To prevent unnecessary power consumption, this instrument features an Auto Power Off function that automatically turns the power off if the instrument is not operated for a specified period of time (30 minutes). With default, it is set to On, however, the setting can be changed with the [FUNCTION] button (page 29).
-
Page 20: Try Playing A Variety Of Instrument Voices
Try Playing a Variety of Instrument Voices Selecting and Playing a Voice You can change the keyboard Voice to another instrument Voice, such as strings, electric piano and others. Press the Voice button corresponding to the desired category. Each press on one of the four Voice buttons alternates among the three Voices assigned to that button. -
Page 21: Enjoy Playing With The Jam Function
Downloading the App Download the free Chord Tracker app (iOS/Android). Chord Tracker (free) This app is compatible with iOS and Android devices. For information on release dates and the latest system requirements, see the website below. https://www.yamaha.com/kbdapps/ SHS-300 Owner’s Manual... - Page 22 Bluetooth Connection Depending on the country in which you purchased it, the instrument may not have Bluetooth capability. Refer to page 9 to check if your keyboard is equipped with Bluetooth functionality. If your instrument is not equipped with Bluetooth functionality or Bluetooth is not available for some reason, you can connect to this app with a USB cable.
- Page 23 USB Cable Connection Use the cable that comes with the instrument for USB connection. Using other USB cables can make the connection unreliable. iOS device Lightning-to-USB Camera Adapter Self-powered USB hub Android device USB (A) Micro B Included USB cable USB Type A female - USB Micro B male AC outlet...
- Page 24 Playing with the Chord Tracker App Connect the keyboard and the app via Bluetooth or a USB cable in advance. For Bluetooth connection, see page 22. For USB cable connection, see page 23. Start the Chord Tracker app and then select a song. The app automatically begins analysis of the selected song then displays the detected chord data on your smart device as shown below.
- Page 25 Select a Jam mode. There are three Jam modes, each designed for a specific style of playing. Press the [JAM] button repeatedly (if necessary) to select the desired mode. Jam modes Lamp Mode Description — Jam mode is disabled. 1Finger This mode is ideal for playing backing.
-
Page 26: Setting Up For Midi Operation
Setting Up for MIDI Operation By connecting the instrument to a computer (or smart device) with a USB cable, MIDI data can be transferred between the instrument and the computer. NOTICE • Make sure to use only the USB cable included with the instrument. •... - Page 27 • For Mac OS computers, you can use the standard driver available on the Mac OS; there is no need to install another driver. • Depending on the computer OS used, the Yamaha Standard USB-MIDI driver may be incompatible with the instrument.
-
Page 28: Customizing The Settings
Customizing the Settings While holding down the [FUNCTION] button, press one of the highlighted keys shown below to set a parameter. The instrument beeps in high or low pitch to indicate the operation. High pitch indicates the setting has been changed or the function has been set to “on.” Low pitch indicates the function has been set to “off.”... - Page 29 Functions Settings Keys TRANSPOSE OCTAVE Shift one octave below For shifting the pitch of the keyboard up or down Default by one octave. Value: -2 – +2 Shift one octave above Default: Depends on the Voice BATTERY TYPE Selects the type of batteries installed to this instrument. Low pitch beep indicates “dry cell,”...
-
Page 30: Backup And Initialization
Backup and Initialization The following data will automatically be maintained as backup data even if you turn off the power. Backup Parameters Function Settings (page 28): • PITCH BEND INVERSION • BATTERY TYPE • AUTO POWER OFF • TUNING • TOUCH RESPONSE •... -
Page 31: Troubleshooting
Troubleshooting Q. The overall volume is low, or no sound is heard. Raise the master Volume with the VOLUME [+] button. Check whether a set of headphones is connected to the [PHONES] jack, or not. When such a connection is made, no sound is output from the speaker of this instrument. Q. - Page 32 Bluetooth function of the connected smart device, then try connecting to the desired smart device again. Check that the smart device is compatible with the app “Chord Tracker” on the Yamaha website: https://www.yamaha.com/kbdapps/ Check that the function “USB MIDI” is set to On (page 29).
-
Page 33: Specifications
Specifications Product Name Digital Keyboard Voices AWM Stereo Sampling Polyphony (max.) Number of Voices Functions 3 modes Overall Controls Tuning, Pitch bend range, USB MIDI select, Transpose, Octave shift, Touch Response Bluetooth version: 4.0 Bluetooth *This function may not Supported profile: GATT be included Complies with Bluetooth Low Energy MIDI Specification depending on the... - Page 34 The contents of this manual apply to the latest specifications as of the publishing date. To obtain the latest manual, access the Yamaha website then download the manual file. Since specifications, equipment or separately sold accessories may not be the same in every locale, please check with your Yamaha dealer.
-
Page 35: Index
Index Troubleshooting ..........31 TUNING ............29 Accessories ............ 10 App ............21, 24 AUTO POWER OFF ........29 USB cable connection ........23 Auto Power Off ..........19 USB MIDI ............29 USB mobile battery .........17 USB power adaptor ........17 Backup ............30 Battery ............ -
Page 36: Drum Kit List
Drum Kit List Keyboard Dance Kit Keyboard Dance Kit Note # Note Note # Note C♯ 0 Surdo Mute C♯ 5 Guiro Short Surdo Open Guiro Long D♯ 0 Hi Q D♯ 5 Claves 2 Whip Slap Wood Block H Scratch H Wood Block L F♯... - Page 37 SHS-300 Owner’s Manual...
- Page 38 For CANADA This device complies with Industry Canada’s licence-exempt RSSs. Operation is subject to the following two conditions: (1) This device may not cause interference; and (2) This device must accept any interference, including interference that may cause undesired operation of the device.
- Page 39 DECLARACIÓN UE DE CONFORMIDAD SIMPLIFICADA EGYSZERŰSÍTETT EU-MEGFELELŐSÉGI NYILATKOZAT Por la presente, Yamaha Music Europe GmbH declara que el tipo de equipo radioeléctrico Yamaha Music Europe GmbH igazolja, hogy a [SHS-300] típusú [SHS-300] es conforme con la Directiva 2014/53/UE. El texto completo de la declaración UE rádióberendezés megfelel a 2014/53/EU irányelvnek.
- Page 40 SHS-300 Owner’s Manual...
- Page 41 Yamaha at the address, telephone number or website shown below. Yamaha may request that you send the defective product to a local authorized Yamaha Servicer or authorize return of the defective product to Yamaha for repair. If you are uncertain as to whether a dealer has been authorized by Yamaha, please contact Yamaha’s Service Department at the number shown below, or check Yamaha’s website...
- Page 44 Yamaha Global Site https://www.yamaha.com/ Yamaha Downloads https://download.yamaha.com/ Manual Development Group © 2019 Yamaha Corporation Published 06/2021 MWES-B0 VCH1280...
Need help?
Do you have a question about the VCJ4330 and is the answer not in the manual?
Questions and answers