
Summary of Contents for DPI DTAC101LW
- Page 1 Console Table with Charging Station User’s Guide for Model DTAC101LW v2729-01 May need to update 60mins Assembly Instructions & User Guide...
-
Page 2: Safety And Warnings
Safety & Warnings Features 8kg weight limit (17.6 lbs) SAFETY WARNINGS FCC WARNINGS Warning: Changes or modifications to this unit not expressly approved by the party 2 AC sockets • WARNING: To prevent fire or shock hazards, do not expose this unit to responsible for compliance could void the user’s authority to operate the equipment. -
Page 3: What You Will Need
What you will need Maintenance Thank you for your purchase. This product has been designed for easy assembly and constructed for durability. All parts were checked prior to packaging to ensure quality. Prior to beginning assembly, please make sure all parts and hardware are included and free of defect. -
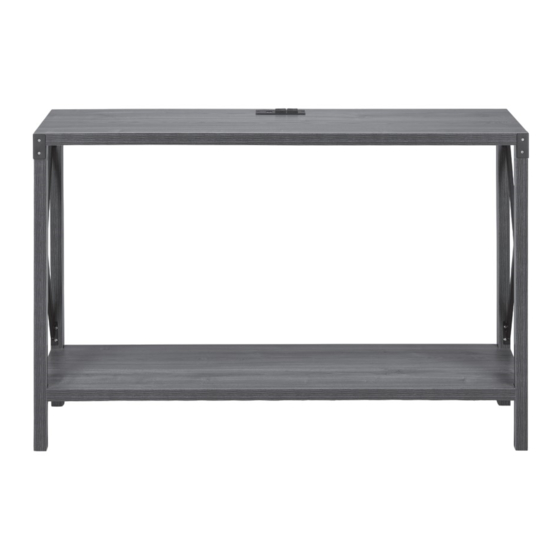
Page 4: Before Assembly
Charging Before assembly Tips before your start: - Remove all wrapping material, including staples & packing straps before you start to This end table includes 2 USB ports and 2 AC outlets that can power assemble. your electronics and devices - DO NOT tighten all screws and bolts until completely assembled. -
Page 5: Part List
Part list Hardware list When unpacking, please be careful not to discard any parts with the packaging. When unpacking, please be careful not to discard any parts with the packaging. Before continuing, please make sure you have the following parts: Before continuing, please make sure you have all of the following hardware: HARDWARE 10x40... - Page 6 Step 1 Step 3 3x15 15x11 10x40 6x32 3x15 3x15 10x40 3x15 6x32 Step 2 Step 4 15x11 3x15 3x15 3x11...
- Page 7 Step 5 Finish Do not tighten ANY bolts until entire unit is set up! 3x15 4x15 3x15 4x15 HARDWARE 10x40 3x15 6x32 3x15 4x15 15x11 3x11 4x15...
-
Page 8: Customer Support
Customer Service: 1-888-999-4215 Email Support: prodinfo@dpiinc.com Protect for Today Email Parts: partsinfo@dpiinc.com Sustain for Tomorrow Copyright © 2021 Digital Products International (DPI, Inc.). All other trademarks appearing herein are the property of their respective owners. Specifications are subject to change without notice.
Need help?
Do you have a question about the DTAC101LW and is the answer not in the manual?
Questions and answers