Table of Contents
Advertisement
Quick Links
Advertisement
Table of Contents

Related Manuals for Lanoptik HC4K


Summary of Contents for Lanoptik HC4K
- Page 1 Embedded USB Microscope Camera HC4K User’s Manual www.lanoptik.com...
-
Page 2: Table Of Contents
- 5 - CHAPTER 6 INSTRUCTIONS - 6 - 6.1 SOFTWARE INSTALLATION - 6 - - 6 - 6.2 DEVICE CONNECTION 6.3 OPEN SOFTWARE - 6 - 6.4 START TO USE - 6 - - 7 - CHAPTER 7 DISCLAIMER www.lanoptik.com... -
Page 3: Chapter 1 Notes And Safety Requirements
When cleaning, please use professional lens tissue or other professional detergent to clear the dirt on the lens. Registered trademark and copyright: Copyright ownership of this produc belongs to Lanoptik Technologies Ltd. Without written authorization of this company, any organizations or individuals shall not photocopy, print, or translation to another language to any part of this document. -
Page 4: Chapter 2 Software System Requirements
User's Manual | HC4K Embedded USB Camera Chapter 2 Software System Requirements 2.1 System Requirements under USB Work Mode Windows 7 (64bit), Windows 8 (64bit), Windows 8.1 (64bit), Windows 10 (64bit) , Windows 11 (64bit) Dual core 3GHz or higher CPU USB 2.0 high-speed interface or USB2.0 compatible interface... -
Page 5: Chapter 3 Packing List
User's Manual | HC4K Embedded USB Camera Chapter 3 Packing List Camera Installation Disk Hexagon key www.lanoptik.com - 3 -... -
Page 6: Chapter 4 Function Introduction Of Each Part
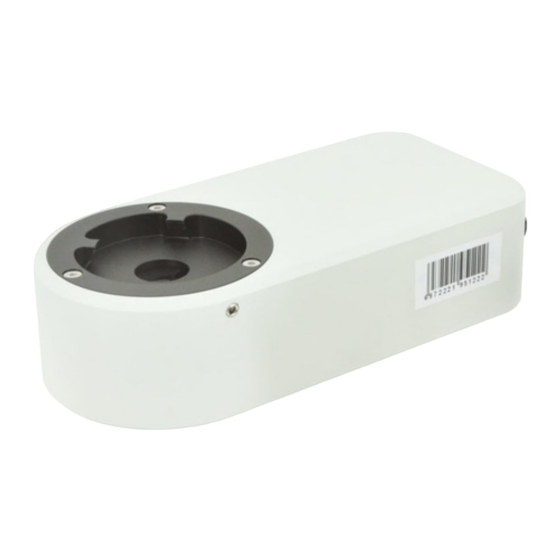
User's Manual | HC4K Embedded USB Camera Chapter 4 Function Introduction of Each Part 4.1 Name and Function for Each Part of the Camera Female interface: connected with the eyepiece end of biological microscope. Fastening screws: tighten the screws with the hexagon key to fix the eyepiece end of the biological microscope. -
Page 7: Chapter 5 Product Assembly Guide
Place the eyepiece part of the microscope to the female interface of the Digital Camera. Tighten the fastening screw. C onnect the HC4K camera to the USB port of computer, run the software and start using it. . Please refer to User Manual of Pixit Pro for software operations. -
Page 8: Chapter 6 Instructions
User's Manual | HC4K Embedded USB Camera Chapter 6 Instructions 6.1 Install Pixit Pro Software Through the download links provided with the packing box, please download Pixit Pro software. For the specific operation of software, please refer to the "User Manual of Pixit Pro_English"... -
Page 9: Chapter 7 Disclaimer
User's Manual | HC4K Embedded USB Camera Chapter 7 Disclaimer 1. In order to protect the legitimate rights and interests of users, please carefully read the instructions, disclaimers and safety instructions provided with this product before using it. The company reserves the right to update the above documents. - Page 10 Specifications are subject to change without any obligation on the part of the manufacturer. LANOPTIK TECHNOLOGIES LTD No. 72 Hongjing Street, Lejia Road, Baiyun District, Guangzhou, China. 510400 Phone: +86 20 3898 6017 | Fax: +86 20 3847 6076 Website: http://www.lanoptik.com | Email: info@lanoptik.com...
Need help?
Do you have a question about the HC4K and is the answer not in the manual?
Questions and answers