Table of Contents
Advertisement
Quick Links
Advertisement
Table of Contents

Summary of Contents for MAD Contax G2
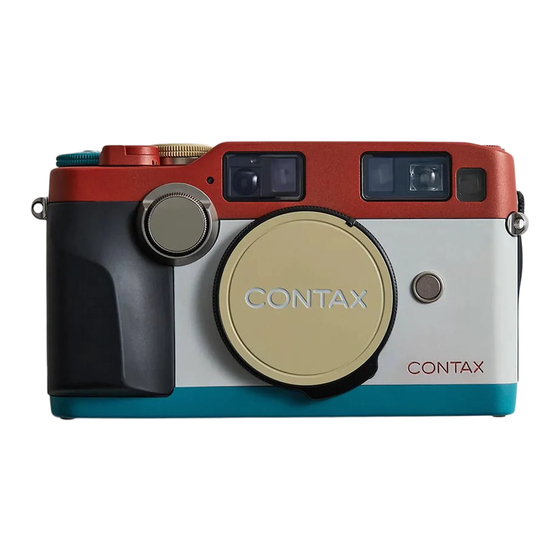
- Page 2 Before using the camera, please read this instruction manual carefully to operate it correctly. This manual explains the operating procedures for this excellent Contax G2 camera with G-mount Planar T*45 mm F2 lens. However, you can also use it in the same way as described in this manual, unless otherwise stated, for the integrated use of the camera with other G-mount Carl Zeiss T* interchangeable lenses.
-
Page 3: Table Of Contents
Specifications • Focusing the Lens Relationship between Drive Modes and Focus Modes Focusing on Auto Focus Focusing on Manual Focus Remarks on the Auto Focus System • Camera Functions and Applied Techniques <Selecting the Exposure Mode> Aperture-priority Auto Exposure mad-paris.com... -
Page 4: Names Of Parts
Self-timer LED Distance Reference Index Display Panel Drive Mode Dial ISO Button Active AF Focusing Window (infrared emitter) Strap Lug Viewfinder Lens Index Lens Release Button Passive AF Focusing Windows Active AF Focusing Window (infrared receiver) External Metering Window mad-paris.com... - Page 5 Focus Lock Button Focus Mode Dial Shutter Curtain Viewfinder Eyepiece Diopter Adjuster Film Mounting Spindle Sync Terminal Camera Back Release Knob Manual Rewind Button Film Check Window Camera Back Battery Compartment/Cover Data back Contacts Tripod Socket DX Contacts Film Chamber mad-paris.com...
-
Page 6: Basic Steps
(see page 9). (see page 11). Set the Film Speed to “DX” Load DX film, pull the tip as far as the orange (see page 18). “I” mark, place it on the spool and close the cover (see page 16). mad-paris.com... - Page 7 Dial to “AUTO” (see page 21). Set your desired aperture Aim the focusing frame at your subject, and depress the shutter (see page 42). halfway. The focusing mark turns on. Press the shutter release and shoot (see page 30). mad-paris.com...
-
Page 8: Loading The Batteries
Use a coin to turn the battery compartment cover as shown and remove the cover. • If battery polarities are not aligned correctly, the camera will not operate and may be damaged. Replace the cover screw. mad-paris.com... -
Page 9: Battery Check
• The 3V lithium battery (CR2) cannot be charged by any means. against cold. The battery reduced by low temperatures will return to normal when you take pictures at • Battery should be kept away from children. an ordinary temperature. mad-paris.com... -
Page 10: Mounting And Dismounting The Lens
(shaded portion) and the lens grip ring in clockwise (the direction of the arrow in the illustration). the direction of the arrow fully, as illustrated, to mount the lens Turn the lens until it locks into place with a “click. ” on the camera again. mad-paris.com... - Page 11 After dismounting the lens from the camera, protect the lens with the lens cap and rear cap, and the camera with the body cap. mad-paris.com...
-
Page 12: Main Switch
OFF, turning off the camera. If you are not using the camera, a fixed exposure. turn off the main switch to prevent the shutter from tripping For details on AE lock, see page 48. inadvertently. mad-paris.com... -
Page 13: Display In The Viewfinder
In the auto exposure mode, the over “ ” or under “ ” mark indicating It does not represent an actual example of display.) deviation from the exposure control range will be displayed. In the manual mode, the correct “ ”, over “ ” or under “ ” mark will be displayed. mad-paris.com... -
Page 14: Display Panel/Exposure Counter
• When auto mode is set with DX code, always “DX” is displayed. • Display of the end of the film. • Remaining operating time in self-tome mode. Multiple Exposure Mark • Elapsed time during bulb exposure (B) mode. mad-paris.com... -
Page 15: Dioptre Adjustment
The adjustable range is from +0.3 to -2 dioptres. If the built-in dioptre adjustment provides insufficient compensation for your eyesight, an optional dioptre lens, mad-paris.com... - Page 16 Place the dioptre lens inside the eyepiece frame. take care in handling so as not to soil the dioptre lens when installing it. Fit the pins on the left side of the eyepiece frame into their holes, and press down the frame to its original position. mad-paris.com...
-
Page 17: Loading The Film
When the film tip lies on the shutter curtain, in particular, never trip the shutter. • Take care not to touch or contaminate the DX contacts and data back contact. • Always load and unload a film in subdued light. mad-paris.com... - Page 18 • If the exposure counter blinks at “00”, the film is not advancing properly. (see illustration). Open the camera back and reload the film correctly. • If the length of film protruding from the cassette is too long, adjust it by winding film back into the cassette before loading the film. mad-paris.com...
-
Page 19: Setting And Checking The Film Speed
16 seconds. When DX automatic film-speed setting is used, “DX” will appear in the display. • If the shutter release is depressed halfway while the film speed is displayed, the display will return to the shooting distance display. mad-paris.com... - Page 20 • When the film speed (ISO number) has been set manually, speed in the display panel will start to blink. that manually set speed will be used even if DX code film is After blinking, remove your finger from the button. later loaded in the camera. mad-paris.com...
- Page 21 • Once the film speed has been set manually, the set value will be stored in memory and remain in effect until the above procedures are used again to change the film speed setting. While the film speed is being set, the display inside the viewfinder will blink and no pictures can be taken. mad-paris.com...
-
Page 22: Shutter Speed Dial
• To prevent unintentional changes of shutter speed, the “AUTO” and “X” positions lock into place. To change from these settings, you must turn the dial while pressing the shutter- speed dial lock release button (on top of the dial). Shutter-speed dial lock release button mad-paris.com... -
Page 23: Drive Mode Dial
To select a mode, turn the drive mode dial until the mode For details, see page 60. aligns with the index mark. • Be sure the dial stops securely at one of the click indents (do not attempt to set the dial between marked settings). mad-paris.com... -
Page 24: Focus Mode Dial/Focus Lock Button
Focusing is performed manually by turning the focusing dial on the front of the camera. <Focus Lock Button> Focus-mode dial Press this button during use of the “CAF” (continuous auto focus) mode when you wish to lock the focus on a subject. mad-paris.com... -
Page 25: Holding The Camera
It is also good to support your body or camera with a building, tree, and so on. Relax the hand and gently depress the shutter release. At the moment to take Tigthen your side, and stabilise the camera. pictures, stop breathing. mad-paris.com... -
Page 26: Rewinding The Film
(do not use pins, needles or is blinking on “00”, then open the camera back and remove other sharply pointed objects). the film cassette. • Take the exposed film for processing as soon as possible. mad-paris.com... -
Page 27: Focusing The Lens
This is a “focus-priority” mode. obtained by setting the focus to infinity (InF). The manual focus mode is also convenient when taking multiple photographs of still-life or other subjects when the distance between camera and subject remains fixed. mad-paris.com... - Page 28 Shooting) • • • During continuous shooting, focus for During continuous shooting, focus is Manual focusing is impossible during successive exposures is locked at the measured independently for continuous shooting. setting established for the first frame. each frame. mad-paris.com...
- Page 29 However, if are taken continuously with the exposure value that has been measured the focus lock is activated, exposure is exposure value that has been measured on the first time. fixed at that time (AE lock). on the first time. mad-paris.com...
-
Page 30: Focusing On Auto Focus
FOCUSING ON AUTO FOCUS ("SAF", "CAF") Viewfinder Display panel Turn focus mode dial to either “SAF” or “CAF” . • The viewfinder distance scale will change depending on the The viewfinder and the display panel will appear as shown in lens installed. the illustration. mad-paris.com... - Page 31 Simultaneously, As focusing is performed automatically, the focusing mark will the distance is indicated on the display panel. light in the viewfinder. Depress the shutter release fully to take the picture. mad-paris.com...
- Page 32 “SAF” because your subject is too close to the camera. However, when the drive mode is set at “CAF”, the shutter trips although the subject is not sharply focused. mad-paris.com...
- Page 33 • Because the focus remains locked as long as the shutter release is depressed halfway, your subject is in sharp focus even if you move the camera. • The focus lock is released if you move your finger from the shutter release. mad-paris.com...
- Page 34 Focus will Focus lock button remain locked at the originally set distance. Depress the shutter release fully to take the picture. • Focus will remain locked so long as the focus lock button is held depressed. mad-paris.com...
-
Page 35: Focusing On Manual Focus
The display panel will show the distance, as linked to operation turned; rotate until the focus scale is aligned with the focus of the focus dial. index mark. <1. Using the camera’s focusing function> Set the focus mode dial to “MF” . mad-paris.com... - Page 36 While looking at the display panel, rotate the focus dial The lens is out of focus, focused on an object in until the correct distance to the subject appears on front of the subject. the panel. [Focus not possible] (blinking) Focus is impossible under current conditions. mad-paris.com...
-
Page 37: Remarks On The Auto Focus System
By combining these two methods, the precision and reliability of the auto focus system has been substantially improved. However, the focusing mechanism may not operate properly in the following cases. In such cases, refer to the following instructions to improve the focusing accuracy. mad-paris.com... - Page 38 Focus by selecting a contrast-rich the background. part, such as a window frame, lock the focus, return to your original composition and shoot. mad-paris.com...
- Page 39 For best results, shoot by selecting an extremely different. object with a high reflection ratio, such as a white shirt. • When shooting at a long distance, such as night scenes, it is recommended to choose the manual focus and set at "InF" (infinity). mad-paris.com...
- Page 40 Otherwise, set the distance to the subject by using the manual focus and shoot. mad-paris.com...
- Page 41 In such case, focus so that soon as the subject comes to the set distance, take your picture. the subject you want to focus fills the focusing frame completely, lock the focus, return to your original composition and shoot. mad-paris.com...
-
Page 42: Camera Functions And Applied Techniques
“Taking Pictures with Flash Units Other than utilizing the lens depth of field. the TLA Flash Unit” on page 162. Manual Exposure In this mode, you can choose the aperture and shutter speed as desired. Intentional over- or underexposure is also easy. mad-paris.com... -
Page 43: Aperture-Priority Auto Exposure
• When the shutter speed is set to slower than 1/60 sec. it is recommended to use the flash unit. If you are not using the flash unit, mount the camera on a tripod to prevent camera shake. mad-paris.com... - Page 44 “ ” mark turns off. brighten up the subject or change the aperture so that the “ ” mark disappears. • Even when an over- or underexposure warning appears, you can take pictures by depressing the shutter release. mad-paris.com...
-
Page 45: Manual Exposure
In the viewfinder, the shutter speed selected and the exposure mark will turn on. Turn the shutter speed dial or the lens’ aperture ring so that the correct exposure mark “ ” turns on. mad-paris.com... - Page 46 As long as the shutter release is depressed, the shutter will remain open to expose the film. • Mount the camera on a tripod or stable base to prevent camera shake and trip the shutter with the Cable Switch L (optional accessory). mad-paris.com...
- Page 47 The exposure mark will light in accordance with the compensation value set; turn the shutter speed dial or aperture ring of the taking lens until the exposure mark at the right of the viewfinder display appears as “ ”, then take the picture. mad-paris.com...
-
Page 48: Exposure Compensation Of "+1/3" ~ "+2
In such cases, use exposure compensation of background, the subject will be underexposed and turn out dark -1/3 ~ -2 to reduce the amount of light on it. like a silhouette. In such cases, use exposure compensation of +1/3 ~ +2 to give more exposure. mad-paris.com... -
Page 49: Using The Ae Lock
First, face the central part of the viewfinder toward your subject, then switch the main switch from “ON” to “AEL” . The exposure will thus be locked. • The shutter speed display in the viewfinder blinks during AE lock. mad-paris.com... - Page 50 Recompose your subject and shoot. • The exposure value will remain in the memory while the A lock is activated, but the display will turn off after 16 seconds to save battery. mad-paris.com...
-
Page 51: Using The A.b.c Mode
• After taking pictures in the A.B.C. mode, be sure to turn the shutter speed settings. the A.B.C. lever right to the stop (position “0”). Flash pictures cannot be taken in the A.B.C. mode. mad-paris.com... - Page 52 "S", you can take A.B.C. mode pictures on single- (The "-" mark is displayed in the viewfinder.) frame shooting; and when it is set to " ", you can take A.B.C. mode pictures continuously (up to three frames) 10 seconds after the shutter release is depressed. mad-paris.com...
- Page 53 • To cancel the A.B.C. mode after it has been activated, turn the A.B.C. lever to the position “0” . • If the main switch is set to “OFF” and then to “ON” again in the A.B.C. mode, three frames will be exposed again in the A.B.C. mode as described above. mad-paris.com...
-
Page 54: Flash Photography
As soon as the flash is fully charged, the mark “ ” will turn on in the viewfinder and the shutter speed will automatically set * Overexposure may occur. In this case, adjust the aperture as follows: ring so that the “ ” mark disappears, and shoot. mad-paris.com... - Page 55 ISO 25 to 800 (not including there. When the flash has automatically measured the light exposure compensation values). and produced the correct exposure, the “ ” mark will blink inside the viewfinder for about two seconds after the shutter is released. mad-paris.com...
- Page 56 TLA flash unit. appears in the viewfinder. Make sure that the flash is fully charged and shoot. • When taking slow-shutter synchronous flash pictures, use a tripod to prevent camera shake because the shutter speed will be slow. mad-paris.com...
- Page 57 • In the “Manual Exposure” Mode: Set the shutter speed dial to “X” or 1/125 sec. or slower. Adjust the aperture so that the correct exposure mark “ ” in the viewfinder appears and shoot. mad-paris.com...
- Page 58 <Using the Exposure Compensation Dial> In the TTL auto mode, the amount of flash light couples with the camera’s exposure compensation dial. If you want to bring out the mood by adjusting the amount of flash, use the exposure compensation dial. mad-paris.com...
- Page 59 (first curtain synchronisation). In combination with a Contax flash having a second curtain synchronisation capability, the Contax G2 can trigger the flash just before the second curtain starts to travel (second curtain synchronisation).
- Page 60 • If you use a cord type that has no direct contact, connect This camera’s shutter speed is set to “X” (1/200 sec.) or 1/125 the cord to the sync terminal on the side of the camera. sec. or slower. mad-paris.com...
-
Page 61: Multiple Exposure
If different subjects or identical subject are exposed on the same frame, more specific photographing can be attained. Set the drive mode dial to ” ” (multiple exposure mode). • The mark “ ” will blink in the display panel. mad-paris.com... - Page 62 “ ” . the shutter release again in this condition, you will be able to make an additional exposure. By repeating this procedure, you will be able to make the number of exposures you want. mad-paris.com...
- Page 63 • Note that you cannot cancel the multiple exposure mode once you have pressed the shutter release for the first exposure. mad-paris.com...
-
Page 64: Using The Self-Timer
In “CAF” mode, auto focus is the main switch to OFF, or turn the drive mode dial to another performed continuously, even during the time the self-timer is mode position. operating; focus is set at the instant the shutter is released. mad-paris.com... -
Page 65: Custom Functions
(“0”). • Be sure when the shutter release is depressed halfway or approx. 16 seconds elapse, custom functions are reset to standard setting (“0”). mad-paris.com... - Page 66 Release the focus-lock button facilitate taking pictures at a pre-set focusing distance. when the scale and mark are aligned. mad-paris.com...
- Page 67 • When this custom function has been selected, be sure to remember to change back to a normal shooting mode after you complete your multiple exposures. Display panel mad-paris.com...
-
Page 68: 67
• When the focus dial is turned, the function number changes This display indicates that custom functions are ready to in the order. be set. When the display panel appears as shown, remove your finger from the buttons. mad-paris.com... - Page 69 • Each time the focus lock button is pressed, the setting contents 16 seconds elapse after the desired select (item) number is change between "0" and "1"; select the number corresponding selected, the custom function is also set. to the function state you wish to set. mad-paris.com...
-
Page 70: Release Socket/Detaching The Camera Back
Cable Switch, the shutter can be released after focusing. If you want to shoot at a decisive moment, set the focusing mode to "MF". • Do not connect a commercially available, ordinary cable release (mechanically operated type) to the release socket because it will cause malfunction. mad-paris.com... -
Page 71: Metering System
While the external light metering is used metering window. for the Hologon T* 16mm F8, measurement is performed on TTL actual aperture metering with other lenses. The metering method switches automatically when the lens is mounted. mad-paris.com... -
Page 72: Using The Hologon 16 Mm F8
Focus the lens on the subject by using the following illustrations as the reference. Especially when the shooting distance is nearer than about 1m, make allowance for off-actual shooting range to focus the lens on the subject. mad-paris.com... - Page 73 • The camera is set in a level position when the "air ball" sits right at the centre of the level gauge. Downward tilt Level gauge (built in the viewfinder) mad-paris.com...
- Page 74 After making sure Distance index (feet) Distance lever the subject is correctly focused, remove your eye from the viewfinder and read the distance on the display panel. mad-paris.com...
- Page 75 The aperture is not adjustable because the Hologon 16mm F8 is fixed at F8. • In the manual exposure mode, adjust the exposure with the shutter speed. • When the Hologon 16mm F8 is mounted on the camera, the metering system automatically switches to the "external metering." mad-paris.com...
- Page 76 Never block the Hologon 16 mm F8 with your fingers because it is very wide and short. If you are shooting with the camera case attached, be sure to check your fingers around the lens because they will be easily shot with the subject. mad-paris.com...
-
Page 77: Depth Of Field
Consult the appended chart for more information. Also, lenses with shorter focal length (wide angle lenses) tend to have inherently greater depth of field than lenses with long focal length (telephoto lenses). mad-paris.com... - Page 78 8.4~∞ 45mm F2 0.8~1.3 1.0~1.6 1.1~2.3 1.4~3.7 1.8~10 2.3~∞ 3.0~∞ 4.2~∞ 0.99~1.01 1.18~1.22 1.47~1.53 1.95~2.06 2.9~3.1 4.6~5.4 8.6~12 60~∞ Sonnar T* 0.98~1.02 1.17~1.24 1.44~1.56 1.89~2.12 2.8~3.3 4.3~5.9 7.6~15 30~∞ 90mm F2.8 0.96~1.05 1.13~1.28 1.39~1.63 1.80~2.26 2.6~3.7 3.8~7.2 6.1~25 15~∞ mad-paris.com...
-
Page 79: Camera Care And Precautions
Though rarely, it may fail to function because this safety circuit battery leakage. has come into action. In this case, set the main switch to OFF, remove the batteries, reload them and use the camera again. mad-paris.com... -
Page 80: Specifications
Metering System: TTL actual exposure metering (centre- exposure mark, exposure compensation, flash mark. Display panel: Shooting distance/Film speed, multiple exposure weighted average light metering)/External metering (automatic switch-over with the mounted lens). mark, custom function display, battery warning mark. mad-paris.com... - Page 81 We may not be able to make repair for Battery Check: Automatic check, battery warning mark the damage or trouble that has occurred when it was used with in display panel. products of other makers offered for use with Contax camera. mad-paris.com...
Need help?
Do you have a question about the Contax G2 and is the answer not in the manual?
Questions and answers