
Summary of Contents for Hyun Joung System SAVERCALL-3000
- Page 1 Home Security System User Manual Hyun Joung System Co., Ltd. Features or exterior may change for improved performance without notice.
- Page 2 IMPORTANT – PLEASE READ THIS SECTION FIRST Savercall-3000 is a Do-It-Yourself Wireless Security System designed to help users protect themselves, their loved ones, and their property and personal possessions. Please read through the important information below Savercall-3000. before getting started with •...
- Page 3 Savercall-3000 Keep away from water or damp areas. Do not use in hot temperatures or humid areas. Savercall-3000 Do not install in direct sunlight or near extreme heat. Savercall-3000 Do not install near strong electrical current or magnetic force. Savercall-3000...
- Page 4 14. Do not connect the keyphone (local switchboard controller) to Savercall-3000 or it may cause damage to the product. 15. When lightning is expected, disconnect the phone line from the unit for protection.
-
Page 5: Table Of Contents
Section Page Savercall-3000 Features & Benefits ……………………….. 8-11 Main Components & Optional Accessories …………………….. 12 Main function …………………………………………………………..13 Savercall-3000 ………………………………….. Over view of 14-15 Details of main unit & sensors…………………………………….. 16 - Main Unit……………………………………………………………………………………….. 16 - Remote controller ………………………………………………………………………….. 17 - Door Sensor ………………………………………………………………………………….. - Page 6 4-To return to wait mode ……………………………………………… 53 5-To make an emergency call ……………………………………….. 53 6-Receiving & Responding to an alarm notification call …. 54-58 7-To remote control Savercall-3000 via Telephone ……….. 58-60 8-How to use telephone with main unit ……………………… 60-61...
- Page 7 70-71 How to check LCD & delete the record in the event of a situation Savercall-3000 Specifications ……………………………………. 72 Savercall-3000 Optional Sensors ……………………………….. 73 Troubleshooting (Q & A) ……………………………………… 74-75 Technical Support, Customer Care & Sales …………………… 76 Warranty Information ………………………………………… 77-78...
-
Page 8: Savercall-3000 Features & Benefits
Savercall-3000 Features & Benefits Feature Benefit Do-It-Yourself Wireless • FM frequency: Up to 150ft. range System covers the entire house, apartment, small business, etc. • No hard-wired installation necessary • Simple screw-in or double-sided tape mounting LCD display and Voice- •... - Page 9 • Automatic mode Supports automatic conversion conversion among alarm-home, alarm-away and off mode • User can assign conversion time Record of sensor • Records what caused sensor activation activation. • User can check memory through remote control and LCD. Support of wire •...
- Page 10 • Phone line disconnection Voice and LCD notification when alarm phone line is disconnected Powersupply disconnection • Voice and LCD notification when alarm power supply is disconnected Remote Operation via • Call in to alarm-home, alarm away Telephone & program system from anywhere in the world •...
- Page 11 Battery power outage • Long-Life Sensor Door Sensor & remote controller Batteries contain replaceable long-life batteries • Notifies users of any low-battery situation Memory Chip Stores All • Retains programmed settings for all Programmed Data User Functions, even during power outages...
-
Page 12: Main Components & Optional Accessories
Main Components & Optional Accessories Main Unit Motion Detector Door Sensor Remote Controller Wired Siren Motion Detector Door Sensor Bracket (Battery AA1.5V X 4EA) (Battery AAA1.5V X 2EA) Adapter Door Sensor Spacer Telephone Line 2EA AC230V 50Hz (DC9V, 500mA) User Manual Warning Sticker Pocket Manual... -
Page 13: Main Function
Main Function * As a multifunctional wireless security system, SAVERCALL-3000 provides a reliable, complete security solution for the home or office. Motion Detector Door Sensor Fire Sensor (Optional) Wireless Repeater/ Siren (Optional) Wired Siren Remote controller Telephone Line Call out to emergency... -
Page 14: Overview Of Savercall-3000
Overview of Savercall-3000 1. In case of intrusion 1) Door sensor or Motion detector will detect intrusion, and Savercall-3000 will sound alarm. 2) Siren will sound, and ‘Alarm notification call’ will call the programmed phone numbers. 3) SAVERCALL-3000 will call the first phone number. - Page 15 3. Voice Guided Menu for Alarm Notification Call - To speak (no.1) - To wiretap (no.2) - To start siren (no.3) - To enter ‘Wait mode’ (no.4) - To stop all dialing (no.8) - To hang up the phone and dial the next phone no (no.9) - To hear repeatedly (no.0) 4.
-
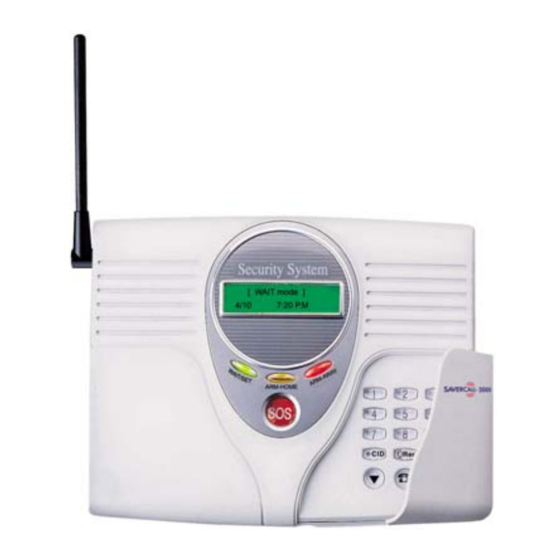
Page 16: Details Of Main Unit & Sensors
Details of main unit & sensors Front side Speaker Antenna Key button SOS button Microphone Press for 2 seconds in emergencies Back side AC adapter jack Telephone line port Extension port (AC230/50Hz, (Optional) DC9V, 500mA) Backup battery Wired siren jack Siren switch Power switch... -
Page 17: Remote Controller
Remote Controller When you register the main unit, please press all 3 buttons together. Alarm button Off button Press to enter Press to enter ‘Wait mode’ ‘Alarm mode’. SOS button Press in the event of an emergency situation. How to replace battery Open the cover using a screwdriver and replace the battery when necessary with: CR2032 3V x 1 ea. -
Page 18: Door Sensor
Door Sensor Within 1Cm(0.4inch) Please press this part for 2 seconds when Magnetic you attach the main unit. How to replace batteries Open the cover as below and replace the batteries when necessary with: AAA-1.5V x 2 ea. Observe (+) and (-) ends. If the battery is low: * Under wait mode, main unit alerts with the following voice messages: - “Door sensor has been activated.”... -
Page 19: Motion Detector
Motion Detector Open the lid as shown above to replace battery or attach motion sensor. Do not touch the sensor area. Use a soft fabric to clean this part when dirty. Power Switch Turn on the power switch Open the lid and replace all when you attach motion batteries when necessary detector to the main unit. -
Page 20: Installation & Setup
* Change the battery when necessary. Installation & Setup of the main unit Installation of the main unit. Telephone line connection with the main unit. Configure the connection as shown below when using a single phone line with Savercall-3000 A/C adapter connection (AC230V 50Hz, DC9V/500mA) -
Page 21: How To Install Motion Detector
How to wall mount the Motion detector Mount the Motion Detector using the included mount and screws. * Please note - Follow the diagram and details listed below, otherwise detection range may be shortened. Place the Motion Detector on a wall using bracket/screws or attach at the desired location. -
Page 22: How To Install Door Sensor
How to install Door Sensor • You will need one Contact with Transceiver, one plain Contact, Shims (for spacers if necessary), and the included screws or double-sided tape for each Door Sensor setup • The space between within 1Cm(0.4inch) • Use the included shims if necessary to match the height of the two contacts •... -
Page 23: Initial Setup
2) Turn on the power switch of the main unit at the back side by pressing WAIT/SET key. 3) You will hear “ding”, then Savercall-3000 enters setting mode. 4) Green LED will blink in setting mode. 0=Exit 1=ID 2=Sensor memory 3=Recording 4=Delaying alarm... -
Page 24: Menu Summary
Menu summary Main menu To finish set mode Wait mode To input password To register remote controller & sensors To record voice guide To set alarm delay time To input telephone number To set current time/day To set additional menu Additional menu To finish additional menu To set alarm delay time sound... -
Page 25: Main Menu (How To Set Up Main Unit)
Main Menu(“1” To set password [1=ID] Create & set a 4-digit Password (=ID Number) that will be needed for programming, editing or accessing the system through the keypad on the Main unit or Remotely by Telephone. K E Y 1 L C D VOICE Please input password. -
Page 26: 2-Sensor Registration
“2” sensor registration. [2=sensor memory] K E Y 2 Activate L C D Sensor VOICE Please activate sensor and remote controller. * All sensors & remote controllers must be registered to be used. * You can assign sensor number from 1 to 30 and register sensors up to 60 pcs. - Page 27 * When registering, user can assign a “Sensor number” to each sensor, so that the user knows which sensor has been activated in case of intrusion or fire. “Sensor number” is very useful if you use many sensors. If you want to assign “remote controller” as no.1 (You can register sensor number from no.1 to no.
-
Page 28: Door Sensor
* It is not possible to delete the registered sensors one by one. It is only possible to change the sensor number. If you want to delete the registered sensors, initialize Savercall-3000. Door sensor Press this “Test button” for 2 seconds for registration. - Page 29 K E Y 1 + WAIT/SET Door sensor L C D Sensor No=1 VOICE 1, the data is entered. * Please note that sensor no.1 and no.2-30 have the following differences: - If user assigns sensor number as no.1, when sensor is activated, main unit will call automatically with ringing siren after alarm delay time in “alarm mode”.
-
Page 30: Motion Detector
Motion detector Please turn on the Power switch. You will see LED blinking When you register “Motion detector”, turn on switch. Motion sensor L C D Sensor No= “Motion detector”, please input sensor number. Please press set VOICE key after finishing. If you want to assign “Motion detector”... -
Page 31: 3-Record User Message
To confirm sensor you assigned, turn off power and then turn it on again. Activate L C D Sensor VOICE Please activate sensor and remote controller. If you want to assign “Motion detector” as sensor no.3 Motion_sens 01 L C D 1=ok 2=change VOICE Motion detector, No.3, Press no.1 for selection, press no.2 for change. -
Page 32: 4-To Input Alarm Delay Time
“4” To input alarm delay time [4=Delaying alarm] To input alarm delay time [4=Delay alarm] In case of entering ‘alarm mode’ or in the event of a situation, activation of Savercall-3000 will be delayed according to the alarm delay time. K E Y 4 Delay alarm [15]... - Page 33 ‘Wait mode’ to ‘Alarm away mode’ or ‘Alarm home mode.’ *In case of the below situation, ‘Alarm delay time’ will be counted if Savercall-3000 detects sensor’s activation under ‘Alarm mode’: If you assign ‘Door sensor’ or ‘Motion detector’s number as No.1.
-
Page 34: 5-To Input Telephone Number
“5” To input telephone number To input telephone number [5=Phone number] You can input maximum 5 telephone numbers, and the numbers should be within 20 digits. K E Y 5 1 Phone number L C D VOICE The first telephone no. Please press set key after finishing. Ex. - Page 35 To register from the second to the fifth telephone numbers: K E Y (Input user telephone number) + WAIT/SET Phone number [2 ~ 5] L C D =(Input user telephone number) VOICE (Input user telephone number), the data is entered. Same as above instruction.
- Page 36 ※ To delete the programmed phone number: -If you programmed 3 phone numbers and would like to delete the third phone number: -Choose number 5 [5=Phone number] in initial setting menu. -If the first phone number is “8615331”, the second phone number is “8615332”, the third phone number “8615333”, etc., and the LCD will display as below: ☎1=028615331...
-
Page 37: 6-To Set Up The Current Time/Day
-Press 2, and Savercall-3000 will enter the menu for changing the telephone number as below: 3 Phone number L C D VOICE Please press set key after finishing. -Here, press WAIT/SET key to delete the third phone number. If you delete the third phone number, the fourth &... - Page 38 Example - The current time is 8:12 AM: K E Y 0 + 8 +1 + 2 + WAIT/SET Time [HH:MM]? L C D 08:12AM VOICE 0, 8, 1, 2 After inputting the time, LCD displays date setting menu. * “Time” should be composed of 2 digit numeric numbers, and “AM/PM”...
-
Page 39: 0-To Finish Setting Mode
“0” To finish Setting mode [0=EXIT] K E Y 0=Exit 1=ID 2=Sensor memory 3=Recording 4=Delaying alarm L C D 5=Phone number 6=Time 7=Others Select >> VOICE The setting is accomplished. Then you will enter “wait mode”. WAIT mode L C D 2/12 8:12.AM VOICE This is wait mode. -
Page 40: Additional Menu
<Additional Menu> “1” To set up delay tone sound In this menu, you can select whether you use the delay tone sound or when “Door sensor no.1” or “Motion sensor no.1” has been activated in “Alarm away mode”, “Alarm home mode”. 1=Delay tone, If you want to use the delay tone sound [0=Exit, 2=Remote... -
Page 41: 3-To Set Up Chime Bell Sound
* If the siren switch of main unit is off, remote controller will not sound, regardless of above setting. “3” To set up chime bell sound To set up chime bell sound (*Default is [2].): K E Y 3 Chime bell [2] L C D 1=select 2=not VOICE If you want chime bell sound, press no.1, otherwise, press no.2... -
Page 42: 5-To Set Up Cid Function
“5” To set up CID function This function is used to see the phone number of caller. “CID” function is only possible if you apply for this service to phone service provider. To set up CID function [5=CID function] (*Default is [2].) K E Y 5 CID use? [2] L C D... -
Page 43: 6-To Set Up Morning Call
To register extension number K E Y 9 + WAIT/SET Out line [ ] L C D VOICE 9, the data is entered. ※ It is possible to input up to 2 digits for “Extension code”. If the phone line is residential, press WAIT/SET key K E Y WAIT/SET Out line [ ] “6”... -
Page 44: 7-To Set Up Automatic Controller Mode
Example – 0+ 6 + 3 + 0 + Any number “7” To set up automatic controller mode * If you select auto mode, Savercall-3000 will be active at programmed time and inactive at programmed time, repeatedly. To set up auto mode [7=Auto mode]... - Page 45 L C D 09:00 PM VOICE Please set time. Please press set key after finishing. To set SAVERCALL-3000 to enter “Alarm Away mode” automatically at 09:30 K E Y 0 + 9 + 3 + 0 + WAIT/SET auto AWAY time ?
-
Page 46: 8-To Set Up Siren Activation Time
* This function is to set up the number of phone rings before the main unit responds when you use the remote control outside via the telephone. For example, if you input 12 for ringer time, Savercall-3000 will respond to a phone call after the ringer sounds 12 times, and then it allows you to... -
Page 47: To Set Up Guide Volume
To set up ringer time [9=Ringer time] (*Default setting is 12 times, and you can set it from 1 to 99 times.) K E Y 9 Ringer time [12] L C D VOICE Please input rings to answer. Please press set key after finishing. * If you inputted the wrong number, press “SOS”... -
Page 48: O-To Finish Additional Menu
“0” To finish additional menu To finish additional menu [0=Exit] To finish additional menu and return to the main menu: K E Y 0 0=Exit 1=ID 2=Sensor memory 3=Recording 4=Delaying alarm L C D 5=Phone number 6=Time 7=Others select >> VOICE Please select the function number. -
Page 49: Savercall-3000 Works
When you are at home, set to “Alarm home mode”. All sensors will be activated except motion detector. If an intruder enters your home, Savercall-3000 will be activated as below: ①An intruder triggers a Door Sensor or Motion Detector and... -
Page 50: Emergency Call Example
Emergency Call Example If you press ‘SOS’ button on remote controller or main unit, Savercall-3000 will be operated as below regardless of current mode: Savercall-3000 immediately ② ①The user should press and dials the first programmed phone hold the red SOS button on the number with ringing Siren Remote controller or main unit. -
Page 51: User Guide
Details: • LED on main unit lights up RED • Savercall-3000 starts countdown before activation according to “Alarm delay time”. • If you want to cancel activation during countdown, you can do this with remote controller or by pressing “#” button of main unit. -
Page 52: 3-To Enter Alarm Home Mode
By Keypad on the main unit –ARM-HOME + Password Remotely by Telephone – Password + 6 Details: • LED on main unit lights up ORANGE • Savercall-3000 starts countdown before activation according to “Alarm delay time”. ALARM HOME L C D 9/12 8:12 AM... -
Page 53: 4-To Return To Wait Mode
※ ‘Wait mode’ is the initial mode, and it is possible to enter any mode from “wait mode”. In “wait mode”, you can use Savercall-3000 as a telephone through the speaker, and can also be used as a chime bell. -
Page 54: 6-Receiving & Responding To An Alarm Notification Call
WAIT/SET + PASSWORD. 6. Receiving & Responding To an Alarm Notification Call ① In the event of a situation such as intrusion or fire, Savercall-3000 will automatically make phone calls to the preset phone numbers, up to 5 places. - Page 55 ‘Voice Guided Menu for Alarm Notification Call’.) ⑤ Wait for the user’s choice for 5 seconds. ⓒ If user doesn’t press any button, Savercall-3000 will hang up the phone and attempt to call the next phone number.
- Page 56 1 To speak via speakerphone: • Press no. 1 • User can talk to the person who is on-site and warn the intruder to leave the place immediately. • After 30 seconds, this menu will stop automatically and Savercall- 3000 will return to the introduction menu. •...
- Page 57 This is used to hang up the phone and dial the next phone number. • If you do not select no. 9 and hang up the phone, Savercall-3000 will dial the next phone number. In this case, phone connection could be delayed.
-
Page 58: 7-To Remote Control Savercall-3000 Via Telephone
7. To remote control SAVERCALL-3000 via Telephone ① You can remote control Savercall-3000 via telephone even if you are outside. You can perform mode change and listen in & talk to the person who is inside. - Page 59 Voice guide will inform you of the menu for remote control mode. d) Savercall-3000 will wait 5seconds for user’s order. If you do not press any button within 5 seconds, Savercall-3000 will hang up the phone. Voice Guided Menu for Remote Control Mode...
-
Page 60: 8-How To Use Telephone With Main Unit
● Menu 1, 2, 3, 4, 0 is the same function as alarm notification call, and 5,6,9 is only possible in remote control mode. Enter “Alarm-away” mode (no. 5) This is used to change the mode of the main unit to “Alarm-away mode”. Enter “Alarm-home”... -
Page 61: 9-How To Use Cid Function
※ LCD display while talking over the phone K E Y 0 + 2 + 8 + 6 + 1 + 5 + 3 + 3 + 3 4:54P 00.07 L C D =028615333_ 4:54P: Current time, 00.07: elapsed time To redial, press [0Redial] key. - Page 62 If you choose “2 not use”, LCD will be displayed as below under “Wait mode”: WAIT mode L C D 9/12 8:12 AM If there was a phone call from outside: Ex) Oct. 15 , 11:28 AM, 02-861-5333… N—10-15 11:28A L C D 028615333 If there was one phone call:...
- Page 63 To make a phone call using “CID” information: K E Y Press [*CID] button N01 10-15 11:28AM L C D 028615333 Select the phone number using [▼], [▲] buttons, and press [0Redial] button. To delete caller ID: K E Y [*CID] C01 10-15 11:28A L C D 028615333...
-
Page 64: 10-How To Use Siren With Main Unit
L C D Private blo- 10. How to use Siren with the main unit Savercall-3000 supports inner siren & external siren with wire & wireless siren (additional option). ※ To set ‘Wireless siren & repeater”, refer to the user manual for “Wireless siren &... -
Page 65: 11-Led Status According To Mode & Status
Alarm-home Mode Orange Emergency call Blinking Yellow/Orange/Red Savercall-3000 has 3 types of LED as follows: Green LED: Wait/set mode Orange LED: Alarm-home mode Red LED: Alarm away mode ※ If all LED lights (Yellow /Orange/Red) are blinking, it means that an event has been activated. -
Page 66: 13-In Case Of Power Failure
LCD. Savercall-3000 will perform normal operation if power is recovered. ※ If power is recovered, Savercall-3000 will return to the previous activation mode. Ex) If power fails in ‘Alarm away mode’, Savercall-3000 will return to “Alarm away mode” if power is recovered. -
Page 67: 14-In Case Of Low Sensors Battery
14. In case of low sensors battery When the sensors battery is low, the Yellow/Orange/Green LED lights will blink, and the LCD & Voice guide will notify low battery status (except remote controller.) If the battery of the remote controller is low, it will not be notified. Low battery alarm will sound upon sensor’s activation. - Page 68 Each sensor is assigned to have a standard characteristic as below: Standard characteristic of each sensor Sensor Characteristic Activation mode SOS of remote Wait controller Alarm Home Emergency Alarm Away Door Sensor Alarm Home Main/Other Gate Alarm Away Motion Detector Alarm Away Main/Other Gate Image Spider...
- Page 69 Please turn on the Power switch. Turn on the power switch Motion_sens 01 L C D 1=ok 2=change Motion detector no. 1, press no. 1 for selection, press no. 2 for VOICE change K E Y Press 2 Motion_sensor L C D Sensor No= VOICE Motion Detector, please input number.
-
Page 70: 16- How To Check Lcd & Delete The Record In The Event Of A Situation
Ex) when the door sensor has been activated (if you assigned no.1 as door sensor) If an intruder breaks in through the door under ‘Alarm-away mode‘, Savercall-3000 will make ‘Alarm notification call’ and LCD will display as below: ALARM AWAY... - Page 71 To check the event: Press [▼] K E Y A01)3-25 10:46A L C D Door_Sensor 01 Date/Time (AM) Activated Sensor (no.) To delete the event: K E Y Press [#DEL]...
-
Page 72: Savercall-3000 Specifications
SAVERCALL-3000 Specifications ITEM SPECIFICATIONS Main Unit 1EA, Motion Detector 1EA, Door sensor 1EA, Remote Controller 1EA, Basic content Wired Siren 1EA Back up Battery 1EA, Power Adapter 1EA, Telephone Line 2EA, Additional accessories, Range: 10m, Horizontal: 90°/ Vertical: 32° Motion Detector... -
Page 73: Savercall-3000 Optional Sensors
SAVERCALL-3000 (Optional sensors) Door Sensor Motion Detector Fire Sensor Wired Siren Repeater & Siren Remote Controller Image Spider Repeater Necklace Type Electric power Window Breakage detector Sensor... -
Page 74: Troubleshooting (Q & A)
Troubleshooting (Q & A) Q: What if I forget the password? A: 1. Turn off main unit. 2. Turn on main unit by pressing WAIT/SET Key. Then you will enter initial setting mode after ‘Beep’. Q: What if I don’t want to activate Motion Detector when someone is in? A: 1. - Page 75 Q: The chime bell doesn’t work. A: 1. Check the chime bell setting. 2. Check if it is in wait mode. 3. Check the battery of door sensor. Q: In case the function button does not work well A: 1. The function button may not work well if the phone connection is inadequate.
-
Page 76: Technical Support, Customer Care & Sales
Email: emark@hjsys.co.kr General Information Regarding Savercall-3000 For general information, feel free to visit our website at: www.hjsys.co.kr We at Hyun Joung System Co., Ltd. would like to thank you for your patronage, and we look forward to your continued support. -
Page 77: Warranty Information
The purchaser must register (by following the instructions on the attached Warranty Registration Form) within 60 days of the purchase date to qualify for warranty coverage. Savercall-3000, Do-It-Yourself Wireless Security System Product: Covered by Warranty Not covered by Warranty •... - Page 78 Savercall-3000 Warranty Registration Form Product: Hyun Joung System Co., Ltd. now offers two easy ways to register your product under Warranty: 1) Register online at www.hjsys.co.kr (Just click on the Warranty Registration Form, fill it out and submit it), or 2) Fill out this Warranty Registration Form and send by e-mail to us-at: emark@hjsys.co.kr...
- Page 79 MEMO...
Need help?
Do you have a question about the SAVERCALL-3000 and is the answer not in the manual?
Questions and answers