
Summary of Contents for Convergence TinyScope CAM
- Page 1 Tinysc Microscopic Camera User Manual Hi, Read me before you explore the world with TinyScopeCAM English...
- Page 2 Inventory TinyScope Microscopic Camera x1 WiFi Box ×1 Dropper x2 Petri Dish ×2 Date Cable x1 Adaptor ×2 Biological Slide x4 Cleaning Cloth x1 Note: The package and contents in the picture are only for reference. It should be based on actual objects.
-
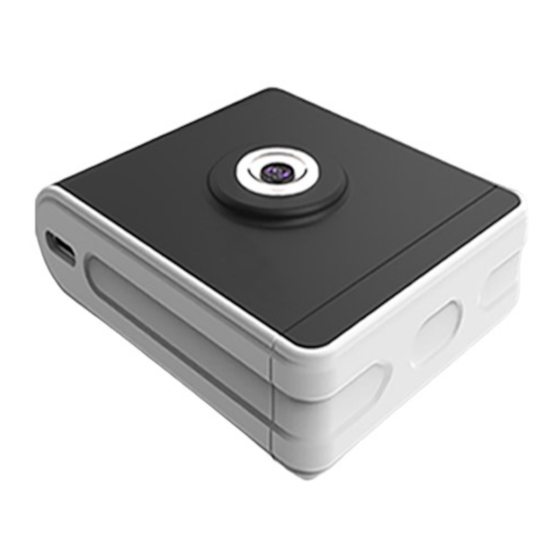
Page 3: Product Specification
Product Specification Plan apochromatic objective Illumination module Type-C data cable interface Magnetic cover plate (bright field illumination side) Magnetic cover plate (dark field illumination side) Note: The two sides of the magnetic cover plate shown in the figure are for reference only, and the structural shape of the functional area is subject to the actual object.The bright and dark field illumination are on the same magnetic cover plate, and they are distinguished by the front side and the back side. - Page 4 User Tutorial (Observe Opaque Objective) Connect TinyScope CAM to Android phone Download [TinyScope] APP. Open [TinyScope]APP- Click on“ ” icon. Click on[OTG];then click on[OTG test] to determine whether your phone supports OTG function. If your phone supports OTG function, please click on [OTG tutorial] again to match your mobile phone brand and follow the step to turn on [OTG] function.
- Page 5 After successful connection,the light guide area will illuminate, and the mobile phone screen will jump to the TinyScope APP interface. Move TinyScope CAM’s lens close to an opaque planar object, and a clear image on your screen indicates a successful connection.
- Page 6 For Android version 10 or above please note In March 2020, the official Android system released the relevant security patch to solve the problem:the early version of Android 10 cannot correctly request USB device permissions. If you have not installed the patch, it may cause a black screen while using our APP.
- Page 7 12345678. Open the TinyScope App on iPhone; select the interface for the microscope camera,and then the view of TinyScope CAM displays in real time. On setting page of the microscope,you can select different resolution options.
- Page 8 (The ends of the data cable should be USB and Type-C port, so if you have connected with the adaptor,please remove it). Connect TinyScope CAM and PC with the data cable. Open [QuickTime Player]-Click on [File] in the upper left corner -Click on [New Movie Record].
- Page 9 If you are observing Anaerobes, you must seal the lid of the petri dish, Aiming the centre of groove to the camera lens,- place the petri dish over the TinyScope CAM for observing. Cautions The magnetic cover plate is not needed when viewing a petri dish sample.
- Page 10 Please ensure that the surface of the observed object is close to the bottom of the petri dish to avoid unfocusing. Observe Biological Slides The two opposite sides of magnetic cover plate are bright field side and dark field side, respectively. Choose the dark field side-the black side when observing with a liquid sampler,while choose the bright field side-the white side when observing biological slides.
- Page 11 Adjust the position of the slide/liquid sampler so that the center transparent part is in the center of TinyScopeCAM lens Select bright field side or dark field side, and aim the center concave part to TinyScopeCAM lens; Cover the magnetic cover plate...
-
Page 12: Problems And Solutions
Problems and Solutions Blurred image displayed on your phone after successful connection Slightly move TinyScopeCAM up and down to adjust the distance between the lens and object; The lens is stained, please observe after wiping the lens according to the safety instructions in this manual. The image is unclear when observing the slides/with liquid samplers in bright or dark field illumination. - Page 13 Multiple Working Modes Observe objects with rugged surface (insects, flowers, etc.). You can adjust the distance between the lens and the object by slightly moving the product towards or a way from the object. When observing soft or humid surface objects (such as skin, towels, ice cubes, etc.), you can add a clean cover slide (0.17mm thick) between the lens and the object to be observed, and the cover slide can be purchased by...
-
Page 14: Safety Instructions
Safety Instructions Do not disassemble or refit the product for any reason; otherwise the failure caused is not covered by the warranty, and you bear all these safety responsibilities. Please do not let the product directly contact with liquid, for neither the lens nor the body of TinyScopeCAM is waterproof. -
Page 15: Product Parameters
Product Parameters Pixel 1300W Optical Resolution 2μm Focusing Range 0-0.25mm Light Source Interface USB2.0 Power supply 5V USB DC Dimension 69.5mm x 56mm x 23mm... -
Page 16: Material Safety Data Sheet
Material Safety Data Sheet Toxic and harmful substances or elements Parts Name Cr(VI) PBDEs × Lens Module Plastic Parts Metal Parts Circuit Board × ssembly × Wire Flannel :indicates the content of this toxic and hazardous substance in all homogeneous materials of this part is under the limit requirement stipulated in the "Requirement Standard for Limits of Toxic and Hazardous Substances in Electronic Information Products"... - Page 17 W i F i B o x User Manual...
- Page 18 Introduction WiFi Box is for connecting USB camera to termi- nals (such as smart phone, tablet, and PC) through WiFi. After the connecting, users can use TinyScope app to control the USB camera wirelessly and capture images and videos. WiFi Box supports 3 terminals at most for simultane- ous accessing.
- Page 19 Inventory User Manual ×1 Warranty card ×1 WiFi Box ×1 Product Specification On/off button Press to turn on/off the WiFi Box. WiFi indicator light Blue: WiFi Box is working. If not lighting,please check whether WiFi Box is off or battery exhausted. Power indicator light Green:Fully charged.
- Page 20 Heating vent USB-A port Using WiFi Box to connect product, please connect the data cable’s USB-A port here. USB Type-C Port Connect the data cable USB Type-C port here for charging.
- Page 21 Operation please follow the step below: 1: Connect the USB camera to the USB-A port of Wifi Box (Figure 2: Connect the USB Type-C Port of the other end of the data cable to the USB camera (Figure 3: Press the on/off button, when the WiFi indicator light become blue, the WiFi Box starts working.
- Page 22 3: Do not place the device at the temperature(above 40 °C or below -10 °C). 4: The product contains small parts, please do not swallow it. 5: If the body is dusty and oily, please wipe it with a dry cleaning cloth.
- Page 23 Material Safety Data Sheet Toxic and harmful substances or elements Parts Name Cr(VI) PBDEs Circuit Board × ssembly Plastic Parts :indicates the content of this toxic and hazardous substance in all homogeneous materials of this part is under the limit requirement stipulated in the "Requirement Standard for Limits of Toxic and Hazardous Substances in Electronic Information Products"...
- Page 24 Tinysc Email Address:service@cvgc.cn Company Website:https://www.tinyscope.com...
Need help?
Do you have a question about the TinyScope CAM and is the answer not in the manual?
Questions and answers