Table of Contents
Advertisement
Available languages
Available languages
Quick Links
INSTALLER: Leave this manual with the appliance.
CONSUMER: Save these Instructions for future reference.
OPERATING INSTRUCTIONS
Model #
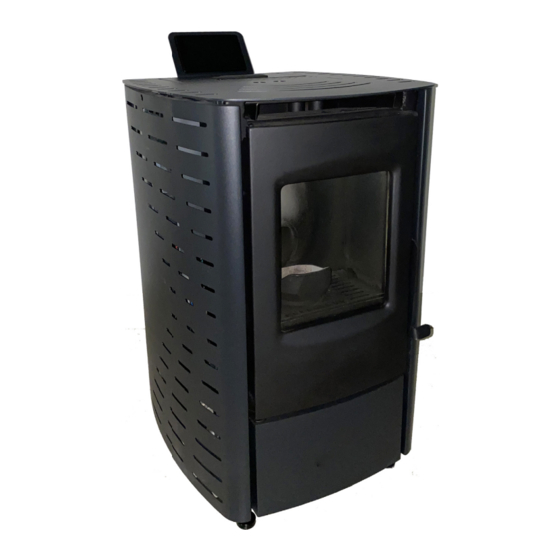
PS20WTS
AND OWNER'S MANUAL
READ INSTRUCTIONS CAREFULLY: Please read this entire manual before installation and use of this
pellet fuel-burning room heater. Failure to follow these instructions could result in property damage, bodily
injury or even death. Do not allow anyone who has not read these instructions to assemble, light, adjust or
operate the stove. Place instructions in a safe place for future reference.
WOOD PELLET FIRE STOVE
PS20WTSTS (F500216)
Apple Store
Google Play Store
THE AUTHORITY HAVING JURISDICTION (SUCH AS MUNICIPAL BUILDING DEPARTMENT, FIRE
DEPARTMENT, FIRE PREVENTION BUREAU, ETC.) SHOULD BE CONSULTED BEFORE INSTALLATION
TO DETERMINE ANY NEED TO OBTAIN A PERMIT. OBSERVE ALL LOCAL BUILDING CODES.
Mr. Heater a subsidiary of Enerco Group Inc.
4560 West 160th st Cleveland, Ohio 44135 1-800-251-0001
66700
Advertisement
Chapters
Table of Contents

Related Manuals for Mr. Heater Grand Teton PS20WTSTS


Summary of Contents for Mr. Heater Grand Teton PS20WTSTS
- Page 1 DEPARTMENT, FIRE PREVENTION BUREAU, ETC.) SHOULD BE CONSULTED BEFORE INSTALLATION TO DETERMINE ANY NEED TO OBTAIN A PERMIT. OBSERVE ALL LOCAL BUILDING CODES. Mr. Heater a subsidiary of Enerco Group Inc. 4560 West 160th st Cleveland, Ohio 44135 1-800-251-0001 66700...
-
Page 2: Table Of Contents
GENERAL HAZARD WARNING: WARNING: FAILURE TO COMPLY WITH THE PRECAUTIONS FIRE, BURN, INHALATION, AND EXPLOSION AND INSTRUCTIONS PROVIDED WITH THIS HAZARD. KEEP SOLID COMBUSTIBLES, SUCH AS STOVE CAN RESULT IN DEATH, SERIOUS BUILDING MATERIALS, PAPER OR CARDBOARD, BODILY INJURY AND PROPERTY LOSS OR A SAFE DISTANCE AWAY FROM THE STOVE DAMAGE FROM HAZARDS OF FIRE, EXPLOSION, AS RECOMMENDED BY THE INSTRUCTIONS... -
Page 3: Specifications
SPECIFICATIONS PS20WTS Model # DIMENSIONS Stove Weight 143.3 (65) [LBS (kg)] Stove Dimenions LxWxH 18.25” x 20“ x 28.5” [in. (cm)] (46.36 x 50.8 x 72.4) Air Inlet Pipe Diameter 1.25” (32) [in. (mm)] Air Outlet Pipe Diameter 3” (80) [in. -
Page 4: Getting Started
GETTING STARTED Allen Wrenches Display Panel Firepot Cover Main Power Cord (x2) Screws (x4) Exhaust Exhaust Connector Stove Feet Connector Silicon Pad ACCESSORY KIT Flex Hose Termination Cap Hose Clamp Fresh Air Adapter Cleaning Tool and Screws (x4) WHAT YOU’LL NEED (NOT SUPPLIED) TOOLS REQUIRED SAFETY EQUIPMENT (RECOMMENDED) •... -
Page 5: Safety Precautions
CARBON MONOXIDE SAFETY PRECAUTIONS WARNING: HAVE AN ESTABLISHED PLAN FOR WHAT WHEN USED WITHOUT ADEQUATE TO DO IN THE EVENT OF A FIRE. CONTACT COMBUSTION AND VENTILATION AIR, THIS YOUR LOCAL FIRE AUTHORITY TO ACQUIRE STOVE MAY GIVE OFF EXCESSIVE CARBON INFORMATION AND A PLAN FOR WHAT TO DO MONOXIDE, AN ODORLESS, POISONOUS IN THE EVENT OF A CHIMNEY FIRE. -
Page 6: Clearance To Combustibles
• It has at least 9.4” (239 mm) of clearance from the CLEARANCE TO COMBUSTIBLES rear to the nearest body. The following stated clearances represent the • Vertical runs of vent pipe must be at least 3” (77 minimum distances between the stove and any other mm) from any wall. - Page 7 UNPACKING 1. Remove heater from carton. 2. Remove all protective packaging applied to heater for shipment. 3. Check heater for any shipping damage. If any damage is found immediately contact the manufacturer at 800-251-0001. CAUTION: DAMAGED PARTS MAY Figure 2: PS20WTS Firepot COMPROMISE SAFE OPERATION.
-
Page 8: Installation
• The house is equipped with a well-sealed vapour AND FOLLOW ALL INSTRUCTIONS. Contact barrier and tight fitting windows and/or has any Mr. Heater with any comments, concerns, or powered devices which exhaust house air. questions. • There is excessive condensation on windows in CAUTION: CONTACT LOCAL BUILDING OR the winter. - Page 9 CONNECTOR REQUIREMENTS AND ASSEMBLY VENT TERMINATION • Install exhaust vent at clearances specified by the CAUTION: A CHIMNEY CONNECTOR SHALL vent manufacturer. • Install exhaust vent terminations at clearances NOT PASS THROUGH AN ATTIC OR ROOF specified by the vent manufacturer. SPACE, CLOSET OR SIMILAR CONCEALED •...
- Page 10 NFPA 211 (US ONLY) APPROVED WALL PASS THROUGH TECHNIQUES Figure 6 (US ONLY) Figure 8 (US ONLY) Brick Masonry: Minimum 3.5 inch (89 mm)thick brick Ventilated Thimble: Sheet steel chimney connector, masonry all framed into combustible wall with a minimum 24 gauge in thickness, with a ventilated minimum of 12 inch (305 mm) brick separation from thimble, minimum 24 gauge in thickness, having clay liner to combustibles.
-
Page 11: Additional Mobile Home Requirements
ADDITIONAL MOBILE HOME REQUIREMENTS — The end of this duct must be equipped with a screen which prevents rodents from infiltrating. WARNING: DO NOT INSTALL IN SLEEPING — The end of this duct must be kept free of leaves, ROOM. snow, ice, or other debris that could restrict air supply when the appliance is in operation. - Page 12 LINED MASONRY CHIMNEY INSTRUCTIONS & DIAGRAM This stove is designed to be vented through a masonry chimney which conforms to local building codes, fire codes, and latest edition of NFPA 21 1 US or CAN/ CSA-B365. 1. If the connection piping from the stove to a Wall masonry chimney is made through a combustible Termination...
-
Page 13: Operation
OPERATION • Do not use the pellet sediment & debris at the bottom of the pellet container. THEORY OF OPERATION • Store pellets in sacks, made of environmentally 1. Combustion occurs in the fire pot, supported by neutral or biologically degradable plastic or from air introduced to and under the fire pot. - Page 14 OPERATING PRECAUTIONS • Cleaning Cycle: The firepot draws dust, ash, & remenants out. WARNING: HOT WHILE IN OPERATION. DO • Feeding Cycle: Pellets will be transported from the NOT TOUCH THE STOVE. KEEP CHILDREN, Pellet Hopper into the fire pot by the auger. This CLOTHING AND FURNITURE AWAY.
-
Page 15: Smart Stove Wifi Connection
MINIMIZING CREOSOTE FORMATION Step 1. Download the Smart Stove app by NHHATC. See “MAINTENANCE” on page 18 for an explanation Step 2. Open the Smart Stove app. The app opens, by of Creosote formation and removal. To slow the build default, to the “Register”... -
Page 16: Wifi Controls
Step 12. After the device and stove are paired, you will be able to see the pellet stove as a connection option on the “Devices” tab at the bottom of the app screen. Step 13. On your device, go to your device’s wifi settings which will now include the stove as an option. -
Page 17: Multi Function Controls
MULTI FUNCTION CONTROLS Wireless Connection Rate Select Auger Lock Screen Display Scheduling Screen Desired Temperature Settings Room Temperature Temperature Status Power Figure 17a Mounted Multi Function Display Panel Figure 17b User Menu Mounted Button Functionality: Normal Operation Lock Screen Power •... -
Page 18: Maintenance
CLEANING: GLASS MAINTENANCE This wood heater needs periodic inspection and repair WARNING: DO NOT CLEAN GLASS WHEN for proper operation. It is against federal regulations HOT. to operate this wood heater in a manner inconsistent Though the circulation of air across the glass reduces with operating instructions in this manual. - Page 19 On each side of the stove there are two access covers that can be removed by removing the fastening screws. Turn off the stove, allow the stove to cool down, and unplug the stove before disassembly and cleaning. Insert a cleaning brush into the openings to loosen any ash build up and then use a vacuum cleaner to remove the loosened ash.
- Page 20 REPLACING: GLASS Replacing the door glass is only permitted by replacing the entire door assembly provided by the manufacturer. See page 26. WARNING: SUBSTITUTING ALTERNATE MATERIAL MAY SHATTER GLASS AND CAUSE INJURY. REPLACING: SEALING GASKETS Over time the sealing gaskets along the glass, door, or ash drawer may lose their rigidity.
- Page 21 REPLACING: EXHAUST BLOWER REPLACING: HEAT EXCHANGE BLOWER Unplug the heater. Disconnect any wiring leading to Unplug the heater. Disconnect any wiring leading to the Exhaust Blower. Remove the wing nuts holding the the Heat Exchange Blower. Remove the screws holding Exhaust Blower plate to the blower housing.
- Page 22 ERROR CODES NOTE: IN THE EVENT OF A POWER FAILURE (ERROR CODE E7), A SMALL AMOUNT OF SMOKE MAY BE EMITTED. THIS LASTS 3 TO 5 MINUTES AND DOES NOT REPRESENT A SAFETY RISK. CAUTION: IF OVERHEATING HAS OCCURRED (ERROR CODES E5 AND E6), THEN AN INSPECTION, MAINTENANCE, AND/OR CLEANING MUST OCCUR BEFORE THE STOVE CAN SAFELY BE OPERATED AGAIN.
- Page 23 ERROR CODES CONTINUED 1. Check wires and connection points. ESC2 Short circuit at temperature sensor #2. 2. Replace Motherboard. 1. Check wires and connection points. ESO2 Open circuit at temperature sensor #2 2. Replace Motherboard. 1. Check wires and connection points. ESC3 Short circuit at temperature sensor #3 2.
- Page 24 TROUBLESHOOTING CONTINUED SYMPTOM CAUSE SOLUTION No fuel in Pellet Add Fuel to Pellet Hopper. Hopper. During operation, besides 1. Unplug the unit so that it will not start suddenly the Lighting phase, the and then unblock the auger. Auger is blocked, auger is not filling the firepot 2.
- Page 25 TROUBLESHOOTING CONTINUED SYMPTOM CAUSE SOLUTION No fuel in Pellet Add Fuel to Pellet Hopper. Hopper. 1. Unplug the unit so that it will not start suddenly and then unblock the auger. Auger is blocked 2. Check that the auger is not blocked. If it is or jammed or blocked, remove the cause of the jamming.
-
Page 26: Wiring Diagram
WIRING DIAGRAM NOTE: IF ANY OF THE ORIGINAL WIRE AS SUPPLIED WITH THE APPLIANCE MUST BE REPLACED, IT MUST BE REPLACED WITH WIRING MATERIAL HAVING A TEMPERATURE RATING OF AT LEAST 105 °C AND RATED FOR 600V Grand Teton Wood Pellet Fire Stove Operating Instructions and Owner’s Manual... -
Page 27: Service Parts
MODEL PS20WTS SERVICE PARTS NOTE: NOT ALL PARTS AVAILABLE. FOR QUESTIONS CONTACT MANUFACTURER. WARNING: FAILURE TO POSITION THE PARTS IN ACCORDANCE WITH THESE DIAGRAMS OR FAILURE TO USE ONLY PARTS SPECIFICALLY APPROVED WITH THIS STOVE MAY RESULT IN PROPERTY DAMAGE OR PERSONAL INJURY. NO. - Page 28 This Warranty gives you specific legal rights, and you may have other rights which vary from state to state. Mr. Heater Inc. reserves the right to make changes at any time, without notice or obligation, in colors, specifi- cations, accessories, materials and models.
- Page 29 POUR DÉTERMINER VOTRE BESOIN DE PERMIS, CONSULTEZ LES AUTORITÉS AYANT JURIDICTIONS DANS VOTRE LOCALITÉ (AUTORITÉS DE PRÉVENTION DES INCENDIES, SERVICE DE LA CONSTRUCTION MUNICIPAL, ETC.). RESPECTEZ TOUS LES CODES DE LA CONSTRUCTIONS LOCAUX. Mr. Heater une filiale de Enerco Group Inc. 4560 West 160th st Cleveland, Ohio 44135 1-800-251-0001 66700...
- Page 30 AVERTISSEMENTS GÉNÉRAUX DE DANGERS : AVERTISSEMENT : NE PAS SE CONFORMER AUX PRÉCAUTIONS ET DANGER D’INCENDIE, DE BRÛLURE, D’ÉMANATIONS INSTRUCTIONS FOURNIES PEUT RÉSULTER EN UN ET DE DÉFLAGRATION. GARDER LES MATIÈRES COMBUSTIBLES SOLIDES TEL LES MATÉRIAUX DÉCÈS DE PERSONNE OU DES BLESSURES GRAVES DE CONSTRUCTION, LE CARTON OU LE PAPIER À...
-
Page 31: Spécifications
SPÉCIFICATIONS PS20WTS de modèle DIMENSIONS Poids du poêle 65 (143.3) [kg (lb)] Dimensions du poêle 46,36 x 50,8 x 72,4 prof.x larg.x haut. [cm (po)] (18,25 x 20 x 28,5) Diamètre du tuyau d’entrée d’air 32 (1,25) [mm (po)] Diamètre du tuyau de sortie d’air 80 (3) [mm (po)] Capacité... -
Page 32: Commencer
COMMENCER Clés Allen (x2) Panneau d’affichage Pot de feu Couvrir Cordon d’alimentation électrique Des vis (x4) Connecteur Tampon en silicone Pieds de poêle d’échappement pour connector d’échappement KIT D’ACCESSOIRES Tuyau flexible Limite de Collier de serrage Adaptateur d’air Outil de nettoyage terminaison et frais Des vis (x4) -
Page 33: Précautions De Sécurité
MONOXYDE DE CARBONE PRÉCAUTIONS DE SÉCURITÉ AVERTISSEMENT : ÉTABLISSEZ UNE RÉACTION DE SURVIE EN SI UTILISÉ SANS COMBUSTIBLE ET AÉRATION CAS D’INCENDDIE. COMMUNIQUEZ AVEC LE ADÉQUATS, CE POÊLE PEUT PRODUIRE UN SERVICE D’INCENDIE LOCAL POUR OBTENIR DES EXCÈS DE MONOXYDE DE CARBONE, UN GAZ RENSEIGNEMENTS ET UNE PROCÉDURE D’ACTIONS À... -
Page 34: Distances De Dégagement Des Matériaux Combustibles
DISTANCES DE DÉGAGEMENT DES • Qu’il y ait un dégagement minimum de 229 mm (9 po) de chaque coté de l’appareil. MATÉRIAUX COMBUSTIBLES • Qu’il y ait un dégagement minimum de 239 mm (9.4 po) Les distances de dégagement indiquées ci-dessous à... -
Page 35: Installation
DÉBALLAGE 1. Sortir le poêle du carton d’emballage. 2. Retirer tout le matériel protecteur placé sur le poêle pour l’expédition. 3. Inspecter le poêle pour détecter tout dommage d’expédition. Si des dommages sont détectés, appelez le fabricant sur le champ-au 1-800-251-0001. ATTENTION : TOUTE PIÈCE ENDOMMAGÉE POURRAIT COMPROMETTRE LE FONCTIONNEMENT SÉCURITAIRE. - Page 36 à combustion de vos votre poêle, veuillez contacter soit : quartiers et possiblement causer une condition dangereuse. Le fabricant Mr. Heater Company à 1-800-251-0001 • L’approvisionnement d’air de combustion de l’extérieur CLEVELAND-IRONWORKS.COM Nos heures de bureau sont de pourrait être nécessaire pour garantir que les appareils...
- Page 37 • Cheminée de maçonnerie certifiée ICBO (International EXIGENCES ET ASSEMBLAGE DES RACCORDS Conference of Building Officials) pour les poêles à ATTENTION : LE TUYAU DE RACCORDEMENT DE combustible solide. CHEMINÉE NE DOIT PAS TRAVERSER LE GRENIER CAPUCHON D’ÉVENT OU LE TOIT, OU TOUT GARDE-ROBE OU ARMOIRE •...
- Page 38 TECHNIQUES DE TRAVERSÉE DE MUR APPROUVÉES NFPA 211 (É-U SEULEMENT) Dégagement de cheminée minimum NFPA 211 (É-U SEULEMENT) Dégagement minimum de la cheminée des surfaces aux montants de soutien en acier et des de brique ou de matériau combustible : 51 mm (2 po) matériaux combustibles : 51 mm (2 po) Gaine à...
-
Page 39: Exigences Supplémentaires Pour Les Maisons Mobiles
EXIGENCES SUPPLÉMENTAIRES POUR MAISONS compromettant une aération adéquate. • Une canalisation permanente d’admission d’air frais MOBILES pour entretenir la combustion devra être installée en répondant aux exigences suivantes : AVERTISSEMENT : NE PAS LOCALISER DANS — La canalisation devra être totalement métallique LES CHAMBRES À... - Page 40 INSTRUCTIONS ET SCHÉMA DE CHEMINÉE DE MAÇONNERIE AVEC CONDUIT DE FUMÉE Ce poêle est conçu pour une évacuation par une cheminée de maçonnerie conforme au code du bâtiment et code des incendies locaux ainsi qu’aux dernières éditions des normes NFPA 211 aux États-Unis ou CSA-B365 au Canada. 1.
-
Page 41: Fonctionnement
FONCTIONNEMENT • Ne pas utiliser les sédiments et débris au fond des contenants de grenailles. THÉORIE DE FONCTIONNEMENT • Entreposer les grenailles dans des sacs à deux ou trois 1. La combustion se produit dans le pot du poêle qui est couches de papier (comme ceux des sacs de ciment) alimenté... - Page 42 PRÉCAUTIONS POUR LE FONCTIONNEMENT • Cycle de nettoyage : Le pot de combustion est nettoyé des cendres, poussières et résidus accumulés. AVERTISSEMENT : BRÛLANT DURANT LE • Cycle d’alimentation : Les grenailles passeront de la FONCTIONNEMENT. NE PAS TOUCHER.LE trémie au pot de combustion par l’entremise de la POÊLE.
-
Page 43: Connexion Wi-Fi " Smart Stove
FONCTIONNEMENT AVEC UNE GÉNÉRATRICE Étape 1. Téléchargez l’application Smart Stove de NHHATC ÉLECTRIQUE Étape 2. Ouvrez l’application Smart Stove. L’application s’ouvre, par défaut, à l’écran « S’inscrire ». Cliquez Ce poêle est conçu pour avoir l’option d’être alimenté sur le bouton « S’inscrire ». par une génératrice électrique, mais les génératrices ne sont pas toutes compatibles pour fonctionner avec cet Étape 3. -
Page 44: Commandes Wi-Fi
Étape 13. Sur votre dispositif, naviguez à vos vos réglages de dispositifs wi-fi qui comprendront maintenant le poêle comme un des choix. Sélectionnez le poêle comme votre connexion wi-fi. Étape 14. Ouvrez à nouveau l’application Smart Stove sur votre téléphone. Étape 15. -
Page 45: Commandes Multifonctions
COMMANDES MULTI-FONCTIONS POUR PS20WTS Connexion Wi-Fi Sélection de taux Tarière écran verrouillé Planification Afficheur Température Paramètres souhaitée état de la Température température ambiante Alimentation Figure 17a Panneau multi-fonction monté Unité de température MODE ÉCO Réglages temps de mélange Réglages ventilateur d’évac. Réglages souffleur Figure 17b Menu utilisateur... -
Page 46: Entretien
ENTRETIEN NETTOYAGE : VITRE Pour un bon rendement de fonctionnement ce poêle à AVERTISSEMENT : NE PAS NETTOYER LA grenailles de bois nécessite un entretien périodique. Toute VITRE LORSQUE CHAUDE. opération ne respectant pas les directives du présent Guide Bien que la circulation d’air sur la porte vitrée réduit du propriétaire contrevient à... - Page 47 Un panneau d’accès se trouve de chaque côté du poêle qui peut être déposés en dévissant ses vis de fixation. Éteindre le poêle, le laisser se refroidir et le débrancher avant tout démontage et nettoyage. Utiliser une brosse dans les ouvertures pour dégager toute accumulation de cendre et nettoyer à...
- Page 48 d’incendie de votre localité. En tant que préparation, ayez un plan de réaction précis pour éteindre les feux de cheminée. REMPLACEMENTS : VITRE Tout bris de vitre ne devra être adressée que par le remplacement de la porte complète fournie par le fabricant.
- Page 49 REMPLACEMENTS : VENTILATEUR D’ÉCHANGEUR REMPLACEMENTS : VENTILATEUR D’ÉCHAPPEMENT D’AIR CHAUD Débrancher le poêle. Déconnecter tout câblage raccordé Débrancher le poêle. Déconnecter tout câblage au ventilateur d’échappement. Retirer les écrous à oreilles raccordé au ventilateur d’air chaud. Retirer les vis de maintenant la plaque de l’ensemble sans son logement.
- Page 50 CODES D’ERREUR REMARQUE :DANS L’ÉVENTUALITÉ D’UNE PANNE DE COURANT (CODE D’ERREUR E7), UNE FAIBLE QUANTITÉ DE FUMÉE POUR- RAIT ÊTRE DÉGAGÉE. CECI DURERA DE TROIS À CINQ MINUTES ET NE REPRÉSENTE PAS UN DANGER. ATTENTION : S’IL S’EST PRODUIT UNE SURCHAUFFE (CODES D’ERREUR E5 ET E6), ALORS UNE INSPECTION, ENTRETIEN ET/OU UN NETTOYAGE DEVRA ÊTRE EFFECTUÉ...
- Page 51 CODES D’ERREUR (SUITE) 1. Vérifier les fils et les points de raccordement. Capteur de température n 2 en ESO2 2. Remplacer la carte mère. circuit ouvert Capteur de température n 1. Vérifier les fils et les points de raccordement. ESC3 court-circuité...
- Page 52 DÉPANNAGE (SUITE) SYMPTÔME CAUSE SOLUTION La trémie est vide. Ajouter des grenailles dans la trémie. 1. Débrancher l’unité de sorte qu’il ne se produise La tarière n’alimente pas le pas de démarrage inattendu et dégager le blocage pot de combustion durant La tarière est de la tarière.
- Page 53 DÉPANNAGE (SUITE) SYMPTÔME CAUSE SOLUTION La vitesse d’alimentation n’est 1. Diminuer la vitesse du ventilateur pour diminuer le Pas assez de grenailles dans pas suffisante pour taux de combustion. le pot de combustion. soutenir ce taux de 2. Augmenter la vitesse d’alimentation. combustion.
-
Page 54: Schéma De Câblage
SCHÉMA DE CÂBLAGE REMARQUE : SI DES FILS QUELCONQUES DOIVENT ÊTRE REMPLACÉS ILS DEVRONT CORRESPONDRE AUX SPÉCIFICATIONS DE CÂBLAGE ORIGINAL DE TEMPÉRATURE NOMINALE DE 105 °C AVEC ISOLANT DE CLASSE DE 600 V Grand Tetton poêle à grenailles de bois Guide du propriétaire et instructions d’utilisation... -
Page 55: Pièces De Service
MODÈLE PS20WTS PIÈCES DE SERVICE REMARQUE : LES PIÈCES NE SONT PAS TOUTES EN MAGASIN. POUR TOUTE QUESTION, COMMUNIQUEZ AVEC LE FABRICANT. AVERTISSEMENT : NE PAS POSITIONNER LES PIÈCES SELON CES SCHÉMAS OU NE PAS UTILISER EXCLUSIVEMENT LES PIÈCES SPÉCIFIQUEMENT APPROUVÉES POUR CE POÊLE POURRAIT RÉSULTER EN DES DOMMAGES MATÉRIELS OU DES BLESSURES AUX OCCUPANTS. - Page 56 Si une pièce est endommagée ou manquante, appelez notre Service de soutien technique au 1-800-251-0001. Adresser toute demande de compensation de garantie à : Service Department, Mr. Heater, Inc., 4560 W. 160TH ST., CLEVELAND, OHIO 44135 U.S.A. Indiquez votre nom, adresse et numéro de téléphone, le numéro de modèle et le numéro de série de votre produit et décrivez les détails concernant la demande de compensation.
Need help?
Do you have a question about the Grand Teton PS20WTSTS and is the answer not in the manual?
Questions and answers