Table of Contents
Advertisement
Advertisement
Table of Contents

Subscribe to Our Youtube Channel
Summary of Contents for ENGINDOT HS60
- Page 1 Laser Distance Meter User's Manual HS60...
-
Page 3: Safety Regulations
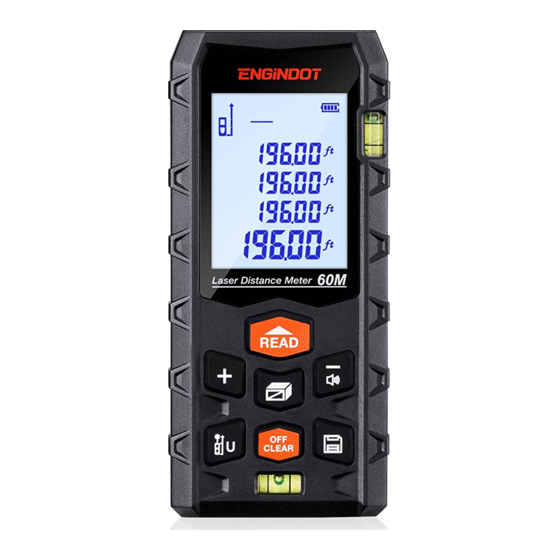
Safety regulations Please read the safety regulations and operation guide carefully before operating. Please read all of the operational guide and safety regulations in this manual before operation . Improper operations without complying with this manual guided could cause damage to the device, influence on measurement result or bodily injury to the user. - Page 4 DISPLAY/KEYBOARD Display Power Supply Record Length,Area, Volume and Pythagorean Laser on Maximum Auxiliary Display Minimum Major Display Keyboard Turn on/Measuring Addition Subtraction/ Sound Area/Volume/ Pythagorean Measuring Save Reference Point/ Unit Switch Turn off/ Remove...
-
Page 5: Batteries Installation
Batteries Installation Battery Installation and Replacement Discharge the battery door on the back of device, and place battery according to correct polarity, then cover the battery door. Only 1.5 V AAA alkaline battery is applied to the meter. If not used for a long time, please take out the battery to avoid battery corrosion to meter body. -
Page 6: Backlight On/Off
Units: Length Area Volume 0.000m 0.000m 0.000m 0.00m 0.00m 0.00m 0.0in 0.00ft 0.00ft 0.00ft 0.00ft 0.00ft 0'00"1/16 Changing Reference Point Press key to change the reference point . The device reference point by default is rear. Back Light On/Off The back light is set to turn on and off automatically. The back light can be on for 15s while operating, and it will be shut off automatically in 15s when there is no operation to the device. -
Page 7: Self-Calibration
Self-Calibration This function can keep the precision of the device. Instruction: Power off, Long press button , and then press . Release the button , then "CAL" and a figure shows on the screen. User can adjust the figure with button according to the accuracy of the meter. - Page 8 Area Measurement: Press button shows on the screen. One of the side of rectangle blinking on the display, please follow the below instructions for area measuring: Press once for length Press again for width The device calculates and shows the result in the major display area.
- Page 9 Pythagoras There are four Pythagoras modes in case that user gets hard to reach the target. 1. Calculate the second leg by measuring the hypotenuse and another leg. Short press three times to enter Pythagoras mode, the hypotenuse of blinking. Press , measure the length of hypotenuse (a) Press...
-
Page 10: Addition / Subtraction
3. Press five times till the one side of blinking on the screen. Press , measure the length of one side (a) Press , measure the length of the median line (b) Press , measure the length of another side (c) Device calculates the length of the leg in full line (x) 4. - Page 11 Not only length can be caiculated in addition and subtraction, but area and volume can do the calculation as well. Take area as sample: Area cumulative function: Measure the first area as showing in PIC1. Then press button , and measure the second area as showing in PIC2, there is a "+"...
-
Page 12: Record Function
Record Function Long press button for 3s to record your measuring result under measuring mode. It can also record the result under Area, Volume and Pythagoras mode. All the calculating records can be saved by the device. Read / Delete the Record: Short press button , read the records by press button... -
Page 13: Technology Specifications
Technology specifications: ITEM Working Range Distance measurement ±(2mm+d*1/10000) precision Measurement unit options m/in/ft Continuous measure- ment function board Area measurement function Volume measurement function Pythagorean proposi- tion measurement Full mode function Add and subtract meas- urement function Min/Max value Max storage 30 units Automatic backlight Buttons/Keys sound... -
Page 14: Instrument Maintenance
Typical Tolerance: ±2mm, when reflectivity 100% (white surface), environment light <2000 LUX. 25 °C Tolerance is usually affected by the distance, reflectivity, and environment light etc. It probably gets tolerance around ±(2mm+0.2mm/m). Instrument Maintenance: The meter should not be stored in high temperature and strong humidity environment for long time;... - Page 15 Within 24 months of purchase, we will provide timely and effective online after-sales service.We will repair or replace any defective product (due to manufacturing fault) within the service period. How to Return Your ENGINDOT Product Contact support@engindotools.com with your order number.
- Page 16 Shenzhen Houqianding Trading Co., Ltd. support@engindotools.com Room 504D, Block B, Sunshine Hotel, No.2003, Jiabin Road, Jianan Community, Nanhu Street, Luohu District, Shenzhen...
Need help?
Do you have a question about the HS60 and is the answer not in the manual?
Questions and answers
Will not power on
The ENGINDOT HS60 may not power on due to the following reasons:
1. Battery Issues – Ensure that the two 1.5V AAA batteries are correctly installed and not depleted.
2. Power Button Not Pressed Correctly – Press and hold the power button for a few seconds to turn the device on.
3. Device Malfunction – If the device still does not turn on, it may require self-calibration or servicing.
If none of these steps resolve the issue, contact support for further assistance.
This answer is automatically generated