
Subscribe to Our Youtube Channel
Related Manuals for Univa EM9P03NN


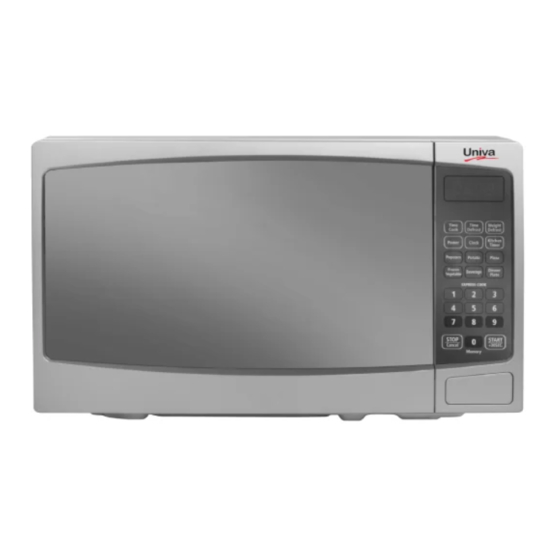
Summary of Contents for Univa EM9P03NN
- Page 1 EM9P03NN Microwave Oven U30EM Instruction Manual IN ORDER TO OBTAIN THE GREATEST SATISFACTION FROM YOUR APPLIANCE, IT IS RECOMMENDED YOU READ THE INSTRUCTIONS CAREFULLY...
-
Page 2: Table Of Contents
Introduction Dear Customer Thank you for choosing this quality, Univa Microwave Oven. This User Manual contains important safety information and instructions on the operation and maintenance of your appliance. Please take the time to read this User Manual before using your appliance and keep this book for future reference. -
Page 3: Safety Warnings
1. SAFETY AND WARNINGS To reduce the risk of fire, electric shock, injury, or exposure to excessive microwave energy when using your appliance, follow basic precautions, including the following: Precautions to avoid possible exposure to excessive microwave energy Operating this oven with the door open can result in harmful exposure to microwave energy. - Page 4 WARNING: Do not heat liquids and food in sealed containers as it may explode. 8. Be cautious when heating food in plastic or paper containers, as it may ignite. 9. Only use utensils that are suitable for use in microwave ovens. 10 If smoke is emitted, switch off and unplug the appliance and keep the door closed to stifle any flames.
-
Page 5: Specifications
2. Specifications Model: EM9P03NN : U30EM Rated Voltage: 230V~ 50Hz Rated Input Power (Microwave): 1450W Rated Output Power Microwave): 900 W Oven Capacity: 30 L Turntable Diameter: 288 mm Dimensions: (W)347 x (D)495 x (H)291mm Net Weight 12.8kg 3. Utensils Certain non-metallic utensils are not safe to use in the microwave. - Page 6 Materials allowed for use in microwave oven Utensils Remarks Browning dish Follow manufacturer’s instructions. The bottom of browning dish must be at least 3/16 inch (5mm) above the turntable. Incorrect usage may cause the turntable to break. Microwave-safe only. Follow manufacturer's instructions. Make sure there Dinnerware is no metallic trim.
-
Page 7: Unpacking
4. Unpacking Remove the oven and all packing materials from the carton and oven cavity. The following accessories are included: Glass tray Turntable ring assembly Instruction Manual A) Control panel Turntable ring assembly Glass window Door assembly Safety interlock system Oven cavity Turntable Installation a. -
Page 8: Installation
5. Installation Consult a qualified electrician, or service centre if the grounding instructions are DANGER not completely understood, or if doubt Electric Shock Hazard! exists whether the appliance is properly Touching some of the internal components grounded. can cause serious personal injury or death. If it is necessary to use an extension Do not disassemble this appliance. - Page 9 Countertop Installation Remove all packing material and accessories. Cabinet: Remove any protective film found Examine the oven for any damage such as on the microwave oven cabinet surface. dents or broken door. Do not install if oven is Do not remove the light brown Mica cover damaged.
-
Page 10: Operation
6. OPERATION 1) SETTING THE CLOCK Press "CLOCK", "00:00" will display. Press the number keys and enter the current time. For example, if the time is 12:10, press "1,2,1,0" in turn. Press "CLOCK" to complete the clock setting. ":" will flash and the digital clock will show. - Page 11 (3) Press "POWER" once, the screen will display "PL10". The default power is at 100% power. To adjust the power level, press the number keys. (see Power Level table) (4) Press " START/+30SEC. " to start cooking. Example: to cook the food at 50% microwave power for 15 minutes: Press "...
- Page 12 6) TIME DEFROST FUNCTION (1) Press "TIME DEFROST", the screen will display "dEF2". (2) Press number pads to input defrosting time. The effective time range is 00:01~99:99 (3) The default microwave power is power level 3. If you want to change the power level, press "POWER"...
- Page 13 POTATO • Press "POTATO" repeatedly until the required number of potatoes to cook appears in the display, i.e.: 1,2,3, etc. 1 SET: 1 potato (approximate 230 gram) • 2 SETS: 2 potatoes (approximate 460 gram) • 3 SETS: 3 potatoes (approximate 690 gram) •...
- Page 14 FROZEN VEGETABLE • Press "FROZEN VEGETABLE" repeatedly until the required weight of the vegetables appears in the display, i.e: 150, 350, 500 g. Example, press "FROZEN VEGETABLE" once and 150 appears. Press "START/+30SEC" to start cooking, the buzzer will sound once. Once cooking time has been completed, the buzzer sounds five times and then revert to waiting state.
- Page 15 8) MEMORY FUNCTION (1) Press " 0/MEMORY " to choose memory 1-3 procedure. The screen will display 1,2,3. (2) If the memory has previously been set, press "START/ +30SEC." If not set, continue to set the memory. Only one or two stages can be set. (3) After completing the set-up, press "START/ +30SEC.
- Page 16 INQUIRING FUNCTION In cooking state, press "CLOCK", the screen will display clock for three seconds. In the microwave cooking state, press "POWER" to inquire microwave power level, and the current microwave power will be displayed. After three seconds, the oven will turn back to the previous state. The same process can be followed in multi-stage state.
-
Page 17: Cleaning & Maintenance
7. CLEANING & MAINTENANCE 1. Unplug the appliance from the power supply. 2. Clean the cavity of the oven after use with a slightly damp cloth. 3. Clean the accessories in the usual way in soapy water. 4. The door frame, seal and other parts must be cleaned carefully with a damp cloth when dirty. - Page 18 DISPOSAL According to Waste of Electrical and Electronic Equipment (WEEE) directive, WEEE should be separately collected and treated. If at any time in future, you need to dispose of this product please do NOT dispose of this product with household waste.
-
Page 19: Warranty
Univa authorized service Agent or consultant. The liability of Univa shall be limited to the repair or replacement by a Univa authorized service dealer in its sole discretion of the defective parts of the appliance at its sole cost. - Page 20 ➢ Howick Mews, Waterfall Park, Bekker Road, Vorna Valley, Midrand, Gauteng, South Africa ➢ P.O. Box 1482, Halfway House, Gauteng, 1685 ➢ Sales and Marketing Tel: +27 11 315 0015 Email: sales@univa.co.za ➢ Service and Spares: Tel: +27 11 315 0015 Email: support@univa.co.za...
Need help?
Do you have a question about the EM9P03NN and is the answer not in the manual?
Questions and answers