Table of Contents
Advertisement
Quick Links
Advertisement
Table of Contents

Summary of Contents for myGEKOgear Moto Snap
- Page 1 Moto Snap by myGEKOgear User Manual...
- Page 2 LED on the camera will illuminate when charging, and will turn off upon reaching full charge. 4. If the Moto Snap will not be used for an extended period of time, please charge at least once every 6 months to maintain the battery's health and avoid low-voltage related damage.
- Page 3 13. The camera may get warm during use. This is normal. 14. Improper use or operation of the Moto Snap may result in damage to the camera or its accessories and will void the warranty.
- Page 4 -- Consult the dealer or an experienced radio/TV technician for help. Warning: changes or modifications not expressly approved by the party responsible for compliance could void the user’s authority to operate the equipment. Contains FCC ID: please refer to website www.mygekogear.com...
- Page 5 RF Exposure Compliance This equipment complies with FCC radiation exposure limits set forth for an uncontrolled environment. This equipment should be installed and operated with minimum distance 20cm between the radiator and your body. This transmitter must not be co-located or operating in conjunction with any other antenna or transmitter.
- Page 6 “Switch Off 2-way Radios” sign by switching off camcorders that may interfere with the radio frequency. myGEKOgear is NOT responsible for the loss of any data/content during operation. By using the myGEKOgear Moto Snap, it is assumed that you agree to all of the above statements.
- Page 7 Step 1: Check What's Inside The package contains the following items. If any items are missing or damaged, please contact the original place of purchase immediately. Main Camera 3-in-1 Mount – Mirror + Snap Mount Hex Wrench User USB Cable Helmet Safety Cord Manual &...
-
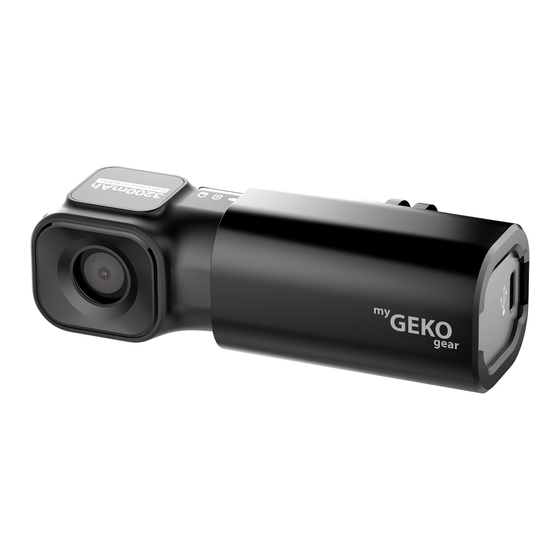
Page 8: Step 2: Product Overview
Step 2: Product Overview No Description Description LED indicator microSD slot / Reset Power ON/OFF USB port (type C) sensor Microphone Lens... -
Page 9: Step 3: Insert Microsd Card
Step 3: Insert microSD Card Insert the micro SD memory card with the pins facing forward and the Moto Snap lens facing forward. (See below for proper installation orientation.) Once the memory card locks into place, replace the slot cover securely over the slot. - Page 10 The slot cover must be tightly sealed to prevent moisture from entering, causing the lens to fog. Insert the lower edge of the slot cover, then press the top edge and sides of the slot cover to create a good seal. See below.
-
Page 11: Step 4: Led Indicator
No Red Light Fully charged Green, rapid Battery Low battery flashing Note: Before first use, use the supplied USB Type-C charging cable to fully charge the Moto Snap. Charge for at least 5 hours until the red LED turns off. -
Page 12: Step 5: Download The App
Step 5: Download the App When using the Moto Snap for the first time, use your smartphone to download and install the Moto Snap app. Scan the QR code or search “Moto Snap” in the iOS App Store or Google Play Store. Android APP layout and features may be changed subject to different software versions. -
Page 13: Step 6: Wi-Fi Connection
Operation] Note: 1. Wi-Fi is turned on automatically when the Moto Snap powers on. If the camera doesn’t connect with the Moto Snap app within 3 minutes, Wi-Fi will be disabled automatically to preserve battery life. If you want to turn... -
Page 14: Step 7: Main Unit Installation
Step 7: Main Unit Installation The Moto Snap can be installed on the right or left rearview mirror. Please use the mirror mount and snap mount to adjust and fine tune the installation position of the camera. See below for an example of a left side installation. - Page 15 Note: Regardless of whether the camera is installed on the left or right side, the myGEKOgear logo on the snap mount must always be upright and face out, with the LED indicator lights always facing up. Below are installation examples for reference.
- Page 16 Slip the safety cord into the safety cord hole of the main unit. Plug the Moto Snap into the Snap Mount and push it to the bottom until it snaps into place. The blue LED light will blink slowly to indicate that the camera is now recording. If recording does not begin, check that the microSD card is inserted properly.
- Page 17 Fasten the safety cord from the main unit to the safety ring on the mount to protect your camera from accidentally falling out of the mount while riding.
- Page 18 Note: 1. When the Moto Snap is inserted into Snap Mount (or used with the optional carry-on Power Key), it will automatically power on and start recording, indicated by a slow-flashing blue LED indicator light. The recording file will be saved onto the microSD card.
-
Page 19: Step 9: Change Password
Step 9: Change Password To change the Wi-Fi password, follow the steps below. If left unchanged, the default password is 12345678. Open the Moto Snap app , and tap to enter [Camera Setting]. Next, tap [Wi-Fi Password]. Enter the old password. (Default password: 12345678) →... - Page 20 iPhone users: Open the Wi-Fi connection menu and tap the MotoSnap network. Next, tap “Forget This Network” and confirm your decision. *Note: Android phone user can skip this step. Next, tap the MotoSnap network again to re-enter your new password and reconnect your smartphone to the Moto Snap.
-
Page 21: Step 10: App Operation
Step 10: App Operation Main Screen... - Page 22 Full screen preview Preview image Note: 1. The Moto Snap App will auto sync the camera's date/time with your smartphone. 2. App layout and features are subject to change, depending on the software version. Refer to the Google Play or iOS App Store for the...
- Page 23 [Picture playback] to enter file playback list. Recording will stop. 2. The files saved in the Moto Snap’s microSD card will be listing on your smart phone. Tap the preview thumbnail to playback. 3. Tap the right top corner “Select” and pick up the files that...
- Page 24 Icon Description Download file to smartphone Delete file Exit Note: 1. If recordings have no audio, check if Audio Recording is OFF in the menu. For video playback, we recommend VLC Media Player. 2. Deleted files cannot be recovered. Backup any important files before deleting them.
- Page 25 Local Album You can use this feature to playback or delete the file that you download to your smart phone. 1. Tap the icon [Local Album]. The camera will stop recording. 2. Tap the file from preview thumbnail you are going to playback.
- Page 26 Camera Setting You can use this feature to set up your preferred options. 1. Tap icon [Camera Setting] on main screen. The camera will stop recording. 2. See available settings below and adjust to your preferred options. Menu Description Options Recording Set the length of each individual 1min / 3min...
-
Page 27: Step 11: Final Check
Wi-Fi Change the Wi-Fi password. (Default: Password 12345678) Firmware Indicates the current firmware version Version of the Moto Snap. Indicates the current application Version version. Step 11: Final Check □ Peel off lens protective film □ Fully charge the camera (Red LED off) □... -
Page 28: Specifications
G-Sensor 3-Axls G-Force sensor Microphone Built-in Battery 3200mAh Operating -10° ~ 60° C Temperature Operating Humidity 20 ~ 70% RH Storage Temperature -20° ~ 70° C Moto Snap Size 107 x 32 x 29 mm Moto Snap Weight Approximately 96g... -
Page 29: Optional Accessories
Built-in IEEE 802.11g/n (HT20) Wi-Fi chip: RTL8188FTV Wi-Fi Frequency 2412~2462MHz Wi-Fi Channel Ch1~Ch11 Optional Accessories Please visit our official website www.mygekogear.com purchase additional accessories for the Moto Snap. Helmet Mount Rear-mirror Mount Adjustable Mount Car Plate Mount Shoulder Band Pouch Charging Bin... - Page 30 Tilt Sensor detects if the vehicle has TS Video Format toppled over and automatically locks the recording. Optional accessories Dedicated Moto Snap are available to use app for adjusting the the Moto Snap in camera’s settings and various other reviewing recordings. applications.
- Page 31 Limited Warranty Our products carry a 12-Month limited warranty from the date of purchase, covering manufacturing defects or faults in workmanship. For questions, support, or warranty claims, contact us at service@mygekogear.com. *IMPORTANT: Proof of original purchase is required for warranty service.
Need help?
Do you have a question about the Moto Snap and is the answer not in the manual?
Questions and answers