
Summary of Contents for Parrot Products GT1060P
- Page 1 Graphics Tablet Wired - GT1060P User Manual Tel: (RSA) 010 140 4900 / Email: sales@parrot.co.za www.parrot.co.za...
- Page 2 Connection Please connect the Graphics tablet to the PC USB 2.0/3.0 port (Don’t connect to the front USB port of the PC). Driver installation 1. After “Connection”, Please wait a minute. Then open “My PC” or “MY COMPUTER”, find the “Pen Driver” CD-ROM. Open the “Tablet_Setup.exe” file to run the driver installation.
- Page 3 3. In the last wizard page, if you want to download the ‘Paint Tool SAI’ software, Please Select it, then click ‘Finish. 4. Select the Download Path to save it. 5. When the download is completed, Open the sai.exe file then follow the wizard to install it. 6.
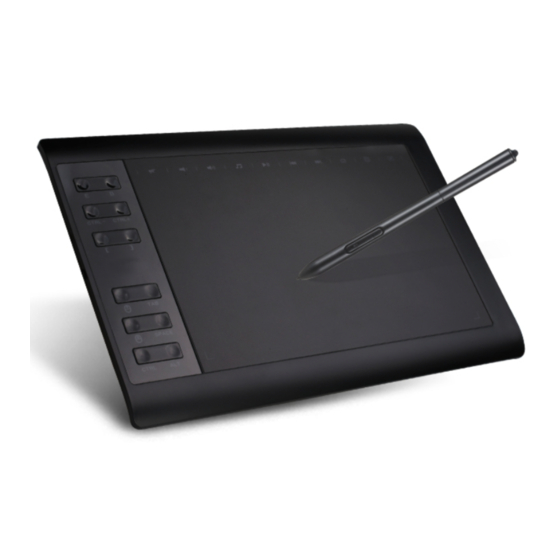
- Page 4 Light Status The workspace light will light up when the tip of the pen touches the working area or when the key of the pen is pressed in the induction zone. Light Key functions There are 12 programmable keys on the left and 10 media keys on the top of tablet. Play/pause Next/Prev Calculator...
- Page 5 Pen setting interface 1. PC and Graphic tablet connection status. 2. Screen Mapping: It can modify the screen mapping area and the graphic tablet work area. 3. Levels Pen Pressure: From 0 to 8192 levels. The curve is used to show the pressure levels, the levels change with the pressure of the pen.
- Page 6 Replace pen nib 1. Remove the pen nib 2. Insert a new nib. 3. Secure it by pushing on it. using the nib removal tool. Button Configuration 1. Open Driver setting interface; select De ned keys. Select the key that you want to customize. Use the keyboard to enter the key.
Need help?
Do you have a question about the GT1060P and is the answer not in the manual?
Questions and answers