Advertisement
Quick Links
Storage Locker Parts & Hardware
A
B
x2 Side Panels
x2 Back Panels
E
x2 Legs
x1 Bottom Panel
H
I
J
6 X 70mm
6 X 30mm
12 X 0.8mm
x2
x2
x2
K
L
M
4 X 4mm
9 X 0.8mm
30 X 13mm
x4
x4
x2
Customer Services:
gardentrading.co.uk
+44 (0)1993 845 559
customerservices@gardentrading.co.uk
Opening Hours: Monday - Friday: 8.30am - 5.30pm
The Garden Trading Company Ltd, Carterton South Industrial Estate, Black Bourton Road, Carterton, Oxon, OX18 3EZ
C
D
x2 Doors
x1 Top Panel
F
G
x1 Shelves
B2
D
A
G
C2
F
N
C1
x4
E
(Friday close at 5.00pm)
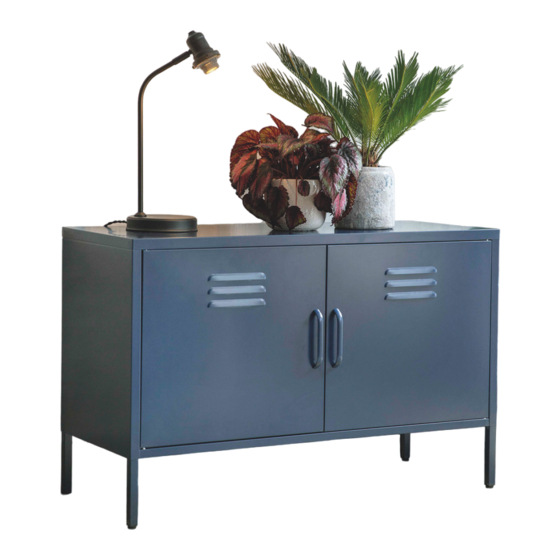
Marlborough Storage Locker
Please read through these instructions and ensure they are kept for future reference. All parts
and hardware are listed on the back of this guide.
Please ensure the unit is securely fixed to the wall to avoid tipping. Fixings are not supplied.
Please ensure you source and use correct plugs and screws for the surface you are fixing this
B1
A
Storage Locker Care Instructions
Dust regularly with a clean dry cloth.
Wipe up any spills immediately with a damp cloth and then dry the surface with a clean dry cloth.
E
Never use abrasive or corrosive cleaning agents.
Always use place mats and coasters to protect the surface from moisture and heat. Avoid sharp objects
scratching the surface.
Avoid placing on uneven surfaces.
Do not drag furniture, always lift to move.
Maximum weight capacity
Top Panel: 30kg
Shelf: 10kg
Bottom Panel: 15kg
Assembly Instructions
product to.
Advertisement

Subscribe to Our Youtube Channel
Related Manuals for Garden Trading Marlborough Storage Locker


Summary of Contents for Garden Trading Marlborough Storage Locker
- Page 1 Maximum weight capacity customerservices@gardentrading.co.uk Top Panel: 30kg Opening Hours: Monday - Friday: 8.30am - 5.30pm (Friday close at 5.00pm) Shelf: 10kg The Garden Trading Company Ltd, Carterton South Industrial Estate, Black Bourton Road, Carterton, Oxon, OX18 3EZ Bottom Panel: 15kg...
- Page 2 Stand both legs (E) up and push the side panels (A) Assemble the back panels (B) by Add the top panel (D), starting from the front. Insert the shelf brackets (N) and down onto the legs. slotting them together. Align the top with all the side and back panels and the shelf (G).
Need help?
Do you have a question about the Marlborough Storage Locker and is the answer not in the manual?
Questions and answers