Table of Contents
Advertisement
Quick Links
OWNER'S GUIDE & INSTALLATION INSTRUCTIONS
Transom Mount:
1kW with Release Bracket
Sealcast
Models:TM258, TM260
Chirp Models:TM185HW, TM185M, TM265LH,
TM265LM, TM275LHW
Patent http://www.airmar.com/patent.html
Follow the precautions below for optimal
product performance and to reduce the risk of
property damage, personal injury, and/or death.
WARNING: Always wear safety glasses, a dust mask,
and ear protection when installing.
WARNING: When the boat is placed in the water,
immediately check for leaks around the screws and
any other holes drilled in the hull.
CAUTION: Chirp transducer—Always operate the
transducer in water. Operating in air will allow the
transducer to overheat resulting in failure.
CAUTION: Never pull, carry, or hold the transducer by
the cable as this may sever internal connections.
CAUTION: Never strike the transducer to release it.
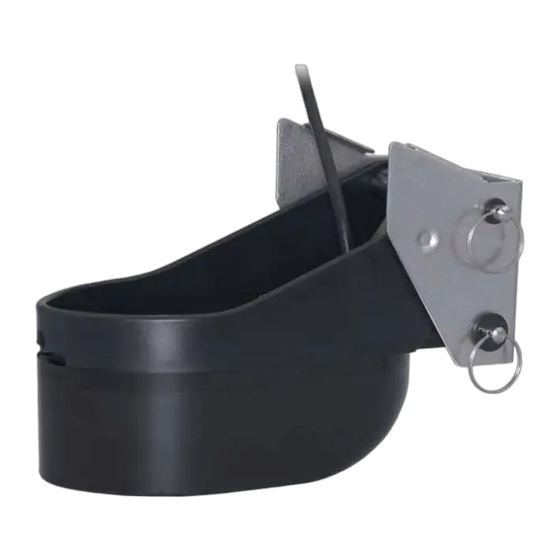
When mounted on the bracket, remove the transducer
by removing the locking pin and hinge pin.
CAUTION: The bracket protects the transducer from
frontal impact only.
CAUTION: Never use solvents. Cleaner, fuel, sealant,
paint and other products may contain solvents that can
damage plastic parts, especially the transducer's face.
IMPORTANT: Please read the instructions completely
before proceeding with the installation. These
instructions supersede any other instructions in your
instrument manual if they differ.
Tools & Materials
Safety glasses
Dust mask
Ear protection
Angle finder
Masking tape (some installations)
Pencil
Electric drill
Drill bits and hole saws:
Bracket holes
5mm, #4, or 7/32"
Transom hole (optional) 2mm or 1/16" larger than connector diameter
Cable clamp holes
3mm or 1/8"
Marine sealant (suitable for below waterline)
Socket wrench
Straight edge
Small screwdriver
Grommet(s) (some installations)
Cable ties
Water-based anti-fouling coating (mandatory in salt water)
Depth Transducer
™
with Temperature Sensor
Record the information found on the cable tag for future reference.
Part No.________________ Date___________ Frequency________ kHz
Applications
• Recommended for outboard and inboard/outboard sport fishing
powerboats 10m (32') and up
• Not recommended for boats with inboard engine(s)
• Not recommended for a stepped hull
• Adjusts to transom angles from 3
• Vertically orients sound beam on hull with deadrise angle up to 28°
• Good operation up to 30kn (35MPH)
Mounting Location
Guidelines
CAUTION: Do not mount the transducer in line with or near water
intake or discharge openings or behind strakes, fittings, or hull
irregularities that may disturb the water flow.
CAUTION: Do not mount the transducer in a location where the boat
may be supported during trailering, launching, hauling, or storage.
• For best performance, the transducer's face must be in contact
with smooth water. To identify an area of "clean" water, observe
the flow off the transom while the boat is underway.
• Allow vertical space above the bracket for it to release and
rotate the transducer upward.
• Mounting the transducer on the side of the transom where the
propeller blades are moving downward is preferred (Figure 1).
• Mount the transducer as close to the centerline (keel) of the
boat as possible to ensure the transducer's face remains in the
water when the boat is turning. However, be sure it is a
minimum of 15 cm (6") beyond the swing radius of the propeller,
so the water passing under the transducer does not cause a
flow disturbance to the propeller.
Figure 1. Mounting location on single drive boat
Copyright © 2009 - 2019 Airmar Technology Corp.
TM260
bracket with shims
(operational position shown)
–21
NOTE: The side
of the transom
where propeller
blades are
moving downward
is preferred.
parallel to
waterline
hull projection
0–3mm (0–1/8")
15cm (6")
minimum beyond
swing radius
Advertisement
Table of Contents

Subscribe to Our Youtube Channel
Related Manuals for Airmar Sealcast TM258


Summary of Contents for Airmar Sealcast TM258
- Page 1 Socket wrench 15cm (6") Straight edge minimum beyond Small screwdriver swing radius Grommet(s) (some installations) Cable ties Figure 1. Mounting location on single drive boat Water-based anti-fouling coating (mandatory in salt water) Copyright © 2009 - 2019 Airmar Technology Corp.
- Page 2 This will ensure that the transducer is in contact with the water at high speeds. Figure 2. Stepped transom: vertical space required Copyright © 2009 - 2019 Airmar Technology Corp. • Using shims—The bracket is supplied with three shims; each ...
- Page 3 1. Prevent the bracket from moving out of position using the remaining hex-washer-head screw. Drill the hole for the stabilizing screw through the center hole of the bracket, any Figure 6. Screw locations on bracket shim(s), and the hull (Figure 6). Copyright © 2009 - 2019 Airmar Technology Corp.
- Page 4 Note that very small leaks may not be readily observed. Do not leave the boat in the water unchecked for more than three hours. Email: sales@airmar-emea.com 35 Meadowbrook Drive, Milford, New Hampshire 03055-4613, USA • www.airmar.com Copyright © 2009 - 2020 Airmar Technology Corp. All rights reserved.
Need help?
Do you have a question about the Sealcast TM258 and is the answer not in the manual?
Questions and answers