
Related Manuals for Geno Technology BTLab SYSTEMS BT209

Summary of Contents for Geno Technology BTLab SYSTEMS BT209
- Page 1 A Geno Technology, Inc. (USA) brand name Nucleic Acid Sequencing Electrophoresis Cell Cat. No. BT209, BT210 & BT211 1-314-991-6034 info@BTLabSystems.com ♦...
-
Page 2: Table Of Contents
WARRANTY ..............................3 INTRODUCTION ............................. 4 FEATURES ..............................4 SPECIFICATIONS ............................5 OPERATING INSTRUCTIONS .......................... 6 NOTICE ................................ 10 TECHNICAL SUPPORT ..........................10 Page 2 of 10... -
Page 3: Warranty
Before using the instrument, please read the operation instruction handbook carefully. WARRANTY Our company guarantees that this unit is warranted against defective material and workmanship for a period of one year from the date of shipment. We will repair or replace the defective equipment returned during the warranty period free if the equipment has been used under normal laboratory conditions and in accordance with the instruction in this manual. -
Page 4: Introduction
INTRODUCTION BT Lab Systems Nucleic Acid Sequencing Electrophoresis Cell Units can be used for AELP, Tolerance Show, SSR, SSCP, HA, DNA Foot printing, RNase, S1 Nucleic Acid Graphs, and Primer Extension Analysis. FEATURES Simple operation, uses only 4 fastening knobs •... -
Page 5: Specifications
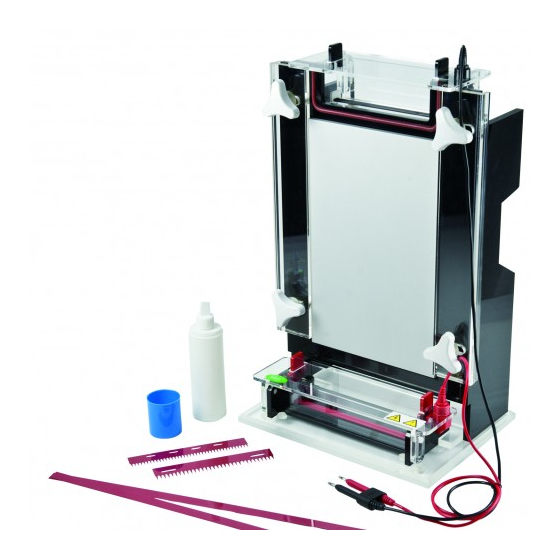
UNIT COMPONENTS Each unit contains the following components Accessory Quantity Body Tank (includes electrodes) Concave Plate Rectangular Plate Spacer Comb Comb Comb Comb Clamps Glue Bottle Seal Water Pipe Electrical Cables SPECIFICATIONS Cat. # BT209 BT210 BT211 Gel Size (W x L) (mm) 180 x 420 330 x 420 330 x 320... -
Page 6: Operating Instructions
OPERATING INSTRUCTIONS 1. Clean the accessories and glass plates Wear gloves and clean every accessory including the glass, spacers, and comb. Start by cleaning the inner glass plates with alcohol. Next, in a clockwise motion, clean the rectangular and concave plates with hydrophilic silane. 2. - Page 7 4. Place the concave plate on top of the rectangular plate, then carefully clamp around the edge of the glass plates 5. Infuse the gel into the cavity until the space between the gel and underside of the concave glass plate is 2-3 cm.
- Page 8 7. After the gel solidifies, carefully remove the comb and the clamp, then clean the comb. 8. Put the glass plates against the body tank, then put the sideboard pressure on the glass plate 9. Fasten the four knobs in accordance with the direction Page 8 of 10...
- Page 9 10. Add the electrophoresis buffer into the upper and lower buffer containers. The upper buffer should be higher than the underside of the concave glass plate by 10mm. 11. Connect the power supply and set the value of constant power at 70~80W for preparatory electrophoresis.
-
Page 10: Notice
14. Connect to the electrophoresis power supply and select the optimum voltage. 15. After the electrophoresis, a. Immediately turn off the power supply b. Unplug the wire electrode c. Carefully pour the electrophoresis buffer d. Release fastening knobs e. Remove the glass plates NOTICE •...
Need help?
Do you have a question about the BTLab SYSTEMS BT209 and is the answer not in the manual?
Questions and answers