Table of Contents
Advertisement
Quick Links
Advertisement
Table of Contents

Summary of Contents for Whisper Tech GEN PPS16
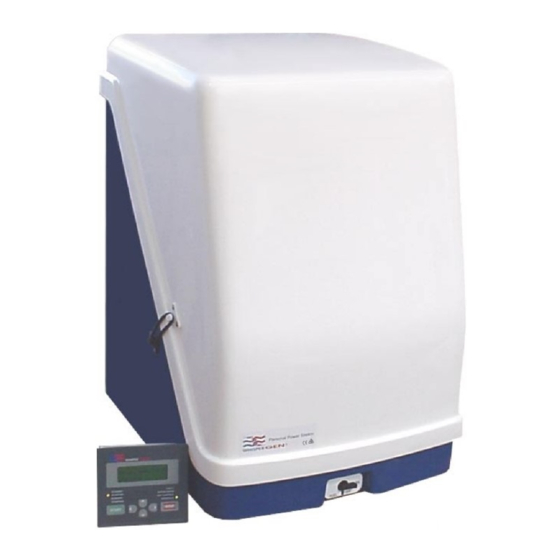
- Page 1 Personal Power Station User’s Manual PPS16 Marine and Land Version Kerosene or Diesel Fuel 12 or 24 Volt Battery Bank Capacity Personal Power Station STANDBY FAULT STARTING AUTOCHARGE RUNNING EXT CONTROL STOPPING HEAT MANAGE START STOP FUEL HISPER IMITED...
- Page 2 Whisper Tech Ltd. reserves the right to revise or change the specifications of its products. This publication describes the state of this product at the time of its publication and may not reflect the product at all times in the future.
- Page 3 Whisper Tech used all due care in preparing this manual. However, Whisper Tech accepts no liability for errors or omissions. Whisper Tech reserves the right to change the specifications of its products, or the information in this manual, without necessarily giving its users notice thereof.
-
Page 4: Table Of Contents
Table of Contents INTRODUCTION The WhisperGen ......................... 1,2 Introduction..........................1 What it does ..........................1 How it works ..........................2 Typical Marine Application ......................3,5 Typical Land Appliction ....................... 4,5 Technical Specifications......................6,7 Summary of Parts........................8,9 Control Panel Parts ........................10 Safety Precautions ........................11-15 OPERATION Introduction........................... - Page 5 MAINTENANCE Introduction ..........................45 Maintenance Schedule......................45,46 Removing the Enclosure Lid ......................47 General Checking ........................48 Checking the Fuel ........................49 Bleeding the Fuel Line ......................50-52 Cleaning the Fuel Pump Filter....................53-54 Checking the Coolant........................55 Bleeding the Coolant Circuit....................56-59 Checking Battery Bank Connections..................
-
Page 6: The Whispergen
The WhisperGen Introduction Congratulations on purchasing a WhisperGen PPS16. This manual is designed to allow you to quickly learn how to safely operate your WhisperGen. Please keep this manual for future reference and read it before operating or maintaining your WhisperGen. -
Page 7: How It Works
How It Works The WhisperGen PPS16 is based on a four-cylinder Stirling-cycle (external combustion) engine that repeatedly heats and cools a mass of pressurised nitrogen gas. Each time the gas is heated and cooled, the changing gas pressure causes the pistons to move up and down. This mechanical motion, via a special mechanism called the “wobble yoke”, rotates an alternator to generate DC electricity which can be used to charge a lead-acid battery bank. -
Page 8: Typical Marine Application
Typical Marine Application... -
Page 9: Typical Land Appliction
Typical Land Appliction... - Page 10 Description WhisperGen PPS16. Engine Block. Exhaust heat exchanger. Coolant header tank. Coolant pump. Hot water cylinder (optional). Space heater (optional). Marine heat exchanger. Seawater pump. Electronics enclosure. Current shunt. DC appliances (12/24 Volt). Inverter (DC to 230/110 Volt AC). Electrical appliances (230/110 Volt AC). Battery bank (12/24 Volt).
-
Page 11: Technical Specifications
Technical Specifications Specifications subject to change without notice Feature Specification Remark Prime mover 4-cylinder Stirling-cycle engine Closed thermodynamic cycle. pressurised to 28 bar with nitrogen. Power output Co-generation of heat and electricity. Heat 5kW useable heat. Heat output depends on operating conditions. - Page 12 Feature Specification Remark Cooling system Cooling method Primary Cooling: Removes heat from engine. Automotive type glycol-based corrosion-inhibited antifreeze. Secondary Cooling: Heat is transferred to hot water Water-cooling (marine applications). cylinder(s) and space heater(s). External Radiator (land applications). Heat exchangers Internal exhaust and marine heat Requires external coolant pump exchangers.
-
Page 13: Summary Of Parts
Summary of Parts Personal Power Station STANDBY FAULT STARTING AUTOCHARGE RUNNING EXT CONTROL STOPPING HEAT MANAGE START STOP FUEL WTL0005... - Page 14 Name Function Enclosure The fibreglass-reinforced cover that protects the internal parts of the WhisperGen. Electronics Enclosure The electronics, including a microcomputer, that controls all WhisperGen functions and regulates power supply to and from the WhisperGen and battery bank. Fuel Valve A manually operated valve that isolates the WhisperGen from its fuel supply, stopping combustion and shutting...
-
Page 15: Control Panel Parts
Control Panel Parts STANDBY FAULT STARTING AUTOCHARGE RUNNING EXT CONTROL STOPPING HEAT MANAGE START STOP WTL0006 Name Function START Key The key that: (a) Starts up the WhisperGen; (b) Begins battery bank bulk-charging; and (c) Clears faults. SELECT Keys The arrow keys that provide access to system menus for; (a) Information display;... -
Page 16: Safety Precautions
Safety Precautions Please read and understand this section ENTIRELY before operating or maintaining the WhisperGen. Not heeding the warnings or recommendations could damage the WhisperGen, cause personal injury, WTL0000 and/or void the warranty. In some countries, this manual must be permanently placed alongside the WhisperGen and maintained in a readable condition. - Page 17 Never remove the burner earthing strap as this will cause the fuel line to act as the earthing path for the glow plug. The fuel could heat up, causing a malfunction or a fire. WTL0024 Do not use fuels other than the specified class of fuel as this may damage the WhisperGen and/or cause a fire.
- Page 18 Do not operate the WhisperGen in a potentially explosive environment. Personal Power Station FUEL WTL0063 Do not store rags or other items inside or beside the WhisperGen as the air circulation through the WhisperGen may be disrupted. Personal Power Station FUEL WTL0064 Do not drill holes in the enclosure.
- Page 19 During normal operation of the WhisperGen, the enclosure lid and electronics enclosure lid must be fitted. Personal Power Station FUEL WTL0010 Bake Time____ OPEN START Do not sit anything on the WhisperGen or press down hard on the top. Personal Power Station FUEL WTL0059 Do not expose the WhisperGen to large physical impacts.
- Page 20 1. Check x Ensure that maintenance procedures and schedules as 2. Check y recommended in this manual are adhered to at all times. 3. Clean p 4. Clean q WTL0069 Perform maintenance procedures mentioned in this manual only. If in doubt, call your authorised WhisperGen service agent.
-
Page 21: Operation
Operation Introduction This section outlines the procedure for operating your WhisperGen. It will show you how to: • Start and stop the WhisperGen; • Charge the battery bank; • Manage heat generation; • Clear faults and warnings; • Adjust the contrast of the LCD; and •... -
Page 22: Information Structure
Information Structure The information displayed on the control panel is structured as shown below. For an explanation on how to navigate within this information structure, individual parameter meanings and edit settings refer the section entitled Displaying System Information. User Fault / Warning Extra Info Menu Menu... -
Page 23: Starting The Whispergen
Starting the WhisperGen To manually start the WhisperGen: 1. Check that the STANDBY indicator on the control panel is lit. If the fault indicator is constantly lit, you will need to clear the fault – see section entitled Clearing Faults and Warnings. If nothing is displayed on the control panel, check that the WhisperGen is connected to the battery bank and that the 3A fuse (F2 position as marked on PCB) is not blown. - Page 24 3. Hold down START on the control panel until all indicators flash and a beep is heard. The STARTING indicator will light up and “Manual start” will be displayed on the control panel. As an anti-tamper feature, short presses of the START key are ignored. Manual start STANDBY FAULT...
-
Page 25: Stopping The Whispergen
Stopping the WhisperGen Manual Stopping The default setting of the Heat Manage option is OFF. Unless it is turned ON, the WhisperGen automatically stops once the battery bank is fully charged - you do not need to manually stop the unit. -
Page 26: Emergency Stopping
Emergency Stopping To stop the WhisperGen in an emergency: 1. Turn off the fuel valve in front of the WhisperGen. FUEL Personal Power Station WTL0012 FUEL The flame in the WhisperGen burner will be extinguished within a few seconds. The fuel cut-off will be registered as a fault and the WhisperGen will stop. -
Page 27: Setting The Maximum Run Time
Setting the Maximum Run Time If the WhisperGen is started manually or from a remote switch, you can limit the operating duration of the WhisperGen by setting a maximum operating time. To set the maximum operating time of the WhisperGen: <... - Page 28 > 3. Press to display the first item on the User Menu Heat Manage STANDBY FAULT STARTING AUTOCHARGE RUNNING EXT CONTROL STOPPING HEAT MANAGE START STOP WTL0006 ∨ 4. Press to scroll down to Max Run Hours. Max Run Hours STANDBY FAULT STARTING...
- Page 29 ∧ ∨ 6. Press to select the maximum number of operating hours for the WhisperGen. If 25 (hours) is selected, the WhisperGen will run continuously until the battery bank is fully charged. Max Run Hours STANDBY FAULT STARTING AUTOCHARGE RUNNING EXT CONTROL STOPPING HEAT MANAGE...
-
Page 30: Remote Controlling
Remote Controlling You can start and/or stop the WhisperGen using a remote on/off switch, timer, or thermostat, if one of these is fitted. To set the remote switch to start/stop the WhisperGen: 1. Access the User Menu on the control panel – follow steps 1 to 3 of the procedure outlined in the section entitled Setting the maximum Run Time. - Page 31 < 5. Press to quit editing Ext. Control. ∨ 6. Press to scroll down to Ext Cont Mode. > 7. Press to begin editing the external control mode setting. ∧ ∨ 8. Press to select an option: 1, 2 or 3. These options are described in the table below. Setting Control Options Control Logic...
-
Page 32: Managing The Battery Bank
Managing the Battery Bank Stages of Charging Every time the WhisperGen is operated, it charges the battery bank. There are three stages in a typical charging cycle as shown below: Time Bulk-charging Absorption-charging Float-charging Time Bulk-charging Absorption-charging Float-charging The battery bank is The battery bank is The charged state charged at the... -
Page 33: Auto-Charging The Battery Bank
Auto-Charging the Battery Bank You can set the WhisperGen to automatically start and charge the battery bank when the battery bank charge level is low. To set the WhisperGen to auto-charge the battery bank: 1. Access the User Menu on the control panel – follow steps 1 to 3 of the procedure outlined in section entitled Setting the Maximum Run Time. -
Page 34: Bulk-Charging The Battery Bank
With the Auto-charge option turned ON, the WhisperGen will automatically start whenever the battery bank charge level falls below a preset level. This “threshold” level is set during the installation of the WhisperGen according to the needs of your particular application. If you wish to change it, contact your authorised WhisperGen agent. -
Page 35: Managing Heat Generation
Managing Heat Generation Setting the Coolant Temperature Whenever it is running, the WhisperGen regulates the temperature of the coolant circulating through it. The coolant is used for space and domestic water heating. By default, the temperature of the coolant is maintained at approximately 60°C. You may however set the coolant temperature to any temperature from 45°C to 70°C. -
Page 36: Turning On Heat Management
Turning On Heat Management Whenever it is running, the WhisperGen maintains the coolant temperature at approximately the set point until the battery bank is fully charged. When the battery bank is fully charged, the WhisperGen stops and returns to the standby mode and the coolant temperature is no longer maintained. -
Page 37: Clearing Faults And Warnings
Clearing Faults and Warnings There are two types of errors that the WhisperGen automatically detects, as described below: Error Type Meaning Indication Warning Error that is minor or which • The FAULT indicator on the control panel indicates that a fault might be flashes while the error exists. - Page 38 When the WhisperGen is started, any warning present is automatically cleared. To manually clear a warning: 3. Access the main menu on the control panel – follow steps 1 and 2 of the procedure outlined in section entitled Setting the Maximum Run Time. ∨...
- Page 39 > 6. Press to begin clearing the warning. Warning Code [102] Edit to clear STANDBY FAULT STARTING AUTOCHARGE RUNNING EXT CONTROL STOPPING HEAT MANAGE START STOP WTL0006 ∨ 7. Press to clear the warning. The Fault indicator turns off. Warning Code STANDBY FAULT STARTING...
-
Page 40: Adjusting The Lcd
Adjusting the LCD Adjusting the Contrast The control panel has a liquid-crystal display (LCD) which shows system information. The contrast of the LCD can be manually adjusted. To increase the contrast of the LCD: < ∧ Hold down repeatedly until the desired contrast is achieved. STANDBY FAULT STARTING... -
Page 41: Adjusting The Backlight
Adjusting the Backlight The LCD has a backlight which allows the LCD to be more clearly seen in dark environments. The backlighting can be manually adjusted. To adjust the LCD backlight: < > 1. Hold down press repeatedly until the desired level of backlighting is achieved. Three levels of backlighting are available namely: high, low, and off. -
Page 42: Displaying System Information
Displaying System Information Available Information The control panel displays information regarding the status of the WhisperGen system. The following information, structured as shown in section entitled Quick Reference - Information Structure, may be obtained from the control panel: Default Display Parameter Meaning Typical Range... -
Page 43: User Menu
User Menu Parameter Meaning Typical Range Heat Manage The heat management function – see section ON or OFF (default). entitled Turning on heat mangement. Temp Setpoint The temperature in °C that the coolant is to 45 to 70°C (default is 60°C). be maintained at during operation of the WhisperGen –... -
Page 44: Extra Info Menu
Extra Info Menu Parameter Meaning Typical Range Alt Current The electric current in Amperes that is 12V: -20 to 75A. being generated by the WhisperGen 24V: -10 to 37A. alternator. Positive values indicate current generation and negative values current flow to the WhisperGen from the battery bank during cranking. -
Page 45: Installation Menu
Extra Info Menu Parameter Meaning Typical Range Isolate Relay The position of the main electrical isolator ON or OFF. relay located inside the WhisperGen. It should be ON when the WhisperGen is operating. Power Relay The power supply to ancillary components ON or OFF. -
Page 46: Displaying Information
Displaying Information Information displayed on the control panel is structured as shown in the section entitled Quick Reference - Information Structure. The default display is the highest level on the information structure. If no keys are pressed for a few minutes, the control panel defaults to the last displayed parameter on the default display. - Page 47 To display a menu at a higher level: < 3. Press . For example, if Alt Current is displayed initially, then to display the main menu, < press To scroll up within a menu: ∧ 4. Press . For example, if Bus Voltage is displayed initially, then to display Alt Current, press ∧...
-
Page 48: Editing Parameter Settings
Editing Parameter Settings Information displayed on the control panel is structured as shown in section entitled Quick Reference. The settings of all the parameters under the User Menu and Installation Menu can be edited. The Warning Code Edit to clear parameter under the Fault/Warning Menu can also be edited. - Page 49 ∧ ∨ 3. Press to edit the setting. In the above example, if the existing setting is OFF and you ∧ wish to turn on auto-charging, then press to change the setting to ON. Auto-charge STANDBY FAULT STARTING AUTOCHARGE RUNNING EXT CONTROL STOPPING HEAT MANAGE...
-
Page 50: Introduction
Maintenance Introduction This section outlines maintenance procedures for your WhisperGen. It will show you how to: • Develop a basic maintenance routine for the WhisperGen; • Maintain the fuel and coolant systems; • Check the battery bank connections; and • Replace the glow plug, fuses, FID, oxygen sensor, and evaporator. - Page 51 The following procedures may need to be carried out if faults develop: Procedure When Bleeding the fuel line. See section - Bleeding the fuel • When there is air trapped in line. the fuel line. • After a fuel run-out occurs. •...
-
Page 52: Removing The Enclosure Lid
Removing the Enclosure Lid The enclosure lid protects the internal parts of the WhisperGen and is held in place by two rubber rings. Some maintenance and troubleshooting procedures require the enclosure lid to be removed. To remove the enclosure lid: 1. -
Page 53: General Checking
General Checking The following general checking routine helps to ensure the proper functioning of the WhisperGen and should be performed every six months. 1. Start the WhisperGen. 2. Check that the WhisperGen exhaust does not contain high levels of smoke. When the WhisperGen first starts, smoke may be released initially. -
Page 54: Checking The Fuel
Checking the Fuel The fuel level should be checked regularly to ensure a constant fuel supply to the WhisperGen. How often the fuel needs to be checked and replenished depends on the operating conditions of the WhisperGen and the size of the fuel tank. In general, the WhisperGen consumes 0.5 to 0.85 litres of fuel per hour of operation. -
Page 55: Bleeding The Fuel Line
Bleeding the Fuel Line Filling a fuel tank that has run empty may introduce into the fuel line air bubbles that could cause the WhisperGen to malfunction. After filling an empty fuel tank, you must bleed the fuel line to remove any air bubbles that might be trapped in it. - Page 56 4. Uncrew the fuel line fitting on top of the burner. WTL0022 5. Connect a clear plastic hose to the exposed end of the fuel line, and allow the hose to drain into a container that will hold at least a litre of fuel. Fuel Line Plastic Hose...
- Page 57 > 8. Press to display the third item on the Installation Menu, Fuel Bleed. Fuel Bleed STANDBY FAULT STARTING AUTOCHARGE RUNNING EXT CONTROL STOPPING HEAT MANAGE START STOP WTL0006 > 9. Press to begin editing the fuel bleeding setting. ∧ 10.
-
Page 58: Cleaning The Fuel Pump Filter
Cleaning the Fuel Pump Filter Fuel supplied to the WhisperGen must have low levels of contamination. The fuel filter inside the fuel pump should be cleaned if faults related to fuel supply occur frequently or if the power output is constantly low. To clean the fuel filter: 1. - Page 59 5. Remove the filter from the fuel pump. WTL0028 6. Clean the filter by either blowing clean compressed air through it or by brushing it in clean diesel or kerosene. Do not use a cloth rag to clean or dry the filter Fuel Filter WTL0029 7.
-
Page 60: Checking The Coolant
Checking the Coolant The coolant level should be checked regularly to ensure a constant circulation of coolant through the WhisperGen. How often the coolant needs to be checked and replenished depends on the size of the coolant header tank and the coolant circuit. In general, you should check the coolant level at least once a month. -
Page 61: Bleeding The Coolant Circuit
Bleeding the Coolant Circuit Filling a coolant header tank in which the coolant level has fallen below the outlet level of the tank, may introduce into the coolant circuit air bubbles that could cause the WhisperGen to malfunction. Should this occur bleed the coolant circuit. - Page 62 > 5. Press to display the first item on the Installation Menu. Hx Nozzle Bleed STANDBY FAULT STARTING AUTOCHARGE RUNNING EXT CONTROL STOPPING HEAT MANAGE START STOP WTL0006 ∨ 6. Press to scroll down to Coolant Bleed 1. Coolant Bleed 1 STANDBY FAULT STARTING...
- Page 63 9. Get a clean rag ready. 10. Open the coolant-bleeding valve with a 6mm hex socket (or with a suitable key). Use the rag to absorb the coolant bleeding out. Oxygen Sensor Exhaust Heat Coolant-Bleeding Exchanger WTL0031 Valve ∨ 11. After the coolant pump has been running for five minutes, press to turn it off.
- Page 64 Repeat steps 3 to 7 to begin editing the coolant pump setting, and then press ∨ to turn off the coolant pump Coolant Bleed 1 STANDBY FAULT STARTING AUTOCHARGE RUNNING EXT CONTROL STOPPING HEAT MANAGE START STOP WTL0006 < 16. Optional: press repeatedly to return to the default display.
-
Page 65: Checking Battery Bank Connections
Checking Battery Bank Connections Power flows between the WhisperGen and battery bank via two power cables connected to the terminals of the battery bank. The WhisperGen also monitors the battery bank voltage, current, and temperature via electrical wires connected to the battery bank. If an electrical fault or warning occurs, these electrical connections may need to be checked –... - Page 66 6. Check that the electrical connections on the side of the electronics enclosure, as shown below, are intact. Before re-securing a wire/cable, first stop the WhisperGen and disconnect the WhisperGen from the battery bank by opening the circuit breaker. If stopping the WhisperGen to re-secure a wire/cable, heed the warning given at the beginning of this section to prevent unintentional starts of the WhisperGen.
-
Page 67: Replacing The Glow Plug
Replacing the Glow Plug Should a “Glowplug cct fault” error message be displayed on the control panel, and the glow plug circuit fuse is intact, it may be necessary to replace the glow plug. In general, you should check the glow plug circuit fuse before deciding to replace the glow plug. To replace the glow plug: 1. - Page 68 5. Remove the glow plug. The glow plug may be hot. Glow Plug WTL0035 6. Insert a new glow plug with a washer into the evaporator and fasten the glow plug securely with a torque of 20 to 25Nm. Do not touch the wire coil on the new glow plug, as this will shorten its life span.
-
Page 69: Replacing Fuses
Replacing Fuses Replacing the Battery Bank Voltage Fuse The WhisperGen detects the voltage of the battery bank via two wires connected to the terminals of the battery bank as shown below. If the battery bank voltage displayed on the control panel is abnormal, it may be that the fuse in the circuit has blown. - Page 70 Replacing Other Fuses The WhisperGen has fuses that protect against overloading of its electrical circuits. If a circuit is overloaded, the fuse will blow and the WhisperGen will shut down with the fault indicated on the control panel. Before replacing a fuse, find out the cause of the fault. Otherwise, damage to equipment may occur.
- Page 71 4. Remove the appropriate fuse and check if it has blown. The fuses are located at the bottom of the electronics enclosure and are marked with their current ratings in Ampere. Error codes displayed on the control panel help identify which circuit and therefore which fuse may possibly have blown.
-
Page 72: Replacing The Fid
Replacing the FID The condition and vertical position of the flame ionisation detector (FID) should be checked if error codes 58, 59, 60, 61, or 62 occur repetitively. To check and/or replace the FID: 1. Stop the WhisperGen and wait until the STANDBY indicator on the control panel is lit. To prevent unintentional starts of the WhisperGen, heed the warning given at the beginning of this section. - Page 73 the electrode tip. If the FID is cracked, has less than one millimetre of the electrode protruding, or has electrical discontinuity, it should be replaced with a new one. Otherwise, the FID is re-usable. Replace if cracked Replace if there is electrical discontinuity (open circuit) Replace if...
- Page 74 9. Lift the wire up by 6mm (no less than 5mm and no more than 8mm) and put a second mark on the wire at the top level of the evaporator. 6 mm First mark Wire Second mark Evaporator WTL0043 10.
-
Page 75: Replacing The Oxygen Sensor
Replacing the Oxygen Sensor The oxygen sensor should be replaced if error codes 10, 14, 56, 60, 61, 62, or 76 occur repetitively. In general, you should check the FID before deciding to replace the oxygen sensor. To replace the oxygen sensor: 1. - Page 76 5. Remove the oxygen sensor. WTL0047 6. Insert a new oxygen sensor into the oxygen sensor hole. Note: the ferrules should already be set in position on the oxygen sensor. The ferrules should be distanced 60mm from the sensing tip of the oxygen sensor. Do not touch the sensing tip of the oxygen sensor, as this will shorten its life span.
-
Page 77: Replacing The Evaporator
Replacing the Evaporator The evaporator should be replaced if error codes 10, 58, 59, 60, 61, or 62 occur repetitively. In general, you should check and/or replace the FID and oxygen sensor before deciding to replace the evaporator. To replace the evaporator: 1. - Page 78 5. Undo the four screws on top of the evaporator. Evaporator (top view) Burner WTL0049 6. Lift the evaporator out of the burner. WTL0050 7. Place the evaporator gasket on the new evaporator, ensuring that all the holes line up. WTL0051...
- Page 79 8. Insert the new evaporator with the gasket into the burner and secure the four screws. 9. Check that the FID slides freely into the burner. If necessary, loosen the four evaporator screws and readjust the position of the evaporator before re-tightening them. 10.
-
Page 80: Flushing The Exhaust Heat Exchanger
Flushing the Exhaust Heat Exchanger The exhaust heat exchanger should be kept free from blockages to ensure optimum performance of the WhisperGen. In general you should flush the exhaust heat exchanger at least every 3 months. If the exhaust heat exchanger becomes blocked the performance of the WhisperGen will decrease. - Page 81 ∨ 5. Press to scroll down to heat exchanger nozzle bleed. Hx Nozzle Bleed STANDBY FAULT STARTING AUTOCHARGE EXT CONTROL RUNNING STOPPING HEAT MANAGE START STOP WTL0006 > 6. Press to begin editing the heat exchanger bleed setting. ∧ < 7.
- Page 82 8. Once the heat exchanger bleed shows OFF repeat steps 6 and 7 two more times. Hx Nozzle Bleed STANDBY FAULT STARTING AUTOCHARGE EXT CONTROL RUNNING STOPPING HEAT MANAGE START STOP WTL0006 This flushes the system a total of 3 times. <...
-
Page 83: Trouble Shooting
Trouble Shooting The WhisperGen automatically alerts the user to most errors. Errors may be faults or warnings. If a fault occurs, the WhisperGen will automatically clear the fault and attempt to restart. By default, the WhisperGen will attempt to restart once. If you wish to change this setting, contact your authorised WhisperGen agent. - Page 84 Code Error Message Likely Cause and Recommended Action Air supply fail Likely cause: Air blower tachometer signal out of range, obstruction of impeller, or electrical fault. Recommended Action: Check connections and presence of any obstructions. Restart. O2 sensor failure Likely cause: Absence of normal signal from oxygen sensor, or faulty oxygen sensor.
- Page 85 Code Error Message Likely Cause and Recommended Action Glowplug cct fault Likely cause: Glow plug faulty and/or glow plug fuse blown. Recommended Action: Check glow plug fuse. If the fuse is intact, replace the glow plug and restart. If the fuse is blown, replace both the glow plug and fuse.
- Page 86 Code Error Message Likely Cause and Recommended Action Heatup failure Likely cause: Failure to reach cranking temperature within eight minutes. Thermocouple failure or poor flame strength. Recommended Action: Check fuel level, fuel valve, and fuel filter. Check exhaust for blockage. Attempt to restart, contact an authorised WhisperGen service agent if problem reoccurs.
-
Page 87: Correcting Warnings
Code Error Message Likely Cause and Recommended Action Battery overtemp Likely cause: Battery bank temperature too high for safe charging. Recommended Action: Check battery bank connections and ventilate battery bank compartment. Restart. Clamp failed off Likely cause: Abnormal electrical condition, possibly resulting in raised battery voltage. - Page 88 Likely cause: Engine coolant hotter than normal. Recommended Action: Check coolant level. Check coolant and seawater circuits for obstructions. Check pumps for operation. Likely cause: Temperature in electronics enclosure abnormally high. Recommended Action: Ensure ambient temperature is below 40°C. Ensure airflow from the base of the enclosure through to the electronics heat sink is not blocked.
-
Page 89: Resetting The Whispergen
Resetting the WhisperGen Resetting the control Panel Due to unusual circumstances, the control panel may sometimes display an incoherent message. If this happens, the control panel should be reset. When performing trouble shooting tasks on the WhisperGen, refer to the applicable section(s) when removing or replacing parts. To reset the control panel: 1. - Page 90 2. Remove the four screws in front of the electronics enclosure. Then remove the electronics enclosure cover. Electronics Enclosure Cover FUEL WTL0052 3. Unplug and then re-plug in the second fuse from the bottom - the fuse that has a current rating of 3A.
-
Page 91: Service Details
Service Details Authorised WhisperGen service agents who commission and/or service the WhisperGen should fill in this section. The duplicate copy of the commissioning details should be detached and returned to your authorised service agent within 14 days of the commissioning date. Commissioning Engine Serial No. - Page 92 Duplicate Important: Transcribe details from the last page to this page. Then detach this sheet and return it to your authorised service agent within 14 days of the commissioning date. Engine Serial No. Commission Date Software Version Commission Date Customer’s Address Heat Manage Temp Setpoint Auto-charge...
- Page 93 Servicing Date / Hours Description of Work Done Agent ’ s Stamp DD MM YY Hour Meter Reading DD MM YY Hour Meter Reading DD MM YY Hour Meter Reading DD MM YY Hour Meter Reading...
- Page 94 Date / Hours Description of Work Done Agent ’ s Stamp DD MM YY Hour Meter Reading DD MM YY Hour Meter Reading DD MM YY Hour Meter Reading DD MM YY Hour Meter Reading...
-
Page 95: Ec Conformity
EC Conformity Manufacturer: Whisper Tech Ltd., 224 Armagh Street P.O. Box 13-705 Christchurch New Zealand Declares herewith that the WhisperGen PPS16 units: Comply with the relevant requirements of the following EC directives: 98/37/EC Machinery directive 89/336/EC, 92/31/EC, 98/13/EC EMC directive... - Page 96 CISPR 22 1997 Information technology equipment – radio disturbance characteristics – limits and methods of measurement. This declaration issued by: Bill Highet General Manager Whisper Tech Ltd. Date of issue: February, 2002 Place of issue: Christchurch, New Zealand.
-
Page 97: Index
Index Evaporator 62, 72 Absorption-charging 27 Air blower 8, 9 Exhaust heat exchanger 8, 9 External control 25 Application 3, 4, 5 Auto-charging 28 Fault 32, 78 Fault clearing 78 Backlighting of LCD 36 Battery bank 1, 27, 60, 64 Fault codes 78 Fault correcting 78 Battery bank voltage fuse 60, 64... - Page 98 Operating options 16 Operating time 22 Operation 16 Oxygen sensor 8, 9, 70 Parameters 37 Parameter settings 41, 43 Pump 3, 4, 5, 50, 53, 56 Quick reference 16 Remote controlling 25 Removing enclosure lid 47 Replacing evaporator 72 Replacing FID 67 Replacing fuses 64 Replacing glow plug 62 Replacing oxygen sensor 70...
Need help?
Do you have a question about the GEN PPS16 and is the answer not in the manual?
Questions and answers