Table of Contents
Advertisement
Quick Links
Model: AF1200
Batch: PR4313
CAUTION:
TO AVOID DAMAGE TO YOUR BENCH TOP AND SPLASH BACK, DO NOT PLACE AIRFRYER
DIRECTLY ON BENCH TOP.
Please use air fryer on heat proof material and on a dry, level and even surface. Leave a
minimum distance of 20cm from walls and other heat sensitive materials.
THIS APPLIANCE IS INTENDED FOR HOUSEHOLD USE ONLY.
PLEASE READ AND RETAIN INSTRUCTIONS FOR FUTURE REFERENCE.
Advertisement
Table of Contents

Related Manuals for Healthy Choice PR4313


Summary of Contents for Healthy Choice PR4313
- Page 1 Model: AF1200 Batch: PR4313 CAUTION: TO AVOID DAMAGE TO YOUR BENCH TOP AND SPLASH BACK, DO NOT PLACE AIRFRYER DIRECTLY ON BENCH TOP. Please use air fryer on heat proof material and on a dry, level and even surface. Leave a minimum distance of 20cm from walls and other heat sensitive materials.
-
Page 2: About This Product
The illustrations used in the manual are to illustrate the operation method and structure of the product. Where there is a small difference between the physical item and the illustrations, please take the physical as the standard. ABOUT THIS PRODUCT: Your personal chef has arrived–... -
Page 3: Important Safeguards
CAUTION: TO AVOID DAMAGE TO YOUR BENCH TOP AND SPLASH BACK, DO NOT PLACE AIR FRYER DIRECTLY ON BENCH TOP. Please use air fryer on heat proof material and on a dry, level and even surface. Leave a minimum distance of 20cm from walls and other heat sensitive materials. Do not place the appliance against a wall or against a wall or against other appliances. - Page 4 9. To protect against electric shock, do not immerse the cord, plug, or appliance in water or any other liquid. Do not expose the appliance to dripping or splashing and ensure that no objects filled with liquids such as vases are placed on the appliance. Do not put any water or other liquid into the main housing of the appliance through the vents.
-
Page 5: Short Cord Instructions
22. Do not touch the hot surfaces. The appliance’s outer surfaces may become hot during use. The rolling cage and rotisserie fork set will be hot. Wear oven mitts or use the cage tongs to remove it. Wear oven mitts when handling the mesh pieces and drip tray. 23. -
Page 6: Preparation For Use
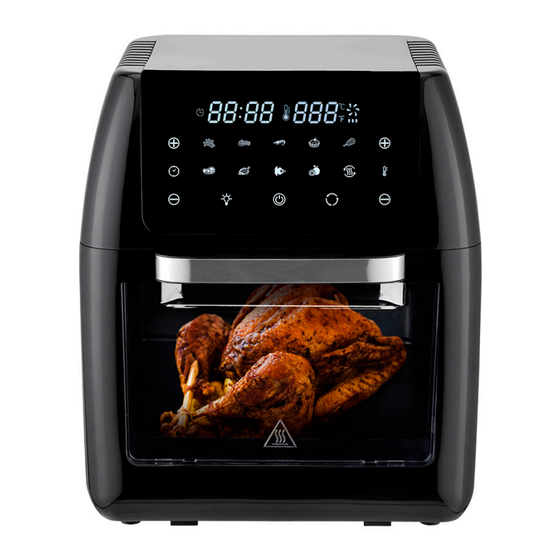
PREPARATION FOR USE: Before using the air fryer for the first time: Warning: when using for the first time, the air fryer may emit slight odour which is not harmful and will disappear after a few minutes. This is because a protective oil was applied to protect parts from possible friction in transport. - Page 7 PARTS: 7. Mesh tray 1. Main unit 8. 3 x mesh racks 2. Air inlet 9. Drip tray 3. Hot air outlet 10. Rolling cage 4. Control panel 11. Rotisserie fork set 5. Door handle 12. Cage tongs 6. Transparent door...
- Page 8 PRODUCT USE AND ACCESSORIES: * Choose an accessory to use for different cooking styles. 1. Mesh tray • The mesh tray can be used as a protection cover to prevent food from contacting the heating element at the top of the air fryer. •...
- Page 9 4. Rolling cage • Great for chips, popcorn and roasting nuts. • Use the clasp to open and lock the rolling cage. • To install the rolling cage, slide in the rotisserie stick (on the cage) with the gear towards the left, then secure the grooves on the other end of the rotisserie stick (on the cage) into the rotating shelf.
- Page 10 6. Cage tongs • Use to remove roasts or chicken which have been cooked using the rotisserie and also for removing the rolling cage from the air fryer. • Place under the rotisserie stick and then lift gently. REMOVEABLE DOOR: •...
-
Page 11: Control Panel
CONTROL PANEL: Power / start–stop button: once the air fryer is plugged in, it will beep once, then the screen will light up and then go off. The power button will remain illuminated. • Press the power button and hold down for 3 seconds to turn the screen on. •... - Page 12 Time control icon: press the + or – buttons next to this icon to increase or decrease the cooking time. • The cooking time range is 1 – 60 minutes, set in 1-minute increments, on all of the cooking preset programs except for dehydrate. •...
-
Page 13: Cooking Chart
COOKING WITH THE AIR FRYER: 1. Place the food onto a mesh rack, on the rotisserie fork set or into the rolling cage. 2. Place the food and chosen accessory into the air fryer and close the door. Plug the power cord into a 220-240V dedicated outlet. -
Page 14: Making Home Made Chips
Food Time Temperature Additional information Stuffed vegetables 10 mins 160°C Cake 20 – 25 mins 160°C Use a baking dish Quiche 20 – 22 mins 180°C Use a baking dish Muffins 15 – 18 mins 200°C Use a baking dish Sweet snacks 20 mins 160°C... -
Page 15: Troubleshooting
TROUBLESHOOTING: Problem Possible cause Solution The appliance is not The air fryer Put the mains plug in an earthed wall plugged into the does not work. socket. mains power. There is too much food Use smaller batches for more even inside the rolling cage. -
Page 16: Frequently Asked Questions
FREQUENTLY ASKED QUESTIONS: 1. Can I prepare foods other than fried dishes with my air fryer oven? You can prepare a variety of dishes including steaks, chops, burgers, and baked goods. 2. Is the air fryer oven good for making or reheating soups and sauces? Never cook or reheat liquids in the air fryer oven. -
Page 17: Technical Specifications
• To clean the removeable door, open the door to a 30 angle and gently remove it by sliding it out and upwards. The door can be washed in warm soapy water. • Do not immerse the power cord, plug or the housing body in water or any other liquids as it may result in damage, fire, electric shock or injury.
Need help?
Do you have a question about the PR4313 and is the answer not in the manual?
Questions and answers