Table of Contents

Subscribe to Our Youtube Channel
Related Manuals for Ondas Networks Airlink WCP

Summary of Contents for Ondas Networks Airlink WCP
- Page 1 Airlink WCP User and Installation Guide Document Version 1.2 April 2021 Warning: Never power on a Airlink WCP without a load on the RF connector. Ondas Networks Inc. | 165 Gibraltar Court, Sunnyvale, CA 94089 | (888) 350-9994 | ondas.com...
-
Page 2: Table Of Contents
Table of Contents FCC Compliance ............................ 3 FCC Exposure Statement ........................3 System Overview........................... 4 Physical Installation ..........................5 Introduction ..........................5 Airlink WCP Enclosure ........................5 4.2.1 Specifications ........................5 4.2.2 Product Overview........................6 4.2.3 Connection Descriptions ....................... 8 4.2.4... -
Page 3: Fcc Compliance
1. This device may not cause harmful interference, and 2. This device must accept any interference received, including interference that may cause undesired operation. Changes or modifications not expressly approved by Ondas Networks could void the user’s authority to operate the equipment. 2 FCC Exposure Statement This equipment complies with the FCC RF radiation exposure limits set forth for a controlled environment. -
Page 4: System Overview
3 System Overview The Airlink WCP platform employs Ondas Networks’ FullMAX technology. The Airlink WCP makes up a wayside communications package, including the radio and associated software/hardware that enables the transmission of ATCS datagrams from the WIU to the BCPs and vice- versa. -
Page 5: Physical Installation
4 Physical Installation 4.1 Introduction A Airlink WCP radio is comprised of software and hardware which is packaged in an indoor enclosure intended for mounting in a 19” rack or directly attached to a wall board. 4.2 Airlink WCP Enclosure 4.2.1 Specifications... -
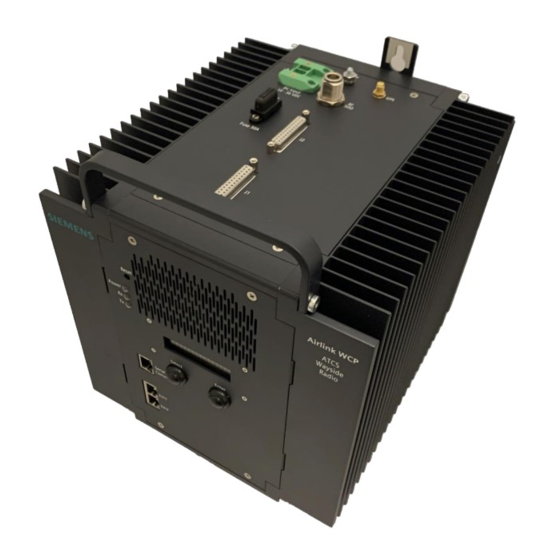
Page 6: Product Overview
4.2.2 Product Overview Figure 2 ; Airlink WCP Overview Page 6 of 10 April 2021... - Page 7 Figure 3 : Airlink WCP Front Panel Figure 4 : Airlink WCP Top Panel Page 7 of 10 April 2021...
-
Page 8: Connection Descriptions
4.2.3 Connection Descriptions Connector Application GPS Antenna SMA female connector for optional GPS antenna. RF Out 50Ω N-Type female connector for RF input from antenna DC Input DC power input 10 to 36 volts. Warning: Ensure Correct Polarity Ground Post Connection to building ground Fuse 30 amp Fuse... -
Page 9: Mounting Guidelines
4.2.4 Mounting Guidelines The Airlink WCP can be mounted in a purpose built rack using the teardrop pin mounting cutouts, or attached to a wall board as described below. Figure 5 : Airlink WCP Mounting Dimensions Page 9 of 10... -
Page 10: System Operation
5 System Operation An Airlink WCP radio automatically starts operation when the DC power is connected. The unit conducts a series of self-tests, the results of which are shown on the front panel display module. Figure 6 : Pushbuttons and Display Status information can be accessed using the “Select”...
Need help?
Do you have a question about the Airlink WCP and is the answer not in the manual?
Questions and answers