Table of Contents
Advertisement
Quick Links
Advertisement
Table of Contents

Summary of Contents for Structure Cycleworks SCW1
- Page 1 OWNERS MANUAL...
- Page 2 Welcome Congratulations on your purchase of a new Structure Cycleworks SCW1, welcome to our family. Undoubtedly you are eager to throw a leg over and blast down your favorite trails, but before you do so take the time necessary to properly build and test your bike before aiming it down those paths.
-
Page 3: Table Of Contents
Table of Contents Safety ....................4 -Components ..................5 Overview -Torque Specifications ................. 6 -Spare Parts ..................8 -Specifications ................... 10 -General Service and Care ..............11 Assembly -Unboxing and Basic Assembly ............12 -Suspension Shock Set-up Chart ............13 -Internal Cable/Hose Routing ............14-16 Maintenance -Colleted Axles Removal And Installation .......... -
Page 4: Safety
Keep this manual handy for reference. Excessive vibration or noise from the wheels, pivots, or frame indicates a serious problem. Stop riding immediately and consult It is strongly recommended that you follow Structure Cycleworks’ and your dealer. component manufacturers’ instructions where indicated in this manual, as many tasks should only be performed by a bicycle repair technician. -
Page 5: Components
Components We outline the basics of installation for each the components included on a complete bike purchase. If you find these instructions hard to follow or need a more step-by-step guide go to the manufacturers website and download the PDF or follow the online instructions or video. -
Page 6: Torque Specifications
Upper Steering Plate Bolt 6 Nm Torque Spec. Shock Bolt 6 Nm Triple Clamp Bolts 5 Nm Seat Clamp Bolt 4 Nm Shock Bolt Trunnion Bolts 6 Nm 10-11 Nm Seatstay to Rocker Bolts 10 Nm Colleted Axle Bolts Derailleur Hanger Bolts Hand tight then 3 Nm 3 Nm Collet Retention... - Page 7 Spherical Bearing Bolt 12 Nm Other Torque Spec. Steering Linkage to Side Bearings Bolts Headset preload 5mm Hex 3 Nm 6 Nm Seat rail clamp bolts 5mm Hex 8 Nm Remote bar clamp 3mm Hex 1 Nm Lower Steering Plate Bolt 6 Nm Remote cable clamp 3mm Hex...
-
Page 8: Spare Parts
Spare Parts... - Page 9 Most Common Spare Parts Listing and Number on Bike Part Number Description KQS 3791 Pivot bolt, rear triangle KQS 2723 Collet washer KQS 3785 Bolt Collet M8 KQS 3550 Rear derailleur hanger KQS 3793 Bearing spacer, rear triangle KQS 3792 Horst link pivot washer 6903-2RS Bearing 6903...
-
Page 10: Specifications
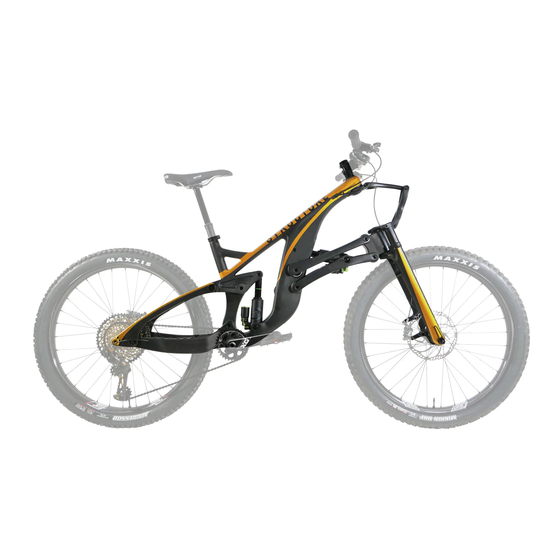
Specifications Frame-fork-set Details Frame/Fork Carbon fiber, including fork, linkages and rear triangle Travel 153mm front / 154mm rear Wheel size 27.5” (650b) Tire clearance 2.6” with generous mud clearance Hardware 17mm colleted aluminum through-axles, machined and engraved 7075 triple clamp Shocks (2) DVO Topaz / T3AIR custom tuned / 205x65 Trunnion mount Headsets (2) -
Page 11: General Service And Care
General Service and Care the bicycle for transportation on a motor vehicle, clamp the bicycle STORING by the wheels or fork. If you accidentally apply a bending force to the Store your bicycle where it will not be an obstacle and with protection fork, do not ride the bicycle until your retailer has inspected the fork from the elements. -
Page 12: Assembly
The SCW1 is delivered with three volume spacers in the positive air Locate fork, steering linkage, headsets and stem. Install the bumpers chamber of the front shock and three in the rear shock. This allows for... -
Page 13: Suspension Shock Set-Up Chart
into lower steering head and install top headset bearing and split race On the steering linkage, loosen all three cinch bolts on the triple on top of fork steerer tube (for fork only, set aside top cap, as it will clamp and carefully slide the triple clamp over the three tops of the not be used). -
Page 14: Internal Cable/Hose Routing
correctly orient the links before installing the upper steerer through the main frame headset. Install top cover, making sure split ring is in place. Using assorted 5mm and 10mm steerer spacers to set desired stem height, install the stem on the steerer. Tighten preload cap to set headset preload, applying no more than 4Nm of torque. - Page 15 the hose behind the olive and insert a hose plug. Then insert the hose end into the fork leg until it comes out the top hole and loosely bolt the caliper to the fork. Slightly loosen the banjo bolt and rotate the hose to an optimal position and re-tighten to 3Nm (27 in-lb) Determine the hose length for the front brake, ensuring that it is not long enough to contact the upper steering link when the suspension is fully compressed.
- Page 17 Determine the hose length for the rear brake after rotating the Insert drive side crank through bottom bracket and tap with soft handlebar bumper to bumper. Cut the hose and slide on cover, bolt mallet until seated. Attach the non-drive side crank with an 8mm and olive.
- Page 18 Set up - Test Ride The front wheel uses a QR style through axle. Once wheel is in position with rotor in caliper, thread the axle until hand tight, then pull lever outward and align lever arm with fork leg. Now you are ready to throw a leg over and check the setup.
-
Page 19: Colleted Axles Removal And Installation
A bearing puller is recommended for bearing removal. However, making sure that the bearing is sitting flush with the outer edge of the Structure Cycleworks bicycles are designed so that bearings may be cup, slowly draw the bearing into the cup with the bearing driver until driven out from the opposite side of the frame. -
Page 20: Brake Dive Reduction Eccentric Position
All SCW1 bikes are delivered to owners with the eccentric in the Plush Telescoping forks are approximately 30% pro-dive under application (17% dive reduction) setting. -
Page 21: Spherical Bearing Replacement
To install a colleted axle, prepare the axle with medium thread locker on the threads and a small amount of grease on the shaft. Make sure that the rubber seals of the bearing caps are fully seated on both sides of the frame and apply a smear of grease on the outer surface. -
Page 22: Maintenance
Maintenance BEFORE EVERY RIDE WEEKLY MONTHLY EVERY 3 MONTHS ANNUALLY/150 HOURS Check the frame and fork for signs of stress, Check that all bolts Check that the bottom bracket Inspect the drive Annual service at your dealer. Overhaul scratches, cracks, dents, deformation or are tightened to proper is tightened to proper torque train for wear... -
Page 23: Warranty
LIFETIME BEARING WARRANTY ITS PRODUCTS, INCLUDING WITHOUT LIMITATION DAMAGES FOR PERSONAL INJURY, Structure Cycleworks pivot bearings are warranted for life to the original owner of the PROPERTY DAMAGE, OR ECONOMIC LOSSES, WHETHER BASED ON CONTRACT, bike. The return process is simple: fill out the Warranty Bearing Replacement Form, WARRANTY, NEGLIGENCE, PRODUCT LIABILITY, OR ANY OTHER THEORY. - Page 24 Structure CycleWorks Calgary Alberta Canada 1 866 230 3567 service@structure.bike...
Need help?
Do you have a question about the SCW1 and is the answer not in the manual?
Questions and answers