
Summary of Contents for DNP WPS Pro
- Page 1 WIRELESS PRINT SERVER WPS Pro User Guide ©2020 DNP Imagingcomm America Corporation. ALL RIGHTS RESERVED REV: 09.27.2020 PN: DOC-U-WPS-PRO-R01...
-
Page 2: Table Of Contents
What’s New in this Version of WPS Pro®? ....... . . - Page 3 Connecting to the WPS Pro Wireless Network ........
- Page 4 Adding the Custom Borders to the WPS Pro ....... . .
- Page 5 WPS Pro User Guide Selecting Borders ................. 122 Simple Web Submission .
- Page 6 AGREE WITH THESE TERMS AND CONDITIONS, DO NOT DOWNLOAD OR USE THIS SOFTWARE. This Software License Agreement (the “Software License Agreement”) is an agreement entered into by and between you (hereinafter referred to as “You” or Your”) and DNP Imagingcomm America Corp.
- Page 7 SOFTWARE ADDRESSED IN THIS AGREEMENT. The information contained in this document represents the current view of DNP Imagingcomm America Corp. on the issues discussed as of the date of publication. Because DNP Imagingcomm America Corp. must respond to changing market conditions, it should not be interpreted to be a commitment on the part of DNP Imagingcomm America Corp., and DNP Imagingcomm America Corp.
- Page 8 WPS Pro User Guide Under Industry Canada regulations, this radio transmitter may only operate using an antenna of a type and maximum (or lesser) gain approved for the transmitter by Industry Canada. To reduce potential radio interference to other users, the antenna type and its gain should be so chosen that the equivalent isotropically radiated power (e.i.r.p.) is not more than that necessary for successful communication.
- Page 9 WPS Pro User Guide Με την παρούσα η PIPO Technology Co., Ltd. δηλώνει ότι Wireless Print Server συμμορφώνεται προς της ουσιώδεις απαιτήσεις και τις λοιπές σχετικές διατάξεις της οδηγίας 1999/5/ΕΚ. Για λεπτομέρειες παρακαλούμε όπως ελένξετε την ακόλουθη σελίδα του διαδικτύου: http://www.dnpphoto.eu/en/...
-
Page 10: Before You Begin
When in doubt, stop what you are doing and reassess the safety of the situation or procedure. Never continue with a step or procedure when there is the slightest doubt regarding safety. Save these instructions for future reference. DNP Imagingcomm America Corporation... - Page 11 Important Safety Instructions WPS Pro User Guide DNP Imagingcomm America Corporation...
-
Page 12: What's New In Version 3.0
What’s New in Version 3.0? What’s New in this Version of WPS Pro®? Please note that this update is for DNM IAM. The following is a list of new features in this version of WPS Pro: Support for QW410 ... -
Page 13: Finding Your Wps Pro® Id
To find the unique identifier for your device, look in the top right corner as shown here: Method 2: Test Print If Test Prints are enabled, simply look at the SSID on the Test Print. Test prints are printed when the WPS Pro® boots up. DNP Imagingcomm America Corporation... -
Page 14: Method 3: Tap Dnp Logo
Method 3: Tap DNP Logo WPS Pro User Guide Method 3: Tap DNP Logo Tap the DNP logo in the bottom right corner to reveal the info panel: DNP Imagingcomm America Corporation... -
Page 15: Wps Pro® User Interface
WPS Pro® User Interface WPS Pro User Guide WPS Pro® User Interface The WPS Pro® 3.0 software has a new look and a few new features. Review this section of the document and get acquainted with the interface changes. DNP Imagingcomm America Corporation... -
Page 16: Printer Status
Red: Error / Critically Low Media · Tap the printer icon to reveal more details: Name: The name of the printer attached to your WPS Pro® console. Status: Shows whether your system is idle, printing an image, etc. ... -
Page 17: Print Queue
WPS Pro User Guide Print Queue The print queue displays the images that are transferred to the WPS Pro® from the client device(s). The images are displayed from top left to bottom right, sorted by the most recently transferred file first. -
Page 18: Info Panel
Tapping the DNP logo in the bottom right corner will reveal the network and software version information. Performance & Storage The status bars in the bottom left corner of the WPS Pro® display performance and storage information: Processor Load U: USB Drive Space A: WPS Pro®... -
Page 19: Maintenance Menu
Shutdown WPS Pro® Powers off your WPS Pro® Clear Image Queue Clears the image queue on the WPS Pro ® and deletes files stored on the WPS Pro® internal drive. Clear FlashAir History Managing FlashAir Transfers section ... -
Page 20: Settings Menu
Settings Menu WPS Pro User Guide Settings Menu The settings menu in version 3 has added sections for the new features and also includes the same options as version 2. Print Status This screen provides you with information about the print jobs and gives you access to the notification history. -
Page 21: Qw410 Support
Print from Android version 9 and later No special apps required Enable AirPrint® To enable or disable AirPrint®, go to the WPS Pro® settings screen, scroll to the Networking settings section, and toggle the following settings: Enable Name Service AirPrint ... -
Page 22: Airprint® With Ios
AirPrint® with iOS WPS Pro User Guide AirPrint® with iOS Connect your iOS device to the WPS Pro® WIFI hotspot (WPS__XX). Use the password DNP2WPS3. Find an image on your iOS device. Use the Sharesheet button to print (you will need to scroll down to find the print icon). - Page 23 A tt en ti on IMPORTANT: WPS Pro only support up to five (5) copies of an image to be printed at one time. To print more than five (5) copies of an image, you need to resend the image.
-
Page 24: Airprint® With Macos
The AirPrint® image(s) will display on the on-screen print queue and begin printing. N o te It may take up to 30 seconds for the images to transfer to the WPS Pro® and begin printing depending on the file size and proximity of the device to the WPS Pro® hotspot. - Page 25 AirPrint® with macOS WPS Pro User Guide Select Add Printer. Find the desired printer and print size in the list. DNP Imagingcomm America Corporation...
- Page 26 AirPrint® with macOS WPS Pro User Guide Click Add. Your Mac will setup the Printer: DNP Imagingcomm America Corporation...
-
Page 27: Airprint® With Android
Click Print. AirPrint® with Android N o te AirPrint® is only compatible with Android versions 9 and up on the WPS Pro®. Connect your Android device to the WPS Pro WIFI hotspot (WPS__XX) Use the password DNP2WPS3 Find an image on your Android device... - Page 28 AirPrint® with Android WPS Pro User Guide Use the Share button to print N o te Methods for printing will vary depending on your Android device manufacturer. Screenshots below may not represent your version of Android. DNP Imagingcomm America Corporation...
- Page 29 The AirPrint® image(s) will display on the on-screen print queue and begin printing. N o te It may take up to 30 seconds for the images to transfer to the WPS Pro® and begin printing depending on the file size and proximity of the device to the WPS Pro® hotspot.
-
Page 30: Printing Borders With Airprint
Requires a Toshiba FlashAir Card Tested with Toshiba FlashAir card models W-02, W-03, W-04 No tethering cable required needed ONE FlashAir card can be paired with the WPS Pro® at a time. DNP Imagingcomm America Corporation... -
Page 31: Pairing Flashair Card With The Wps Pro
Pairing FlashAir Card with the WPS Pro® Windows Users For Windows users, there is a SD Card Utility available on the WPS Pro® in the maintenance area. You will need a USB drive to copy the file from the WPS Pro® to your Windows PC. - Page 32 Pairing FlashAir Card with the WPS Pro® WPS Pro User Guide Tap Save SD Card Utility to USB. DNP Imagingcomm America Corporation...
- Page 33 Pairing FlashAir Card with the WPS Pro® WPS Pro User Guide When prompted, insert the USB Drive into USB Slot 4: DNP Imagingcomm America Corporation...
- Page 34 Pairing FlashAir Card with the WPS Pro® WPS Pro User Guide Wait for the file transfer to complete (see prompts below), then remove the USB Drive from your WPS Pro®. DNP Imagingcomm America Corporation...
- Page 35 Run “WPS_SDRecovery_1.2.0.exe” from the folder where you extracted the files to your PC. Type in the 2-digit WPS Pro® ID into the form. Click SET. Your FlashAir card is now ready to pair with the WPS Pro®. DNP Imagingcomm America Corporation...
- Page 36 APPAUTOTIME=0 UPLOAD=1 MASTERCODE=dnpdnpdnpdnp LOCK=1 Change APPSSID to your WPS Pro® SSID. Ex : “WPS3__f5” N o te There are 2 UNDERSCORES after WPS3, then your WPS Pro® Once finished, put the FlashAir card in your camera and test the connection by following the instructions below.
-
Page 37: Transferring Images Via Flashair With Wps Pro
WPS Pro User Guide Transferring Images via FlashAir with WPS Pro® Configure FlashAir Settings: Enable FlashAir on your WPS Pro® console on the settings screen and set the transfer mode to DPOF or All New (Shoot- to-Print) modes. All New Mode (Shoot-to-Print) This mode will automatically transfer all new photos from the FlashAir card to the WPS Pro®... - Page 38 If you continue to have issues, please see the troubleshooting section below. The “C” meter indicates that your FlashAir card is connected to the WPS Pro® and the amount of free space left on the FlashAir card: DNP Imagingcomm America Corporation...
-
Page 39: Flashair History
WPS Pro User Guide Transferring Image(s) When the WPS Pro® finds new or DPOF images on your FlashAir card, it will display a message indicating that an image is transferring and will display that image in the print queue on the console. -
Page 40: Troubleshooting Flashair Card Issues
Troubleshooting FlashAir Card Issues: WPS Pro User Guide Select Ok. Troubleshooting FlashAir Card Issues: You MUST be using a Toshiba FlashAir W-02, W-03, W-04 card for the WPS Pro® to transfer images. DNP Imagingcomm America Corporation... - Page 41 Troubleshooting FlashAir Card Issues: WPS Pro User Guide If you are having trouble pairing your FlashAir card with the WPS Pro®, try running the SD Card Utility and click the Repair button: Select the Drive letter for your FlashAir card and the Toshiba version number.
- Page 42 Troubleshooting FlashAir Card Issues: WPS Pro User Guide Press “Enter” on your keyboard for both of these prompts: Optional: Name the FlashAir Card. Otherwise, click ENTER. Once complete, click OK. DNP Imagingcomm America Corporation...
-
Page 43: Simple Web Submission
Upload images via a simple web page with by enabling the Simple Web Submission setting. No apps are required. Any device with a web browser can transfer images to the WPS Pro®. Connect your device to the WPS Pro® Wi-Fi hotspot (WPS__XX) -
Page 44: Qr Code
Printer Firmware Check If your printer firmware is older than the latest firmware as of August 14, 2020, the WPS Pro ® will update the firmware on your DNP printer. To enable or disable the firmware checks, go to the Firmware settings on your WPS Pro®. -
Page 45: Supported Print Sizes
Supported Print Sizes Please see the chart below to see the print sizes available in the WPS Pro® version 3. The print settings can be filtered in the “Printing” section on the settings screen. Filtering the print settings limits the sizes that are broadcast from the WPS Pro®... - Page 46 Supported Print Sizes WPS Pro User Guide Print Size Print Setting Queue Name Width Height Media RX1-5x7 2138 1548 5x5sq Square RX1-5x5sq 1548 1540 3.5x5 1/2 Panel RX1-3.5x5 1548 1088 3.5x5*2 2 Strip RX1-2x3.5x5s 2176 1548 Print Size Print Setting...
- Page 47 Supported Print Sizes WPS Pro User Guide DS80 Print Size Info Queue Name Width Height 8x12 8x12 Media DS80-8x12 3636 2448 Partial DS80-4x8 2448 1236 4x8x2s 2 Strip DS80-4x8x2s 2502 2448 Partial DS80-5x8 2448 1536 5x8x2s 2 Strip DS80-5x8x2s 2502...
-
Page 48: Introduction
Manage your system wirelessly. Use the WPS Pro mobile apps to manage your network and printers while you’re on-the- move. With the WPS Print 2 Application, you can print from compatible iOS or Android mobile devices. In many cases you can even print from within other photo apps by using the share functionality! Use the WPS Status app to monitor your printer media usage, check to make sure your prints were transmitted, and troubleshoot network issues. -
Page 49: Getting To Know Your Wps Pro Device
When hooking up your WPS Pro device, you are only going to use the power port and up to two (2) USB ports; if you are connecting only one printer, you are going to use only one USB port. For more information, please “Setting Up the WPS Pro System”... -
Page 50: What Devices Can Send Prints To My Wps Pro
What devices can send prints to my WPS Pro? The WPS Pro device is compatible with the following input devices. You can connect up to five input devices at the same time, using any combination of devices as long as each device is connected wirelessly to the WPS Pro network. -
Page 51: System Requirements
System Requirements WPS Pro User Guide System Requirements WPS Pro supports the following: Windows 7, 8.1 or Windows 10 OS X 10.6 and later iOS 8 or later iPhone™/iPad™ Version 4.4 (KitKat) or later Android™ DS40 Supported Printers DS80 RX1-HS... -
Page 52: Installation
Installation Your WPS Pro box contains your WPS Pro unit and a power cable. Use the diagram below to find the ports you will need when using your system. Figure 1. WPS Pro Back View of Ports DNP Imagingcomm America Corporation... -
Page 53: Setting Up The Wps Pro System
Figure 2. WPS Pro Power Port Connect the printer(s) to the USB ports on the back and side of the WPS Pro device. If you are connecting only one (1) printer to the device, connect the printer USB cable to the lower USB port on the back of the device. - Page 54 A tt en ti on When you start or restart the WPS Pro device, it takes about three (3) minutes before the device is ready for use. Once the WPS Pro has started, the WPS Status app is displayed and a test print is automatically printed.
- Page 55 Setting Up the WPS Pro System WPS Pro User Guide While using your WPS Pro system, make sure that the WPS Status app is displayed on the console when you are ready to print. Figure 4. WPS Status App DNP Imagingcomm America Corporation...
-
Page 56: Connecting To The Wps Pro Wireless Network
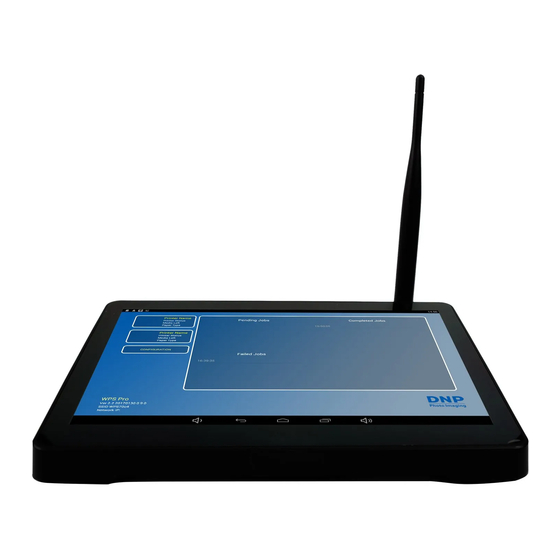
WPS Pro User Guide The touchscreen display shows you the type of printer(s) you have connected to the WPS Pro and the amount of media remaining in the connected printer(s). The touchscreen display also shows the last five (5) completed print jobs and any pending print jobs. -
Page 57: Connecting The Wps Pro To An Existing Network
You can connect the WPS Pro to an existing home or office network using an Ethernet cable. Connect the cable to the back of your WPS Pro unit and to a working network port on your router or network hub. At this time, you cannot bridge the WPS Pro device wirelessly to an existing network. - Page 58 Turning Off the WPS Pro WPS Pro User Guide Touch the Shutdown WPS Pro option. Your WPS Pro console will now powered OFF. DNP Imagingcomm America Corporation...
-
Page 59: Using Android Devices With Wps Pro
Be sure to follow the installation steps at “Setting Up the WPS Pro System” on page 53 before continuing. There are two transfer methods you can use to print from your Android Device to the WPS Pro network - web services or FTP. -
Page 60: Using Android Devices For Web Transfers (Mobile Apps)
WPS Pro network and the user. Currently, the companion app, WPS Print 2, use an HTTP interface to transfer images to the WPS Pro device for printing. While you can also use web services transfer on a PC or Mac computer, that method requires third party software development. -
Page 61: Printing From Android Devices Using The Wps Print 3 App
WPS Pro User Guide Printing from Android Devices using the WPS Print 3 App The WPS Print 2 app allows you to print existing images from your device’s photo gallery or photo album to the WPS Pro device. N o te When using this app, the images you take are saved in an album in your photo gallery or camera roll. - Page 62 Printing from Android Devices using the WPS Print 3 App WPS Pro User Guide At the WPS Print home screen, press the blue + button to open your image options. Select either the Camera or Gallery option from the menu.
- Page 63 Printing from Android Devices using the WPS Print 3 App WPS Pro User Guide To print images using your camera: If necessary, accept any app permissions. Once your device’s default camera application opens, take your picture. When you are returned to the WPS Print 2 application, view your image. If you are ready to print, press the Print ...
- Page 64 Use the Quantity scroll wheel to select your print quantities. Press the Print button to print your images. Your images are transmitted wirelessly from your Android device to the WPS Pro. Print times can vary depending on your image size, distance from the Wi-Fi device, and signal strengths.
-
Page 65: Using Android Devices For Ftp Transfers
FTP is built on a client-server architecture and uses separate control and data connections between the client and the server. FTP transfer is best used when transferring images from a mobile device to the WPS Pro for printing. To do this, you must have a FTP client application installed on your mobile device. -
Page 66: Printing From Android Devices Using Ftp Transfer
N o te If the login was successful, a dialog box is displayed, confirming the connection. Once you connect to WPS Pro, you can now print your images wirelessly. Please note that WPS Pro only prints JPEG and PNG file formats. -
Page 67: Printing Errors
N o te WPS Pro has been built for JPEG and PNG files with an RGB color space. Make sure your images are in one of these formats before sending them to the WPS Pro for printing. -
Page 68: Using Apple Mobile Ios Devices With Wps Pro
Be sure to follow the installation steps at “Setting Up the WPS Pro System” on page 53 before continuing. There are two transfer methods you can use to print from your Apple device to the WPS Pro network - web transfer or FTP transfer. -
Page 69: Using Apple Devices For Web Transfers (Mobile Apps)
WPS Pro network and the user. Currently, the companion app, WPS Print 2, use an HTTP interface to transfer images to the WPS Pro device for printing. While you can also use web services transfer on a PC or Mac computer, that method requires third party software development. -
Page 70: Printing From Apple Devices Using The Wps Print 3 App
SSID: WPS3__xx Password: DNP2WPS3 (All CAPS) The WiFi SSID is WPS3_xx, where xx is the unique ID for your WPS Pro®. When prompted, type the following password: DNP2WPS3 Wait two minutes for your device to connect to the wireless network before opening the app. - Page 71 Printing from Apple Devices using the WPS Print 3 App WPS Pro User Guide From your WPS Print 3 app home screen, you can either take a picture using your device’s camera, or choose images from your camera roll. To print images using your camera: Touch the camera in the upper left corner of the app.
-
Page 72: Using Apple Mobile Ios Devices For Ftp Transfers
FTP is built on a client-server architecture and uses separate control and data connections between the client and the server. FTP transfer is best used when transferring images from a mobile device to the WPS Pro for printing. To do this, you must have a FTP client application installed on your mobile device. -
Page 73: Printing From Apple Devices Using Ftp Transfers
If the login was successful, a dialog box is displayed, confirming the connection. Once you connect to the WPS Pro network, you can now print your images wirelessly. Please note that WPS Pro only prints JPEG and PNG file formats. -
Page 74: Using Airprint To Transfer Images
The WPS Pro Wi-Fi login credentials have changed for version 3: SSID: WPS3__xx Password: DNP2WPS3 (All CAPS) The WiFi SSID is WPS3_xx, where xx is the unique ID for your WPS Pro®. When prompted, type the following password: DNP2WPS3 Select your image or images. - Page 75 Printinting from Apple Devices using AirPrint WPS Pro User Guide Your image(s) are printed and the image is displayed on your console’s print queue. Your image may take 10 - 20 seconds to print. DNP Imagingcomm America Corporation...
-
Page 76: Printing Errors
N o te WPS Pro has been built for JPEG and PNG files with an RGB color space. Make sure your images are in one of these formats before sending them to the WPS Pro for printing. -
Page 77: Using A Windows Pc With The Wps Pro
Using a Windows PC with the WPS Pro The easiest way to transfer images from your computer to your WPS Pro network is using the HFP transfer option. Use the following sections to configure your PC computer to use WPS Pro. -
Page 78: Using Windows Pc With The Hot Folder Print Options (Hfp)
HFP, or Hot Folder Printing, is a transfer method where a hot folder (or “watched folder”) is continuously monitored by the WPS Pro system. Images copied into this folder are automatically printed and then removed. Hot folders are used both for manual image imports (copying and pasting files into the hot folder) and for integration with third party software (often via FTP to the hot folder). -
Page 79: Printing From A Windows Pc Using Hfp
N o te WPS Pro has been built for JPEG and PNG files with an RGB color space. Make sure your images are in one of these formats before sending them to the WPS Pro for printing. -
Page 80: Using A Mac With The Wps Pro
30 feet away from WPS Pro and still send the print job successfully. Before you begin printing, check your WPS Pro console and make sure the WPS Status app is running. In order to process the images it receives, the WPS Pro console must have the WPS Status app open and active. -
Page 81: Using A Mac For Hot Folder Printing (Hfp)
HFP, or Hot Folder Printing, is a transfer method where a hot folder (or “watched folder”) is continuously monitored by the WPS Pro system. Images copied into this folder are automatically printed and then removed. Hot folders are used both for manual image imports (copying and pasting files into the hot folder) and for integration with third party software (often via FTP to the hot folder). -
Page 82: Printing From A Mac (Hfp Transfer)
A tt en ti on Any custom cropping must be done before printing as WPS Pro only “center crops” to maximize print size and eliminate white spaces. Custom cropping can be accomplished via the capture and edit functions found in standard applications like Photoshop, Lightroom, iPhoto, etc. -
Page 83: Printing Errors
N o te WPS Pro has been built for JPEG and PNG files with an RGB color space. Make sure your images are in one of these formats before sending them to the WPS Pro for printing. -
Page 84: Using A Digital Camera With The Wps Pro
Be sure to follow the installation steps at “Setting Up the WPS Pro System” on page 53 before continuing. WPS Pro enhances your digital camera capture-to-print work flows. There are a few ways to print to your DNP printers using your digital cameras and your WPS Pro device: “Using Digital Cameras for Wi-Fi Transfers”... -
Page 85: Using Digital Cameras For Wi-Fi Transfers
WPS Pro User Guide Before you begin printing, check your WPS Pro console and make sure the WPS Status app is running. In order to process the images it receives, the WPS Pro console must have the WPS Status app open and active. -
Page 86: Using Digital Cameras For Ftp Transfers
FTP transfer, follow the instructions in “Using Android Devices for FTP Transfers” on page 65 or “Using Apple Mobile iOS Devices for FTP Transfers” on page 72 to connect your camera to the WPS Pro network and print directly from your digital camera. -
Page 87: Custom Borders
Custom borders provide the ability to create branded prints with custom logos and event information. The borders are automatically applied to any print of the specified print size when the images are printed via the WPS Pro system and you have enabled borders. -
Page 88: Adding The Custom Borders To The Wps Pro
Adding the Custom Borders to the WPS Pro A tt en ti on You must complete this procedure from a PC or Mac computer that is wirelessly connected to your WPS Pro device. Connect to the WPS Pro Wi-Fi network. -
Page 89: Enabling Borders
Enabling Borders Once you have created your borders and added them to the appropriate folders, you can easily enable these borders from your WPS Pro’s touchscreen display. Just follow these steps! From your WPS Pro’ touchscreen, touch the Configuration button. - Page 90 Enabling Borders WPS Pro User Guide The WPS Pro Configuration screen is displayed. Under the correct file transfer section (either FTP, HFP, depending on your file transfer preferences), locate the Enable Borders option. DNP Imagingcomm America Corporation...
-
Page 91: Troubleshooting Borders
Borders are only enabled for one print size. If you want borders enabled for all print sizes, you must have border files installed on your WPS Pro device for all print sizes. Example: You are using your WPS Pro system with a DS620A printer and you have 6x8 ribbon and paper installed. You have included border files in your 4x6 print size folder, and you have enabled borders using the WPS Pro Configuration screen on your device’s touchscreen display. -
Page 92: My Border Isn't Printing
My border isn’t printing. Check for the following common issues if your border isn’t printing: Have you enabled borders using the WPS Pro Configuration screen? If so, did you reboot your WPS Pro device to make sure the changes were saved? Is your border file named correctly? ... -
Page 93: Advanced Actions
Changing the settings covered in this chapter can cause your WPS Pro device to not function in the manner in which you intended. Your WPS Pro device ships with recommended settings from the factory. Only make the changes covered in this chapter if you are trying to customize a setting for your specific needs. -
Page 94: Changing The General Configuration Settings
Use the general configuration settings to change your archive settings, default language, and initial test print settings. Configuring Image Archiving You can archive your images to a micro SD card once you have printed them. WPS Pro is set to archive your images by default. - Page 95 Scroll to the bottom of the page and touch the Save Configuration button. Upon touching the Save Configuration button, the software restarts. After three minutes, reconnect to the WPS Pro Wi-Fi network. (If you have initial test prints turned ON, reconnect once your test image prints.)
-
Page 96: Changing The Test Print Setting
Changing the Test Print Setting When the WPS Pro starts, a test image is automatically printed. Use this procedure to enable or disable that setting. Under the General section of the WPS Pro Configuration screen, locate the Init Test Print option. -
Page 97: Changing The Default Language
Return to the WPS Pro Configuration screen to confirm the change has been made. About the WPS Pro Region Setting The region setting displays the region where your WPS Pro device is intended to be used. The sales region cannot be changed. -
Page 98: Changing The Printing Settings
Use the printing settings to change your print finish type, printer pooling settings, and other printing size options. N o te When sending images via WPS Pro, keep the image size in mind in relation to your selected print sizes. You must send images that are formatted to the correct aspect ratio for your print media. - Page 99 Changing the Printing Size Options WPS Pro User Guide 3 Strip Printing - Allows 5x7 prints to be cut into three 2x5 strips. 5" 7" 4 Strip Printing– Allows 6x8 prints to be cut into four 2x6 strips. ...
- Page 100 Changing the Printing Size Options WPS Pro User Guide Half Size Panel Printing – Only prints on half of a ribbon panel. The next order will start on a new ribbon panel. 6" 8" Square Size Printing – Allows printing of square images such as 5x5, 6x6 and 8x8.
- Page 101 Scroll to the bottom of the page and touch the Save Configuration button. Upon touching the Save Configuration button, the software restarts. After three minutes, reconnect to the WPS Pro Wi-Fi network. (If you have initial test prints turned ON, reconnect once your test image prints.)
-
Page 102: Changing The Print Finish
WPS Pro User Guide Changing the Print Finish You can print your images with either a matte or glossy print finish. WPS Pro is set to Glossy by default. If you wish to print your images with a matte finish: Under the Printing section of the WPS Pro Configuration screen, locate the Printing section. -
Page 103: Changing The Print Pooling Settings
Scroll to the bottom of the page and touch the Save Configuration button. Upon touching the Save Configuration button, your device restarts. After three minutes, reconnect to the WPS Pro Wi-Fi network. (If you have initial test prints turned ON, reconnect once your test image prints.) -
Page 104: Changing The High Density Printing Mode
N o te Please note that this option only applies to DS820 printers. Under the Printing section of the WPS Pro Configuration screen, locate the Printing section. Find the Matte option and change the radio button to ON or OFF. -
Page 105: Configuring Ftp Settings
FTP client application installed on your mobile device. Be sure your FTP client application allows for binary data transfer as that is the data type WPS Pro supports. Use this section to set up your FTP setting for your WPS Pro network. -
Page 106: Configuring Partial Matte
Configuring Partial Matte Enables or disables the partial matte print finish option. Under the FTP section of the WPS Pro Configuration screen, locate the Enable Partial Matte option. Change the radio button to ON or OFF. Scroll to the bottom of the page and touch the Save Configuration button. -
Page 107: Configuring Borders
Scroll to the bottom of the page and touch the Save Configuration button. Upon touching the Save Configuration button, your device restarts. After three minutes, reconnect to the WPS Pro Wi-Fi network. (If you have initial test prints turned ON, reconnect once your test image prints.) Now images printed using FTP transfer will have the selected border applied. -
Page 108: Changing The Number Of Copies Printed
Scroll to the bottom of the page and touch the Save Configuration button. Upon touching the Save Configuration button, your device restarts. After three minutes, reconnect to the WPS Pro Wi-Fi network. (If you have initial test prints turned ON, reconnect once your test image prints.) Now images printed using FTP transfer will print the number of copies you selected. -
Page 109: Selecting The Printer Queue
Scroll to the bottom of the page and touch the Save Configuration button. Upon touching the Save Configuration button, your device restarts. After three minutes, reconnect to the WPS Pro Wi-Fi network. (If you have initial test prints turned ON, reconnect once your test image prints.) -
Page 110: Selecting Borders
Scroll to the bottom of the page and touch the Save Configuration button. Upon touching the Save Configuration button, your device restarts. After three minutes, reconnect to the WPS Pro Wi-Fi network. (If you have initial test prints turned ON, reconnect once your test image prints.) -
Page 111: Configuring Hfp Settings
You can now transfer your images to WPS Pro using HFP. See “Using Windows PC with the Hot Folder Print Options (HFP)” on page 78 or “Using a Mac for Hot Folder Printing (HFP)” on page 81 for more information. -
Page 112: Configuring Partial Matte
Configuring Partial Matte Enables or disables the partial matte print finish option. Under the HFP section of the WPS Pro Configuration screen, locate the Enable Partial Matte option. Change the radio button to ON or OFF. Scroll to the bottom of the page and touch the Save Configuration button. -
Page 113: Configuring Borders
Scroll to the bottom of the page and touch the Save Configuration button. Upon touching the Save Configuration button, your device restarts. After three minutes, reconnect to the WPS Pro Wi-Fi network. (If you have initial test prints turned ON, reconnect once your test image prints.) You can now add borders to your images. -
Page 114: Changing The Number Of Copies Printed
Scroll to the bottom of the page and touch the Save Configuration button. Upon touching the Save Configuration button, your device restarts. After three minutes, reconnect to the WPS Pro Wi-Fi network. (If you have initial test prints turned ON, reconnect once your test image prints.) Now images printed using HFP transfer will print the number of copies you selected. -
Page 115: Selecting Borders
Configuring the Windows File Protocol The Windows File Protocol is enabled by default. This setting allows the WPS Pro to transfer files via standard Windows processes and procedures. Disabling this option can cause failed image transfers. Only change this setting under the supervision of Technical Support. -
Page 116: Configuring Flash Air Options
Configuring Flash Air Enables or disables the Flash Air transfer option. Under the Flash Air section of the WPS Pro Configuration screen, locate the Enable option. Change the radio button to ON or OFF. Scroll to the bottom of the page and touch the Save Configuration button. -
Page 117: Configuring The Mode
Enables whether images are transferred using DPOF or if all new images are transferred from the SD card. Under the Flash Air section of the WPS Pro Configuration screen, locate the Enable option. Change the radio button to DPOF or All New. -
Page 118: Configuring Partial Matte
Configuring Partial Matte Enables or disables the partial matte print finish option. Under the Flash Air section of the WPS Pro Configuration screen, locate the Enable Partial Matte option. Change the radio button to ON or OFF. Scroll to the bottom of the page and touch the Save Configuration button. -
Page 119: Configuring Borders
Scroll to the bottom of the page and touch the Save Configuration button. Upon touching the Save Configuration button, your device restarts. After three minutes, reconnect to the WPS Pro Wi-Fi network. (If you have initial test prints turned ON, reconnect once your test image prints.) You can now add borders to your images. -
Page 120: Changing The Number Of Copies Printed
Changes the number of copies of each print you order. Under the Flash Air section of the WPS Pro Configuration screen, locate the Copies option. Tap the Copies box and select the number of copies from the list. You can choose any number between 0 and 49. -
Page 121: Selecting The Printer Queue
Selecting the Printer Queue Selects the default printer and print size. Under the Flash Air section of the WPS Pro Configuration screen, locate the Queue option. Tap the Queue box and select the printer and default print size you want. -
Page 122: Selecting Borders
Use this option to select a border to print on all of your images. For more information on setting up and enabling custom borders, see “Custom Borders” on page 87. Under the Flash Air section of the WPS Pro Configuration screen, locate the Border Selected option. Tap the Border Selected box and select the border you wish to add to your image. -
Page 123: Simple Web Submission
Configuring Simple Web Submission Enables or disables the transfer of images through a web page option. Under the Simple Web Submission section of the WPS Pro Configuration screen, locate the Enable option. Change the radio button option to ON or OFF. -
Page 124: Configuring The Mode
WPS Pro User Guide Configuring the Mode Under the Simple Web Submission section of the WPS Pro Configuration screen, locate the Mode option. Change the radio button to Advertise or Quiet. Scroll to the bottom of the page and touch the Save Configuration button. -
Page 125: Configuring Partial Matte
WPS Pro User Guide Configuring Partial Matte Enables or disables the partial matte print finish option. Under the Simple Web Submission section of the WPS Pro Configuration screen, locate the Enable Partial Matte option. Change the radio button option to ON or OFF. -
Page 126: Configuring Borders
Enables or disables borders for images you transfer using Simple Web Submission. For more information on setting up and enabling custom borders, see “Custom Borders” on page 87. Under the Simple Web Submission section of the WPS Pro Configuration screen, locate the Enable Borders option. -
Page 127: Changing The Number Of Copies Printed
Changes the number of copies of each print you order. Under the Simple Web Submission section of the WPS Pro Configuration screen, locate the Copies option. Tap the Copies box and select the number of copies from the list. You can choose any number between 0 and 49. -
Page 128: Selecting The Printer Queue
Selecting the Printer Queue Selects the default printer and print size. Under the Simple Web Submission section of the WPS Pro Configuration screen, locate the Queue option. Tap the Queue box and select the printer and default print size you want. -
Page 129: Selecting Borders
Use this option to select a border to print on all of your images. For more information on setting up and enabling custom borders, see “Custom Borders” on page 87. Under the Simple Web Submission section of the WPS Pro Configuration screen, locate the Border Selected option. -
Page 130: Configuring The Networking Options
Scroll to the bottom of the page and touch the Save Configuration button. Upon touching the Save Configuration button, your device restarts. After three minutes, reconnect to the WPS Pro Wi-Fi network. (If you have initial test prints turned ON, reconnect once your test image prints.) -
Page 131: Configuring Ota
Configuring OTA Enables or disables over-the-air transfer protocols. Under the Networking section of the WPS Pro Configuration screen, locate the Enable OTA option. Change the radio button option. Scroll to the bottom of the page and touch the Save Configuration button. -
Page 132: Configuring Name Services
Configuring Name Services Enables or disables over-the-air transfer protocols. Under the Networking section of the WPS Pro Configuration screen, locate the Enable Name Service option. Change the radio button option. Scroll to the bottom of the page and touch the Save Configuration button. -
Page 133: Configuring Airprint
WPS Pro User Guide Configuring Airprint Under the Networking section of the WPS Pro Configuration screen, locate the Enable Name Service option. Change the radio button option. Scroll to the bottom of the page and touch the Save Configuration button. -
Page 134: Configuring Firmware Options
Configuring Firmware Enables or disables checking for firmware updates automatically. Under the Firmware section of the WPS Pro Configuration screen, locate the Check Firmware option. Change the radio button option. Scroll to the bottom of the page and touch the Save Configuration button. -
Page 135: Configuring Firmware Updates
WPS Pro User Guide Configuring Firmware Updates Under the Firmware section of the WPS Pro Configuration screen, locate the Check Firmware option. Change the radio button option. Scroll to the bottom of the page and touch the Save Configuration button. - Page 136 4524 Enterprise Drive NW Concord, NC 28027 1-855-367-7604 or (724) 696-8957 www.dnpphoto.com www.dnpimagingcomm.com...
Need help?
Do you have a question about the WPS Pro and is the answer not in the manual?
Questions and answers