Table of Contents
Advertisement
Address: No.9 Haishu Road,Yuhang District
Hangzhou, Zhejiang 311121 China
Phone:
+86-571-88566372
Website: http://www.microtechmd.com
Lotus Global Co., Ltd.
1 Four Seasons Terrace
EC
REP
West Drayton, Middlesex
London, UB7 9GG, United Kingdom
Document 1010-LBL-00021
Revision V01
Issued 2017/10/20
BLOOD GLUCOSE MONITORING SYSTEM
Instruction
Manual
Advertisement
Table of Contents

Summary of Contents for YUNPAI GoChek
- Page 1 BLOOD GLUCOSE MONITORING SYSTEM Instruction Manual Address: No.9 Haishu Road,Yuhang District Hangzhou, Zhejiang 311121 China Phone: +86-571-88566372 Website: http://www.microtechmd.com Lotus Global Co., Ltd. Document 1010-LBL-00021 1 Four Seasons Terrace Revision V01 West Drayton, Middlesex Issued 2017/10/20 London, UB7 9GG, United Kingdom...
- Page 2 Please read this user manual to help master the simple functions of your GoChek meter. If used properly, the blood glucose meter will give you accurate results. The GoChek blood glucose monitoring system will give you accurate readings from fresh capillary or venous whole blood.
-
Page 3: Specification
Index Specification Specification Product Name: GoChek / GoChek Connect / GoChek Connect+ Size: 83.5 mm (L) × 54 mm (W) × 19 mm (Thickness) Product Components Glucose Test Range : 1.1-33.3 mmol/L (20-600 mg/dL) Component Descriptions Results Display: plasma equivalent... -
Page 4: Product Components
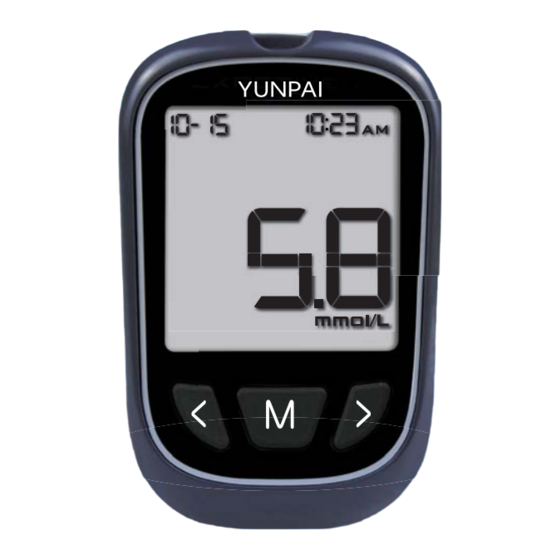
Product Components Component Descriptions Included components: Glucose meter, lancing device, clear cap, battery, user guide, carrying case Blood Glucose Meter Optional components (purchased separately): blood glucose test strips, control solution, lancets, code chip The meter reads the test strips and displays the blood glucose concentration. -
Page 5: Storage And Handling
Strips Test GoChek blood glucose test strips contain chemical reagents. After the test strip is placed into the test strip port and a blood sample is applied, the blood automatically wicks into the test window. - Page 6 Do not refrigerate or freeze test strips. Control Solution Do not store or use strips in a humid environment, such as a bathroom. Do not store the meter, test strips, or control solution near bleach or cleaning agents that contain bleach. Control solution is a glucose solution of known concentration that is used to confirm that your meter and test strips are working properly.
-
Page 7: Battery Installation
Meter Setup Before Use The display will now show the month and day in the top left corner. Change the month and day by pressing the “<” or “>” buttons . Press “M” to save. Battery Installation Next, set the correct time. By default, the meter will show the time in 24 hour display mode. - Page 8 The Hyper and Hypo settings are OFF by default. Additional Settings If your meter is has wireless functions (GoChek Connect and GoChek Connect+), there may be some additional settings in the System Settings menu. See additional user guide for more information.
-
Page 9: Quality Control Tests
Insert the test strip all of the way into the test strip port, and the The test reminder alarms sound for 1 minute, and meter will turn on automatically. If the audio is on, you will hear a then repeat at an interval of 5 minutes. The alarm “beep”... - Page 10 When “ “ and “#” are displayed simultaneously, the result is from a Shake the control solution bottle, gently squeeze out the control control solution test, and it will not be included in the 7, 14, 30, 60, or 90 solution, discard the first drop, and drop the second drop onto a clean day average.
-
Page 11: Testing Your Blood
Testing Your Blood Fingertip Testing: The following steps show how to use the meter, test strips, code chip, Adjust the depth penetration to reduce the discomfort. You do not lancing device and sterile lancets together to measure your blood glucose need the clear cap for fingertip sampling. - Page 12 Forearm or Palm Testing Pull back the cocking barrel until Holding the lancing device you hear a click. Now the lancing against the side of the finger to device is loaded and ready to be lanced, press the release Collecting blood samples from your palm or forearm may be less painful draw blood.
-
Page 13: Testing Blood Glucose
Testing Blood Glucose Lancet Removal When you insert the code chip and test strip, the meter will automatically Pull out the lancet from the Unscrew the lancing device turn on (except in data transfer mode). lancet holder. Please dispose cap. Firmly push the needle of the used lancet properly. - Page 14 Apply blood to the sample area of the If an error code is displayed, please check the troubleshooting test strip. If the audio is on, the meter will beep, telling you that enough instructions (page 32). If “HI” or “LO” symbol is displayed, refer to the blood has been applied and the meter will start to to measure.
-
Page 15: Understanding Test Results
Understanding Test Results “HI” and “LO” Messages Suggested Test Times and Target Goals Your meter can accurately measure blood glucose concentrations Tracking your glucose concentrations with regular blood glucose testing is between 1.1-33.3 mmol/L (20-600 mg/dL). “HI” and “LO” messages an important part of managing diabetes. -
Page 16: Meter Memory
Memory Mode This meter sytem is only for in vitro diagnostic use, and only can be used with GoChek test strips. Use of other test strips can lead to Press the “M” button to enter memory mode. The wrong test results. -
Page 17: Clearing The Memory
“<” or “>” buttons to scroll through the 7, 14, 30, 60, and 90 day averages. Press the “M” button to see the before meal and after meal marker GoChek meters are capable of transferring memory data to a personal averages. The meter will calculate the computer. -
Page 18: Maintenance
Maintenance Cleaning Proper maintenance of your meter is recommended for the best results. Glucose Meter Storage Under normal circumstances, no special cleaning is required. If cleaning is needed, wear gloves before applying a mild detergent and water with Keep the test strip port area clean. a soft damp cloth. -
Page 19: Troubleshooting
Troubleshooting Warranty The meter has built-in messages to alert you of problems. When error Please complete the warranty card that came with this product and mail messages appear, note the error number, turn off the meter, and then it to your dealer to register your purchase. Please keep your sales follow these instructions.
Need help?
Do you have a question about the GoChek and is the answer not in the manual?
Questions and answers
how do you set up time and date
To set up the time and date on the YUNPAI GoChek meter:
1. Use the “<” or “>” buttons to change the month and day.
2. Press the “M” button to save the date.
3. Set the correct time (default is 24-hour display mode).
4. Press “M” to save the time.
5. Use “<” or “>” to switch between 24-hour and 12-hour display modes.
6. Press “M” again to save and continue.
This answer is automatically generated