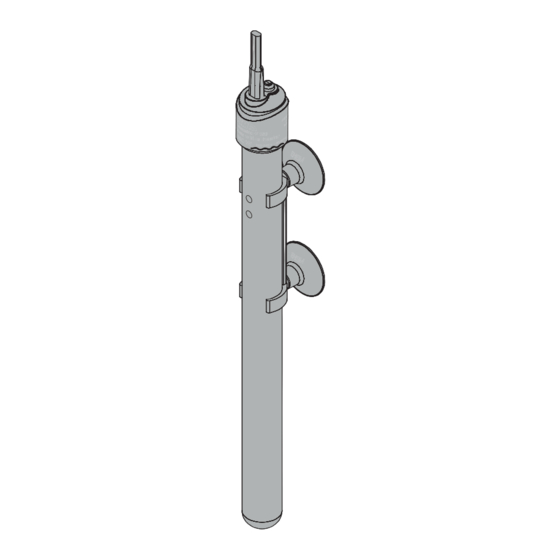
TOP FIN PRO Series Operating Manual

TOP FIN PRO Series Operating Manual

Aquarium heater

Advertisement

AQUARIUM HEATER
PRO150 W
(Type 5310051)
PRO200 W
(Type 5310053)
PRO300 W
(Type 5310052)
en
Operating manual
fr
Mode d'emploi
es
Manual de instrucciones

Advertisement

Table of Contents
loading

Summary of Contents for TOP FIN PRO Series

  • Page 1 AQUARIUM HEATER PRO150 W (Type 5310051) PRO200 W (Type 5310053) PRO300 W (Type 5310052) Operating manual Mode d'emploi Manual de instrucciones...
  • Page 2 min. water level Technical data Ø HEATER Type Watt TOPFIN US gal 5310051 Ø 1.26 × 12.87 inch 150 W 120 V / 60 Hz up to 79 5310053 Ø 1.26 × 15.19 inch 200 W 120 V / 60 Hz up to 106 5310052 Ø...
  • Page 3 IMPORTANT SAFETY INSTRUCTIONS WARNING- To guard against injury, basic safety precautions should be observed, including the following. ‧ FOR HOUSEHOLD USE ONLY ‧ WARNING! RISK OF ELECTRIC SHOCK! ‧ DO NOT RUN DRY! READ AND FOLLOW ALL SAFETY INSTRUCTIONS. ‧ DANGER –...
  • Page 4 ‧ Do not install or store the appliance where it will be exposed to the weather or to temperatures below freezing. ‧ Make sure an appliance mounted on a tank is securely in stalled before operating it. ‧ Read and observe all the important notices on the appliance. ‧...
  • Page 5 ‧ Connect the equipment into an outlet on a circuit different from that to which the receiver is connected. ‧ Consult the dealer or an experienced radio/TV technician for help.
  • Page 6 You are prompted for an action. Application ® The TOP FIN Pro heater is an adjustable heater for aquariums. The temperature range is 64 – 90°F ± 1°F or 18 – 32°C ±0.5°C. The appliance and all parts included in the scope of delivery are intended for private use and must only be used: ‧...
  • Page 7 English Safety Instructions Risks for persons and property can arise from this appliance if the appliance is improperly used or not used as intended or if the safety instructions are not heeded. For your safety ‧ Do not let the appliance packaging and small parts get into the hands of children as hazards can arise (danger of suffocation!).
  • Page 8 English ‧ Protect the socket and plug against moisture. It is recommended to form a drip loop with the cable to prevent any water running along the cable to the socket. ‧ The electrical data of the appliance must match the data of the power source. This data is found on the type plate, the packaging, and in these instructions.
  • Page 9 English Start the configuration 6. Select your desired language in the language selection field and proceed with the initial configuration. Follow the instructions accordingly. Control light ‧ Lights up red: Heater is heating. ‧ Light off: Heater is not heating. LED indicator ‧...
  • Page 10: Table Of Contents

    6.2 E-mail adress for heater messages .........31 6.3 Deactivating WLAN ............32 6.4 Activating WLAN ..............33 7 Heater settings ................34 8 Status LED indicator ..............37 9 Reset ....................39 ® 10 Connecting with other TOP FIN Pro device ......39 11 Information ..................42...
  • Page 11: Symbols

    English Symbols Home page Settings Remove Change Save Add device Overview Manual control Smart Control Temperature / Current water temperature Heater Time Temperature setpoint Factory Defaults Attention...
  • Page 12 English Initial configuration Select language. Select unit system. Change name of heater (optional). Enter and save preferred name (optional).
  • Page 13 English Select next setting. Add a new aquarium to network. Change name (optional). Select next setting. Continue with Step 12.
  • Page 14: Manual Control

    English Continue with Step 12. Connecting with an existing aquarium (optional). Selecting an aquarium from the list. Connecting the aquarium. Select heater regulation type MANUAL CONTROL.
  • Page 15: Smart Control

    English Set the setpoint temperature by moving the slider. Save the settings. Continue with Step 24. Select heater regulation type SMART CONTROL.
  • Page 16 English Search for other TOP FIN Pro devices. ® Select your device. EHEIM Filter_XXXXXXX Select your filter. Pair with device.
  • Page 17 English Filter XXXXXXX To pair this filter it must be configured in Bio Mode. Filter XXXXXXX Set the setpoint temperature for the day. Filter XXXXXXX Set the temperature difference for nighttime.
  • Page 18 English time time Filter XXXXXXX Save settings. Home page HOME PAGE Overview of aquarium with all connected devices. Change name.
  • Page 19 English Enter and save preferred name. Add a new aquarium. Remove aquarium. Add device.
  • Page 20 English Change to view the heater overview. Heater overview Heater Overview: The current heater mode, temperature setpoint and current water temperature. Heater ON/OFF.
  • Page 21 English Change the temperature setpoint. Show the selection menu for OVERVIEW, TEMPERATURE and SETTINGS. Go back to home page.
  • Page 22 English Heater mode HOME PAGE Select the heater overview. Show the selection menu. Select TEMPERATURE for heater modes. Overview of heater modes.
  • Page 23 English Manual control Select MANUAL CONTROL. Set the setpoint temperature by moving the slider. Save the settings.
  • Page 24 English Smart control Select SMART CONTROL. Search for other TOP Pro devices. ® Select your device. EHEIM Filter_XXXXXXX Select the network.
  • Page 25 English Pair with device. Filter XXXXXXX To pair this filter it must be configured in Bio Mode. Filter XXXXXXX Set the setpoint temperature for the day. Filter XXXXXXX Set the temperaure difference for nighttime.
  • Page 26: Settings Home

    English time Filter XXXXXXX Save settings. Settings home Select settings. Call up network setting. Continue with 6.1.
  • Page 27 English Select/change language. Enter the e-mail address and user name to receive messages from the heater. Continue with 6.2. The current time is set. Manual setting of date and time.
  • Page 28 English Activate/deactivate automatic change between summer and winter time. Display network information and switching off the WiFi function. Reset to factory settings. Carry out manual update.
  • Page 29: Connect With Available Network

    English Connect with available network Search for available networks. Connect available network. Enter password for the selected network.
  • Page 30 English Select CONNECT to connect to the network. EHEIM heater XXXXXXXX Change EHEIM heater XXXXXXXX network name to your own name. EHEIM heater XXXXXXXX Activate password usage and use a password with a minimum of 8 characters. #x1y2z3# Save network settings.
  • Page 31: E-Mail Adress For Heater Messages

    English Go back to settings. E-mail adress for heater messages Enter the e-mail address and user name to receive messages from the heater. Only possible in networks with Internet connection. Name Name Read and confirm the privacy policy. Name Name...
  • Page 32: Deactivating Wlan

    English Name Save the data. Deactivating WLAN Select “Show Network Information”. Select “Turn off WiFi Feature”.
  • Page 33: Activating Wlan

    English Feature”. Select “Deactivate WiFi” to disable the WiFi function. Select “Deactivate WiFi” to disable the WiFi function. The status LED light on the heater flashes continuously yellow after approx. 3 - 5 seconds. WiFi function deactivated. Device settings remain available. Activating WLAN Press the red reset button for approx.
  • Page 34: Heater Settings

    English take a few seconds. If the status LED lights blue, a network has been created and is visible on a WLAN- enabled device (smart phone, tablet, etc.). Heater settings Change to the heater overview. Show the selection menu for OVERVIEW, TEMPERATURE and SETTINGS.
  • Page 35 English Enter and save preferred name (see items 3 & 4). Open heater expert settings. Adjustment of actual temperature with external thermometer. Example: Actual temperature = 79°F Display thermometer = 77°F Setting calibrate temperature = -2°F...
  • Page 36 English = -2°F Select ”Show Network Information“. Change name. Initial configuration reset. Reset to factory settings.
  • Page 37: Status Led Indicator

    English Status LED indicator LED flashes white: Device control unit is starting. LED lights permanently blue: Device is ready for operation (MASTER) and can be connected to WLAN- capable device (smart phone, tablet, etc.). LED lights permanently green: The device is ready for operation and is connected to a MASTER device.
  • Page 38 English http://192.168.1.1/update. LED flashes red/green/blue: Resetting the network settings or resetting to factory settings. LED lights alternating white/red/white: Connection to home network or to MASTER network failed (network name wrong, password wrong, poor WLAN reception). LED lights alternating green/red/white: Master network or home network is no longer accessible.
  • Page 39: Reset

    5 – 8 seconds. LED flashes red/green/blue. Device is reset. LED flashes white: Device control unit restarting. LED lights permanently blue: Device is ready for operation again. ® 10 Connecting with other TOP FIN Pro device Add device. Add device.
  • Page 40 English Select your device. EHEIM Filter XXXXXXX Select the network. The selected device can be identified using DETECT. LED flashes pink. The device can be added to the selected network using ADD. LED flashes white.
  • Page 41 English If the LED lights permanently green, complete the process with SAVE. Devices are connected to each other.
  • Page 42: 11 Information

    If you are not satisfied with this product, return it with your valid proof of purchase for a refund. Conditions apply. See store or PetSmart.com for details. ® For more information about Top Fin products, please call 1-888-839-9638. Dist. by/par: Pacific Coast Distributing, Inc.
  • Page 43 La reproducción o copia -incluso parcial- sólo puede hacerse con la autorización expresa del productor. ® TOP FIN Pro Series Engineered by EHEIM If you are not satisfied with this product, return it with your valid proof of purchase for a refund.

This manual is also suitable for:

Pro150 wPro200 wPro300 w531005153100535310052

Table of Contents