Table of Contents
Advertisement
Quick Links
Advertisement
Table of Contents

Related Manuals for dirwin Seeker

Summary of Contents for dirwin Seeker
- Page 1 Ver. 1.20...
- Page 2 Welcome to follow Dirwin's page on Facebook. Learn more promotion information and watch our new videos on https://www.facebook.com/qr/108860221504902. Timely Giveaways Available on Facebook!
-
Page 3: About Manual
This manual includes details of the product, and information on its operation and maintenance and other helpful tips for owners. Read it carefully and familiarize yourself with the Dirwin Seeker before using it to ensure safe use and prevent tragic accidents. Be sure to retain this manual as your convenient Dirwin Seeker information source. -
Page 4: Product Specification
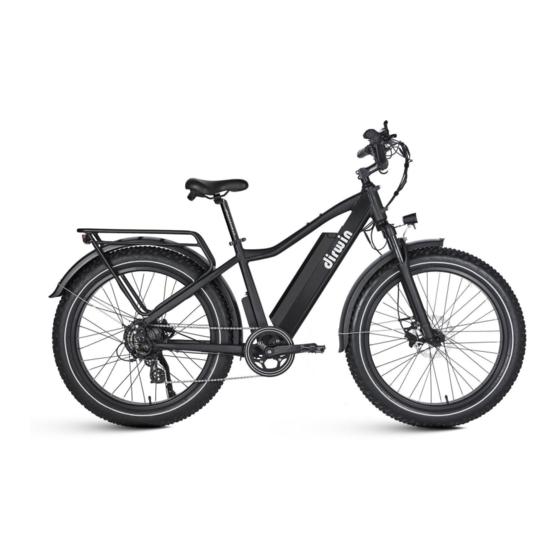
Product Specification Battery Front Fork 48v 16Ah Lithium Battery Alloy Front Suspension Fork A6061 ALUMINUM TIG WELDED Motor Bike Frame 750W Motor FRAME Display Brake Colored LCD Display 180mm Hydraulic Disc Brakes Derailleur Charger 7-speed Shimano-Altus-7 Speed US Standard 2.0A Smart Charger Speed Freewheel Max. - Page 5 Display Bell Shifter Handle Brake On/o Switch Throttle Saddle Frame Battery Cargo Rack Head light Taillight Front fork Mud slab Rear brake Front brake Tire Rear derailleur Pedal Controller...
- Page 6 Wheelbase Maximum Load Capacity Min / Max Seat Height Motor 45.3" 350 lbs 29.5" ~ 40.2" 750w Tires Total Length Handlebar Reach 26" × 4" 74.8" 46.1" Safety Checklist NOTICE: Before every ride it is important to carry out the following safety checks...
- Page 7 Safety Check Basic Steps 1. Ensure front and rear brakes work properly. 2. Ensure brake pads are not over worn and are correctly positioned in relation to the rims. Brakes 3. Ensure brake control cables are lubricated, correctly adjusted and display no obvious wear. 4.
- Page 8 Assembly Instructions NOTICE: The following assembly steps are only a general guide to assist in the assembly of your Dirwin Bike and is not a complete or comprehensive manual of all aspects of assembly, maintenance and repair. We recommend you consult a certified bicycle mechanic to assist in the assembly, repair and maintenance of your bicycle.
- Page 9 Step 4 : Use a bike pump with a press gauge to Inflate tires to desired PSI. The recommended pressure for this mode is 20 PSI (1.379 Bar). Do not overinflate or underinflate tires. Step 5 : Install the pedals. The left and right pedals are marked on both ends. First, install the right pedal by tightening the pedal in clockwise direction.
-
Page 10: Recommended Torque Values
Step 8 : Install the optional rear rack. Align the holes in the rear rack with the holes in the frame and tighten with screws. Step 9 : Check that battery pack is locked into the frame of the Dirwin Seeker. When you want to take off the battery, insert the key and turn to release the battery pack. -
Page 11: Display Features
Rear Wheel 35-40 Bottom Bracket Parts 35-55 Pedals Disk Mounting Bolts Disk Caliper Mount Crank Bolts Rear Derailleur Cable Pinch Front Derailleur Clamp Saddle Post Clamp Display Features The image shows the various features and information displayed on the Display.You can see 3 buttons in the left, we will use “mode”... - Page 12 2 seconds, the Trip Meter will be reset to zero. 5. With the proper safety gear and rider knowledge and understanding you may now proceed to operate your Dirwin Bike. You can begin by pedaling the bike in the appropriate drivetrain gear with or without pedal assistance. You may also use the throttle to accelerate and maintain your desired speed.
- Page 13 Error Detection Display Your Dirwin Bike is equipped with an error detection system integrated into the display and controller. In the case of an electronic control system fault an error code should display. The following error codes are the most common and can aid in troubleshooting.
-
Page 14: General Settings
General Settings Press and hold the power button to turn it on. There are two kinds of display interface, including normal display interface and data statistics interface. Long press to switch from normal display interface to data statistics interface; long press to switch from data statistics interface to normal display interface. - Page 15 In the power-on state, while the vehicle is stationary, press and hold “up”and“down” buttons for more than 2 seconds, and the meter enters the normal setting state. Each setting item needs to be carried out while the e-bike is stationary. Brightness Use the“up”and“down”...
-
Page 16: Speed Limit Setting
Speed Limit Setting The default value of the highest riding speed of the instrument is 36 km/h. Change this value to set the maximum riding speed of the electric vehicle. When the electric motor exceeds the set value, the controller will stop supplying power to the motor to protect the rider. -
Page 17: Wheel Size
Wheel Size LD stands for wheel diameter and can be set to 16, 18, 20, 22, 24, 26, 700C, 28,29. Use the “up”and“down” buttons to select the wheel diameter corresponding to the e-bike to ensure the accuracy of the meter speed display and mileage display. The factory default wheel diameter value is 26inch. -
Page 18: Driving Range
Driving Range The range of your Dirwin Bike is the distance the bike will travel on a single full charge of the onboard battery pack. The range values in this manual are estimates based on expected usage characteristics. Some of the factors which effect range include changes in elevation, speed, payload, and acceleration, number of starts and stops and ambient air temperatures. -
Page 19: Parking Storage And Transport
6. Do not park,store,or transport your Dirwin Bike on a rack that is not designed for the size and weight of the bike. 7. Wide tires, as used on Dirwin Bike, cannot fit into all bike racks. Please select an appropriate rack for the width of tires used on your bike. -
Page 20: Carrying Loads
MAXIMUM PAYLOAD FOR Dirwin Seeker The total maximum weight limit of the Dirwin Seeker(125 Kilograms) includes the weight of the rider as well as clothing, riding gear, cargo, etc. The kickstand is not designed to be used for loading cargo. You MUST hold onto the bike whenever loading cargo. -
Page 21: Charging Procedure
Charging Procedure Follow these steps for charging your Dirwin Bike: 1. Turn the battery pack off using the key switch. 2. Remove the rubber cover on the charging socket on the opposite side of the battery switch. - Page 22 Always charge your battery in temperatures between 10 and 26 degrees Celsius and ! ensure the battery and charger are not damaged before initiating charge. If you notice anything unusual while charging, please discontinue charging and use of the bike and contact Dirwin Bike for help.
- Page 23 Basic Battery Charging Tips 1. The battery should be recharged after each use.There is no memory effect,so you can charge the battery after short rides without damage. 2. The battery can be recharged on or off the bike. 3. Remove the battery by turning the key and then pulling the battery forward and up until the battery detaches from the mating receptacle.
-
Page 24: Charging Time
2. Fully charge the battery before each use to extend the life of the battery and help to reduce the chance of over-discharging the battery pack. Do not charge the battery with any other chargers than what was originally supplied with your Dirwin Bike or a charger purchased directly from Dirwin Bike for use with your specific bike serial number,as approved by Dirwin Bike. -
Page 25: Bicycle Care
7. If you notice a strange smell or the charger or battery are overheating,please stop charging immediately and contact Dirwin Bike. 8. Do not yank or pull on the cables of the charger.When unplugging carefully remove both the AC and DC cables by way of pulling on the plastic plugs,not pulling on the cables. -
Page 26: Basic Troubleshooting
Therefore, always have a certified bicycle mechanic perform a tune-up on your Dirwin Seeker after your initial break-in period of 80- 160 km (depending on total weight, riding characteristics and terrain). Regular inspections and tune-ups are particularly important for ensuring that your bicycle remains safe and problem-free. - Page 27 2. Repair or replace strange noises 3. Damaged motor wiring 3. Repair or replace motor As a parent or guardian, you are responsible for the activities and safety of your child. ! The Dirwin Seeker is not designed for use by children.
- Page 28 6. Ensure handle bar grips are not damaged and properly installed. Loose or damaged grips can cause you to lose control and fall. 7. Do not use this product with standard bicycle trailers,stands or bicycle racks Contact Dirwin Bike to check if your equipment will work with the bicycle.
-
Page 29: Warranty Info
17. Any aftermarket changes to your Dirwin Bike not expressly approved by Dirwin Bike could void the warranty and create an unsafe riding experience 18. - Page 30 (tires, tubes, brake pads, cables and housing, grips). Dirwin Bike will not be liable and/or responsible for any damage, failure or loss caused by any unauthorized service or use of unauthorized parts. In no event shall Dirwin Bike be responsible for any...
- Page 31 Components of the Dirwin Seeker are subject to higher wear when compared to bicycles without power assistance. This is because the Dirwin Seeker can travel at higher average speeds than regular cycles and has a greater weight. Higher wear is not a defect in the product and is not subject to warranty.
- Page 32 DIRWIN BIKE CO., LTD. Testing & Sales Center:2400 N lakeview ave, Chicago IL 60614 Warehouse: 611 Reyes Dr, Walnut CA 91789 Call Us: 1-626-288-2970 WD: 8 am-5 pm EST WKD: 9 am-6 pm EST E-mail: sales@dirwinbike.com; support@dirwinbike.com www.dirwinbike.com...
Need help?
Do you have a question about the Seeker and is the answer not in the manual?
Questions and answers