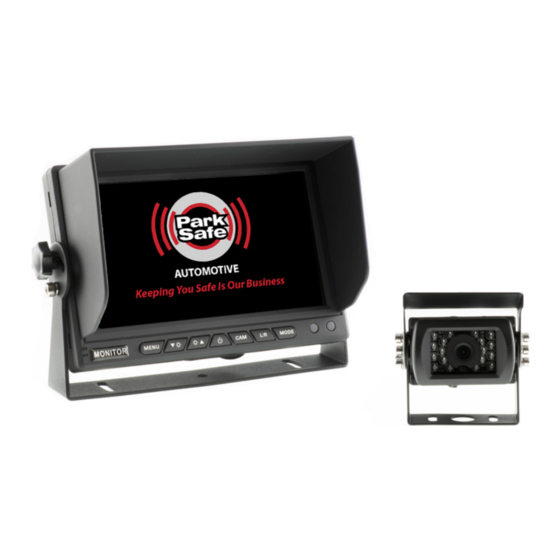
Summary of Contents for Park Safe PS033
- Page 1 AUTOMOTIVE Monitors and Camera Install Guide Specifications Subject To Change Without Notice...
-
Page 2: Table Of Contents
CONTENTS IMPORTANT NOTES ON WIRING RECOMMENDED WIRING EXAMPLES ON NON CANBUS VEHICLES Typical wiring for always on monitors and camera system - Typical wiring for monitors and camera system on reverse RECOMMENDED WIRING EXAMPLES ON CANBUS VEHICLES - CANBUS VEHICLE. Typical wiring for monitors and camera system on reverse (PSPK4) - CANBUS VEHICLE. -
Page 3: Important Notes On Wiring
IMPORTANT NOTES ON WIRING (See wiring examples on page 3/4 & 7) 1. Isolate all power. Make sure the vehicle power is off when installing camera and monitor system. 2. Camera positions. Check position of cameras for ideal view before mounting. (See page 7) 3. -
Page 4: Recommended Wiring Examples On Non Canbus Vehicles
RECOMMENDED WIRING EXAMPLES ON NON CANBUS VEHICLES TYPICAL WIRING FOR ALWAYS ON MONITOR AND CAMERA SYSTEM When the vehicles ignition is on, the camera and monitor is always on. A relay is used to prevent power draw from battery when the system is off and isolate the circuit from the vehicle. If more than one camera is used then use the trigger wire to control the camera view. -
Page 5: Recommended Wiring Examples On Canbus Vehicles
RECOMMENDED WIRING EXAMPLES ON CANBUS VEHICLES CANBUS VEHICLE - TYPICAL WIRING FOR MONITOR AND CAMERA FOR POWER ON WHEN IN REVERSE (PSPK4) Use PSPK4 for 12v on reverse to prevent any CANBUS errors on vehicle or low power dropout from CANBUS ECU. Relay is used as PSPK4 is rated at 1 Amp max. -
Page 6: Canbus Vehicles And Canbus Interface Units
CANBUS VEHICLES AND CANBUS INTERFACE UNITS It is highly recommended that you use a CANBUS Interface unit to make any connections to the vehicle when fitting monitors and camera systems to prevent any issues with power, interference and warranty claims. PSKP4 / PSKP5 are 12 volt only. -
Page 7: Oem Brake Light Cameras
OEM BRAKE LIGHT CAMERAS Parksafe Automotive offer a range of OEM brake light cameras for specific vehicles. Depending on the model the brake light camera it may contain LED’s or a bulb for the illumination of the brake light during braking. If the brake light camera does not contain LED’s or a bulb then the original unit LED array will be used by unclipping the LED array from the original unit and clipping it into the replacement brake light combined camera. -
Page 8: Multi Function Cameras - One Button Control
MULTI FUNCTION CAMERAS - ONE BUTTON CONTROL One button control cameras have a small control box in the loom that allows you to make changes to the camera such as Guidelines on/off, Guideline Style, Guideline Height, Guideline Width, PAL/NTSC, Normal/Mirror Image, Inverted/Non Inverted Image. Ideally place the one button controller in a position where both installer and customer can access. -
Page 9: Mounting And Wiring Of Cameras
MOUNTING AND WIRING OF CAMERAS - Ideally keep cameras away from heavy water spray areas. - Do not clean cameras with a pressure washer. - Seal all connectors with self amalgamating tape to protect from water ingress. - Check view and position of camera before mounting to make sure it provides the view required. -
Page 10: Monitor Menus And Chainging Settings
MONITOR MENUS AND CHAINGING SETTINGS Most monitor menus are very similar so this simple guide will help you navigate the menu. Not all monitors have all the menu options and some monitors are are fixed on one view. Please note: Some monitors when in the activated trigger mode will not let you enter the menu. You need to make sure the trigger is not activated first to enter the menu Monitors keys. -
Page 11: Monitor Menu
Monitor Menu. Examples of menu features. (Not all features are included on all monitors.) Volume - Adjusts the volume of the internal speaker if fitted. Brightness - Adjusts the brightness of the screen. Contrast - Adjusts the contrast of the screen (The relative difference between light and dark areas). - Page 12 PARKING SENSORS CAMERAS & MONITORS DASH CAMERAS LIGHTING POWER INVERTERS COMSUMABLES WWW.PARKSAFEAUTOMOTIVE.COM Page 10...
-
Page 13: Maintance Of Monitors And Cameras
MAINTANCE OF MONITORS AND CAMERAS Monitors - Clean the monitor only with a damp soft cloth. - Do not use or spray any chemical cleaners onto the monitor as there is a possibility of damage to the surface of the LCD and monitor case. - Do not use any abrasive cleaners or abrasive cloths to clean the monitor as this can damage the case and LCD Screen - Check fixings are secure... -
Page 14: Notes
NOTES Page 12... -
Page 15: Warranty
WARRANTY All monitors and cameras have a 2 year warranty. The warranty is non transferrable and only applies to the original purchaser. Should the product be found to be defective within the warranty period, the product or part will be replaced without charge. - Page 16 Parksafe Automotive Limited, Suppliers of Vehicle Electronics. FORS & CLOCS Approved. DVR Recorders, Vehicle CCTV, Dash Cameras, Reversing Systems, Parking Sensors, Lighting, Warning Beacons & Consumables. OEM Design Services. ISO 9001 Approved Company ‘KEEPING YOU SAFE IS OUR BUSINESS’ Parksafe Automotive Ltd, Eden House, High Holborn Road, Codnor Gate Industrial Estate,...
