Advertisement
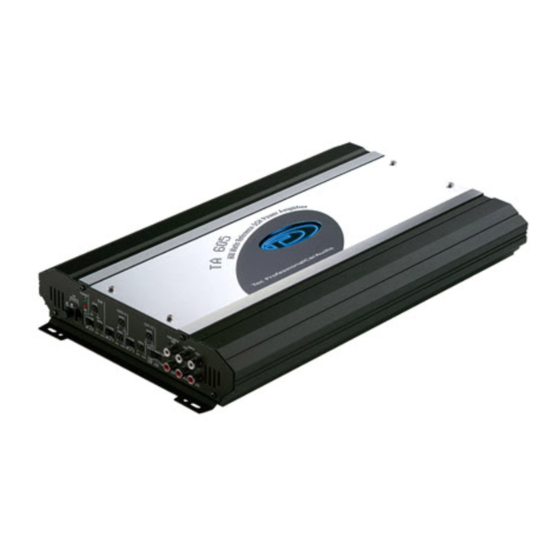
TA-605
5 Channel Feature Guide
(1)(2) Line Input/Sub-Input : This allows connection to any head unit that has a RCA outputs.
(3) Input-selector switch : The sub outputs signal is a sum of the Ch1+2(Front) and ch3+4(Rear) outputs.
All three inputs will accept signal for use with a head unit with three preamp outputs.
1) When set to "1+2Ch" position, the front Inputs (Ch1+2) will provide signal for the entire Amplifier.
2) When set to "1+2Ch, 3+4Ch" position, both the front and rear inputs will accept signal allowing the use of head unit fader.
3) When set to "1+2Ch, 3+4Ch, SUB" all three inputs wil accept signal seperately for use with a headunit with thre preamp outputs.
(4)(7)(11) LEVEL : This allows level adjustment of the input signal. Use this control to correctly match the head unit to 3/4 volume, with the
BASS and TREBLE on zero, then slowly turn up the amplifier level control towards the MAX end of the control, NOTE : If the sound becomes
distorted, turn this control down.
(5)(8)(10) "High-Pass" frequency control : This control is active when the switch is set to "Hi-pass" and permits selection of the
desired crossover frequency.
(5)(8)(10) "Low-Pass" frequency control : This control is active when the switch is set to "Low-pass" and permits selection of the
desired crossover frequency.
(6)(9)(12) CROSSOVER SELECTOR : Set the appropriate mode of operation. The 3 positions available are FLAT, HIGH PASS and LOW PASS.
(13) POWER LED : When illuminated the amplifier is turned on.
(14) PROTECTION LED : When illuminated it indicates a fault has occurred. Check installation.
(15) +12V : This must be connected directly th the vehicle batteries positive(+) terminal via an inline fuse at the battery end.
Note : This is to be the lasst wire to hook up during installation as damage could result.
(16) REMOTE : This terminal is for turning the amplifier on and off. This requires a requires a switched positive (+12V) to power "on" the
amplifier, this can be found on the rear of the head unit in the form of a electric antenna output, or a remote on output. Of not available you
can wire to the ACC position on the key.
(17) GROUND : Connect directly to the vehicle's chassis.
NOTE : This is to be the first wire to hook up during installation as damage could result.
(18) FUSE : Please ensure correct type of fuse is fitted, as specified in this manual.
(19) Loudspeaker connections : (If the amplifier is to be connected in a bridged mode, proceed with the section "Bridged loudspeaker
connections".) As with any audio component, connection of the amplifier and speakers with the correct polarity is essential for goods bass
reproduction. Ensure there fore when connection that the positive (+) loudspeaker terminal.
The same applies to the negative (-) terminals. The left-hand amplifier channel must also be connected to the left-hand loudspeaker and the
right-hand the right-hand amplifier channel to the right-hand loudspeaker.
Bridged loudspeaker connections : The AMP can also be bridge in a mono configuration. This enables you to
use the amplifier for one or more subwoofer(s) or amid-range speaker. In this configuration the amplifier sums the right-hand and oeft-hand channel
delivering a single channel (mono) output.
Note : The amplifier can sum the right-and oeft-hand signal information only both the right-and left-hand RCA connections have been made.
CAUTION : The amplifier must be presented with a load of 4 Ohms or higher in bridged mode. A lower load will cause the amplifier
to overheat or switch off. This can lead to permanent damage of the unit
5 Channel
RMS 60Wx4CH+165Wx1CH
Advertisement
Table of Contents

Summary of Contents for Tecprecision TA-605
- Page 1 TA-605 5 Channel Feature Guide 5 Channel RMS 60Wx4CH+165Wx1CH (1)(2) Line Input/Sub-Input : This allows connection to any head unit that has a RCA outputs. (3) Input-selector switch : The sub outputs signal is a sum of the Ch1+2(Front) and ch3+4(Rear) outputs.
- Page 2 TA-605 System Example 5 Channel RMS 60Wx4CH+165Wx1CH 5 Channel Installation 4 Channel Installation 3 Channel Installation...
- Page 3 TA-series Specifications TA-605 Front and Rear Channels : Into 4 ohms @ 14.4 VDC 65W x 4 Into 2 ohms @ 14.4 VDC 100W x 4 Bridged into 4 ohms @ 14.4 VDC 200W x 2 Sub Channel : Into 4 ohms @ 14.4 VDC 165W x 1 Into 2 ohms @ 14.4 VDC...
Need help?
Do you have a question about the TA-605 and is the answer not in the manual?
Questions and answers