Advertisement
Table of Contents
- 1 Table of Contents
- 2 Safety Considerations
- 3 Product Introduction
- 4 Installation Method
- 5 Pre-Installation Preparations
- 6 Instructions for Proper Installation
- 7 Installation Notes
- 8 Testing Methods
- 9 Usage Methods
- 10 Maintenance and Upkeep
- 11 Filter Replacement Time
- 12 Filter Replacement Method
- 13 Notes
- 14 Failure Diagnosis and Resolution
- 15 After-Sales Service
- 16 Packing List
- Download this manual
Dear customer,
Thank you for purchasing our company's water purifier!
You now have water treatment equipment that is at the world's leading position in today's water
treatment field. It produces pure water that can be consumed directly so the water you drink is cleaner and
also beneficial to your health.
Before you install and use this water purifier, please be sure to read the user manual, this enables
qualified and standardised installation as well as reasonable use and maintenance to maximise the
effectiveness of your water purifier.
If you experience difficulties during installation or usage, please contact your local distributor to carry
out repairs or maintenance for you.
Installation and User Manual
Model
s:
KRAUSEN NEW LINE A-D LCD
-1-
For indoor use only
Advertisement
Table of Contents

Related Manuals for Krausen NEW LINE Series

Summary of Contents for Krausen NEW LINE Series
- Page 1 Installation and User Manual Model KRAUSEN NEW LINE A-D LCD For indoor use only Dear customer, Thank you for purchasing our company’s water purifier! You now have water treatment equipment that is at the world’s leading position in today’s water treatment field.
-
Page 2: Table Of Contents
Contents _____________ Page Safety Considerations……………..………..……………………………3 Product Introduction………………………..…...………………………6 Installation Method……………………………..……………..………12 1. Pre-Installation Preparations…………………………..…………..…… 12 2. Instructions for Proper Installation…………………………..……...…… 13 3. Installation Notes……………………………………………...…..……… Testing Methods..................16 Usage Methods………………………………………………………..…17 Maintenance and Upkeep……………………………………..……..…17 1. Filter Replacement Time……………………………….…………………..2. Filter Replacement Method…...………………………….………..……… …18 3. Notes ……………………………………………………………….……..Failure Diagnosis and Resolution……………………….…………..…19 After-Sales Service……………………………………..…...………...….19 Packing List…………………………………………………..………..…20... -
Page 3: Safety Considerations
Safety Considerations (Be sure to read and remember these safety considerations) In order to avoid property damage and harm to you and others, make note of the following safety precautions. ★ Ignoring the following safety precautions could result in a risky situation: Warnings If you ignore contents in this section, it may cause permanent damage to the water purifier or cause serious property damage. - Page 4 Do not use a power source exceeding When installing or repairing, the machine the machine’s specified value, only use must be disconnected from the power 220V AC power! source! The outlet used for the machine’s Otherwise it may lead to electric current must be greater than the shock.
- Page 5 The installer, service man, user or other responsible person should control system pump's pressure, volume of the waste water and filter's life for replacement. The pump type should correspond to the system model. Otherwise, it's can destroy the pump or other system's part. Unauthorised disassembly or modification of the machine could lead to machine malfunctions and leakage accidents.
-
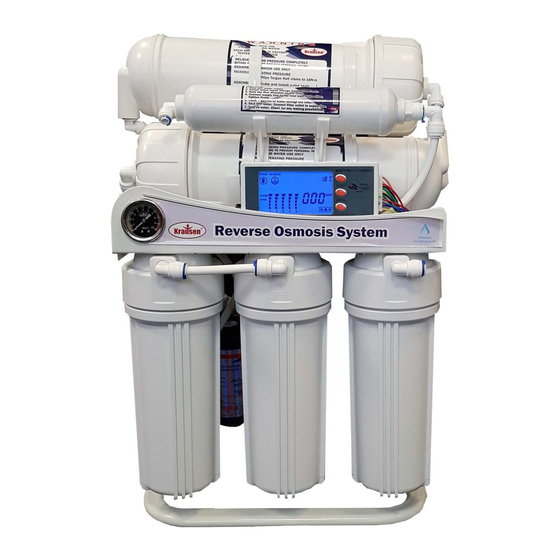
Page 6: Product Introduction
Product Introduction 1. Blown-up profile of the water purifier The system could be in 2 versions based on normal bracket or stable bracket. Normal Bracket Stable Bracket with Pressure meter Diagram 1 2. Electrical diagram Diagram 2... - Page 7 4. Technical Parameters 4.1 KRAUSEN NEW LINE A – D All types of NEW Line series (A-D) must be used only for domestic consumption, as a systems of direct filtration without additional tank usage and the drinking water production should not exceed 100 liters per day.
- Page 8 The hardness could reduce membranes' life. In case, of the big hardness level, we recommend to use prefiltration filters, such as Krausen water softeners systems or Krausen Aqua Mix Ion systems, as well as to use antiscalant liquid for the special membranes for High TDS.
- Page 9 Also known as a one-way valve, controls the flow direction. Flush Solenoid Valve: It's optional part and using for the modification KRAUSEN NEW LINE LCD only. It's help to clean up 2 membranes surface, to prevent the rise of the bacteria, to extend the life of the membranes.
- Page 10 LEAKAGE SENSOR TDS SENSORs the light is on, when the membrane flashing process started. The automatic membrane cleaning can be done every 7-8 hours or after immediately after long work period of time. The limit time of flashing could be between 0,5 – 1,5 min.
- Page 11 Filter service life LCD display show the INLET water TDS LCD display show the PURE water TDS The “Strong washing” button is a manual flashing start. It could pushed manually if need to make a membrane cleaning. Control Function Flush Function When power on, the LCD display will all light, the buzzer will beep one time.
-
Page 12: Installation Method
The pump and inlet solenoid and flush solenoid are all off. The buzzer will beep. TDS Function TDS is a measure of the combined total dissolved solids in a liquid. The 3 small signs in left will show the original water TDS value; ( Measuring range 0-999) The 2 big signs in right will show the pure water TDS value;... -
Page 13: Instructions For Proper Installation
Scissors 1 pair 21mm wrench 16mm wrench 14mm and 12mm multi wrench Needle nose pliers ③ Confirm that you have all the connectivity accessories required for installation ④Prior to installation turn off the water and/or electricity 2. Instructions for Proper Installation Inlet water metal hose and 3-way inlet water joint ①... - Page 14 bottom of the faucet (see Diagram 7). If you want to fix the faucet to the wall, please use the faucet hanging piece. (when installing be sure to tighten the joints to prevent leakage) Diagram 7 Diagram 8 ④ Waste water pipe installation Using a φ6mm drill punch a small hole into the sink drain pipe, take a suitable length of the 6mm water pipe, lay one end just inside the hole (See Diagram 8), put some silica gel where the 6mm pipe and the drain pipe connect to prevent leakage, use a cable tie to fix the waste water pipe to the drain pipe.
-
Page 15: Installation Notes
Warning: ◆ When installing the RO membranes, you should pay attention to the direction of the membrane; ◆ When installing the RO membranes, you should first make sure that one end of the membrane has an O-ring; ◆ When installing, be sure to put the end with the O-ring into the end of the membrane shell with the pure water connection, when installing correctly you only need a little force to put the reverse osmosis membrane into the membrane shell, if you encounter too much resistance, please do not force the reverse osmosis membrane into the membrane shell, doing so may cause permanent... -
Page 16: Testing Methods
If the inlet water pipe is 6mm, should ensure that the inlet water tube and connector have 30-40cm of straight piping to avoid burst pipe accidents caused by bending in the pipe. If the power cord wiring needs to be longer, then according to the wiring requirements use a Φ8mm pinched tube to wrap around the connection, then on the outside wrap around insulating electrical tape, do not place it on the floor, it should be suspended in the air or in another place away from the ground. -
Page 17: Usage Methods
Usage Methods 1. The major components of this product are plastic, when using the product always observe the integrity of the water purifier to ensure safe use. 2. In order to prevent microbial contamination of membrane components during storage and transportation the reverse osmosis membrane elements packages can contain a small amount of protective solution while the coconut activated post carbon filter will emit activated carbon powder the first time it is used. -
Page 18: Filter Replacement Method
◆ Poor water quality, taste declines, TDS value of water rises; ◆ Water flow is significantly reduced, check to see if the filter or membrane is blocked (and determine that it was not caused by a temperature drop); ◆ If the filter’s outer surface is covered in mud or the filter has significantly changed colour; ◆... -
Page 19: Failure Diagnosis And Resolution
Failure Diagnosis and Resolution Failure Reason Resolution Method Experienced The machine The power source is not connected Check the power source or the power will not start source plug Low inlet water pressure or no water Check the inlet water pressure Low-pressure switch failure, cannot connect the After connecting the inlet water, power source... -
Page 20: Packing List
9. If your water purifier exhibits abnormal behavior, please immediately turn of the water source, cut off the power, and contact your local vendor. Notes The company reserves the right to change product design, configuration, and specifications without notice. The company has the final explanation rights if this manual is unclear, has mistakes, or if there were printing problems which caused problems.
Need help?
Do you have a question about the NEW LINE Series and is the answer not in the manual?
Questions and answers