Table of Contents
Advertisement
Quick Links
Advertisement
Table of Contents
Troubleshooting

Related Manuals for Visioneer Rabbit PC30dwn

Summary of Contents for Visioneer Rabbit PC30dwn
- Page 1 Rabbit PC30dwn ™ User Guide...
- Page 2 Visioneer Rabbit™ PC30dwn Copyright Information © 2022 Visioneer, Inc. All rights reserved. The Visioneer brand name and OneTouch® logo are registered trademarks of Visioneer, Inc. Changes are periodically made to this document. Changes, technical inaccuracies, and typographic errors will be corrected in subsequent editions. Information is subject to change without notice and does not represent a commitment on the part of Visioneer.
- Page 3 Visioneer Rabbit™ PC30dwn Visioneer's Limited Product Warranty Please go to www.visioneer.com, select your product, and then click the “Warranty Program” link to view the warranty terms and conditions for your device. Restricted Rights Legend Use, duplication, or disclosure is subject to restrictions as set forth in contract subdivision (c)(1)(ii) of the Rights in Technical Data and Computer Software Clause 52.227-FAR14.
- Page 4 Product Recycling & Disposal If you are managing the disposal of your Visioneer® product, please note that the product may contain lead, mercury, Perchlorate, and other materials whose disposal may be regulated due to environmental considerations. The presence of these materials is fully consistent with global regulations applicable at the time that the product was placed on the market.
- Page 5 Your Visioneer® equipment and supplies have been designed and tested to meet strict safety requirements. These include safety agency examination, approval, and compliance with established environmental standards. To ensure the continued safe operation of your Visioneer® equipment, follow these safety guidelines at all times: Do these: Always follow all warnings and instructions that are marked on or supplied with the equipment.
- Page 6 ® Visioneer Rabbit™ PC30dwn Any part of the machine is damaged. ■ Maintenance Information Any operator product maintenance procedures will be described in the user documentation supplied ■ with the product. Do not carry out any maintenance on this product which is not described in the customer ■...
- Page 7 ® Visioneer Rabbit™ PC30dwn User Guide...
-
Page 8: Table Of Contents
Unpack The Visioneer® Rabbit™ PC30dwn ........ - Page 9 ® Visioneer Rabbit™ PC30dwn Windows Printer Properties ........... . 46 Basic .
- Page 10 ® Visioneer Rabbit™ PC30dwn Toner Cartridge Installation ........... . 89 Calibrating the Copier Module.
- Page 11 ® Visioneer Rabbit™ PC30dwn User Guide...
-
Page 12: Welcome
©2022 Visioneer, Inc. All rights reserved. The Visioneer brand name and logo are registered trademarks of Visioneer, Inc. Information is subject to change without notice and does not represent a commitment on the part of Visioneer. Changes are Escanea el código QR con tu dispositivo móvil Android o iOS. -
Page 13: Documentation
® Visioneer Rabbit™ PC30dwn Welcome An available Universal Serial Bus (USB) 3.0 port ■ Microsoft® Windows® operating system: ■ 32-bit or 64-bit Windows 7 (Service Pack 1) ■ 32-bit or 64-bit Windows 10 ■ 32-bit or 64-bit Windows 11 ■... -
Page 14: The Visioneer ® Rabbit™ Pc30Dwn Features
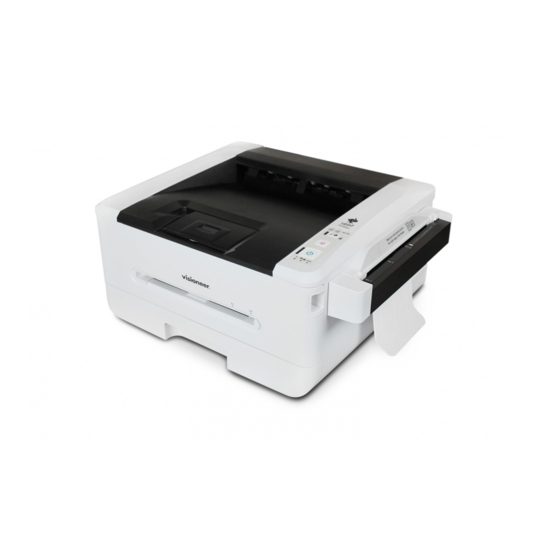
1. Output Tray — Holds documents after being printed and/or copied. 2. Paper Stop (Regular Documents) — Flip up to keep regular documents stacked neatly in the output tray. 3. Control Panel — Function buttons to control Visioneer ® Rabbit™ PC30dwn’s actions. - Page 15 ® Visioneer Rabbit™ PC30dwn Welcome User Guide...
-
Page 16: Setup
E T U P ® UNPACK THE VISIONEER RABBIT™ PC30DWN ® Remove the Visioneer Rabbit™ PC30dwn from its protective foam and plastic bag. 1. Remove any shipping tape from the device as indicated in the following illustration(s). The above illustrations are for example purposes only. Your device’s packaging may vary slightly. -
Page 17: Install The Toner Cartridge
® Visioneer Rabbit™ PC30dwn Setup 2. Remove the copier module’s paper guide from the protective bag. Gently squeeze the tabs of the paper guide, then, insert them into the grooves below the copier module until you feel a small click. - Page 18 ® Setup Visioneer Rabbit™ PC30dwn 4. Use scissors to carefully open the bag that contains the toner cartridge. 5. Remove the protective cover from the toner cartridge. 6. Remove tapes and protective packaging; start from the front of the toner cartridge, carefully pulling the tape around and off the back.
-
Page 19: Load And Adjust The Paper Tray
® Visioneer Rabbit™ PC30dwn Setup 8. Locate the small tab at the top left of the cartridge. Push it all the way to the right and return it to its starting point. It should click back into place. Note: Clean drum unit corona wire each time you replace the toner cartridge. -
Page 20: Connect The Power Cord
® Setup Visioneer Rabbit™ PC30dwn 2. Insert stack of sheets into the paper tray. See Main Paper Tray for sheet capacity. 3. Adjust the paper guides to fit neatly against the paper. 4. Return the paper tray into the device. -
Page 21: Connect The Usb Cable
Card, that you received with the device, for our customer service contact information. 1. Open an Internet Explorer window, or any other Internet browser you have installed on your computer. 2. In the web address field type www.visioneer.com. User Guide... - Page 22 3. Press Enter on your computer’s keyboard or click the option on screen to go to the web address. ® devices web page loads click on Register Your Product. 4. When the Visioneer 5. Fill in the registration form, all required fields have an asterisk (*). A valid email address is required for registration.
- Page 23 ® Visioneer Rabbit™ PC30dwn Setup User Guide...
-
Page 24: Installation
Install and Connect the device 1. Start Microsoft Windows and make sure that no other applications are running. 2. Go to www.visioneer.com/install. 3. Launch the installer once the download is complete. 4. Connect the device: a. Plug the USB cable into the USB port on the device then into a USB port on the computer.Turn on the device power. - Page 25 ® Visioneer Rabbit™ PC30dwn Installation b. Connect one end of an ethernet cable to an available port of your ethernet hub. Connect the other end to the port marked at the back of the product. 5. Click OK. 6. Select your device from the list.
- Page 26 ® Installation Visioneer Rabbit™ PC30dwn 9. Make sure the boxes for Driver is selected, as well as any other applications you want to install. 10. The software will have to first be downloaded by clicking Download. The total size of the download is shown at the bottom.
-
Page 27: View The User Guides
® Visioneer Rabbit™ PC30dwn Installation View the User Guides 1. Return to the Main menu and click on View user guides. 2. Click on View device documentation to access the device user guide. Device user guide—Instructions for device setup, installation, operation, maintenance, safety, ■... -
Page 28: Mac Installation
Visioneer Rabbit™ PC30dwn 5. Turn on the Visioneer® Rabbit™ PC30dwn’s power. ® The status light comes on and flashes indicating that the Visioneer Rabbit™ PC30dwn is receiving ® power. Your computer recognizes that a Visioneer Rabbit™ PC30dwn has connected by USB or Ethernet cable and automatically loads the appropriate software to run the device. - Page 29 ® Visioneer Rabbit™ PC30dwn Installation 3. Click on the Add icon. ® 4. Select the Visioneer Rabbit™ PC30dwn to add it to the list of available printers. 5. Click Add. User Guide...
-
Page 30: Connect To The Network Using A Ethernet Cable (Wired)
O N N E C T I O N Connecting the Visioneer® Rabbit™ PC30dwn to the network allows you to print from any device without having to install any software on your computer. The prerequisite of doing so is that the printer/copier and the device share the same network. -
Page 31: Setting Up Wired And Wireless Network Connection
3. You can now print from your mobile device. CONNECT THE PC30dwn TO YOUR WI-FI ® 1. Temporarily connect to your network either with the ethernet cable or directly to the Visioneer Connect to the Network using a Ethernet Cable (Wired) Connect Rabbit™... - Page 32 6. A message appears stating the connection is successful. ® 7. The Visioneer Rabbit™ PC30dwn is now connected to your Wi-Fi. You may disconnect from your initial connection. You can now print wirelessly from any device connected to your Wi-Fi.
- Page 33 ® Visioneer Rabbit™ PC30dwn Setting up Wired and Wireless Network Connection User Guide...
-
Page 34: Installing The Mobile Application
This is only required for use with mobile devices. Quickly download the mobile scanning app for Android or Apple. 1. Scan the QR code with your Android or iOS mobile device. Android 2. Install the application. ® 3. The Visioneer Rabbit™ PC30dwn is now ready to use with your mobile device. User Guide... - Page 35 ® Visioneer Rabbit™ PC30dwn Installing The Mobile Application User Guide...
-
Page 36: Loading The Paper Trays
Post-It™ notes that may come off during the scanning process and get stuck in the device. Misuse as described here will void your device’s warranty. Please go to www.visioneer.com, select your product, and then click the “Warranty Program” link to view the warranty terms and conditions for your device. -
Page 37: Manual Paper Tray
® Visioneer Rabbit™ PC30dwn Loading The Paper Trays Manual Paper Tray Maximum amount of paper in the manual tray ■ 1 page of 20 lbs (80 g/m ) new printer paper Preparing Documents for Printing Fan the documents to make sure all pages in the stack are separated. - Page 38 ® Loading The Paper Trays Visioneer Rabbit™ PC30dwn 3. Insert stack of sheets face down into the paper tray. 4. Ensure the paper guides fit neatly against the paper. Return the paper tray into the device. User Guide...
- Page 39 ® Visioneer Rabbit™ PC30dwn Loading The Paper Trays Loading the Main Paper Tray with sheets longer than A4 1. Remove the paper tray. 2. Press down on the first length adjustment latch, and at the same time slide the manual tray upwards until it “clicks”...
- Page 40 ® Loading The Paper Trays Visioneer Rabbit™ PC30dwn 4. Insert stack of sheets face down into the paper tray. 5. Ensure the paper guides fit neatly against the paper. 6. Return the paper tray into the device. Note: The paper tray will extend beyond the back of the device. Please account for extra operation space.
- Page 41 ® Visioneer Rabbit™ PC30dwn Loading The Paper Trays User Guide...
-
Page 42: Printing
R I N T I N G ® Easily print return mailing labels, recipes or documents using your Visioneer Rabbit™ PC30dwn. See Loading The Paper Trays for supported document types. PRINTING FROM YOUR WINDOWS PC 1. Open the document in your preferred application. -
Page 43: Printing From Your Android Mobile Device
® Visioneer Rabbit™ PC30dwn Printing ® 4. Select Visioneer Rabbit™ PC30dwn as the printer. Mac OS Printer Properties. For additional settings click on Show Details. For detailed information, see 5. When the settings are correct, click Print. PRINTING FROM YOUR ANDROID MOBILE DEVICE Installing The Mobile Application to ensure your device is print ready. - Page 44 Rabbit™ PC30dwn 1. Select and open your document in preferred viewer. You may also directly print photos or files by tapping the More icon, when applicable. Then select Print. ® 2. Select the Visioneer Rabbit™ PC30dwn as the printer. User Guide...
-
Page 45: Printing From Your Ios Mobile Device
® Visioneer Rabbit™ PC30dwn Printing 3. Ensure all the pages desired for printing are selected.Tap the Show More icon for additional settings. Copies — print multiple copies of the document. Paper size — this will resize the text/images on the page to the paper selected size. For best results, the paper size should match your document’s and/or the paper size that is currently in the paper tray. - Page 46 ® Printing Visioneer Rabbit™ PC30dwn 1. Select and open your document in preferred viewer. 2. Tap the Share icon. 3. Tap on Print. User Guide...
-
Page 47: Canceling A Print Job
® Visioneer Rabbit™ PC30dwn Printing ® 4. Select the Visioneer Rabbit™ PC30dwn as the printer. 5. Observe the settings are correct. Tap Print. CANCELING A PRINT JOB There are two ways to cancel a print job. 1. From your PC. - Page 48 Windows — users can normally stop a print request by using Windows Control Panel > ■ ® Devices and Printers (right click on the Visioneer Rabbit™ PC30dwn’s icon, select See what’s printing. Select the print job you want to cancel and right click on it then select the correct acting).
-
Page 49: Windows Printer Properties
® Visioneer Rabbit™ PC30dwn Printing WINDOWS PRINTER PROPERTIES These options are available when you select Properties from the Print Window. Basic Orientation — change the orientation (portrait or landscape) of the printed documents. User Guide... -
Page 50: Paper
Picture Mode — if the picture in your document does not print clearly, click Picture Mode to improve its quality. Text as Black — print color text in pure black. Note: The Visioneer ® Rabbit™ PC30dwn print in Black & White only. -
Page 51: Layout
® Visioneer Rabbit™ PC30dwn Printing Layout N-up — select the number of pages to be printed on a single sheet of paper. Select between Off, 2up (2 pages-in-1), 4-up(4 pages-in-1), 9-up(9 pages-in-1), 16-up(16 pages-in-1). Border — select to add border around each page when printing more than one page on a single sheet of paper (None, Border Line, Dashed Line). -
Page 52: Watermarks
® Printing Visioneer Rabbit™ PC30dwn Watermarks The Watermark tab allows you to add some text or image (such as Confidential, Important, Draft, etc) for your document. First Page Only — check the box to print the watermark on the first page only, otherwise the watermark will print on all pages. - Page 53 ® Visioneer Rabbit™ PC30dwn Printing Adding a New Text Watermark 1. Select New/Add to add new watermark text. Name — name your watermark text. This name will be shown in the Watermark text list. String — enter your watermark text, such as confidential, important, and so on.
-
Page 54: Adding A New Image Watermark
® Printing Visioneer Rabbit™ PC30dwn Adding a New Image Watermark 1. Select New/Add to add new watermark image. Name — name your watermark image. This name will be shown in the Watermark image list. File — click the Browse button to locate your watermark image. -
Page 55: Duplex
® Visioneer Rabbit™ PC30dwn Printing Duplex The Duplex option must be enabled to print on both sides of the paper. Flip Horizontal — select to flip the duplex document on the left edge. Flip Vertical — select to flip the duplex document on the bottom edge. -
Page 56: Mac Os Printer Properties
Orientation — change the orientation (portrait or landscape) of the printed documents. Media & Quality Feed from — specify to feed from the main paper tray or the manual feed ■ Media type — this feature is disabled for the Visioneer ® Rabbit™ PC30dwn. ■... - Page 57 ® Visioneer Rabbit™ PC30dwn Printing Two-Sided — have the document printed on both sides of the paper. ■ Reverse page orientation — the data is rotated 180 degrees. ■ Flip horizontally — the data is mirrored. ■ Paper Handling Collate pages — select to print your document in the page order such as 1/2/3, 1/2/3, 1/2/3.
-
Page 58: More
® Printing Visioneer Rabbit™ PC30dwn More On the More tab, a Wait Timeout option is provided to set the amount of time the printer waits for data to come from computer during a job. If the data stream pauses for longer than the specified number of seconds, the job is canceled. - Page 59 ® Visioneer Rabbit™ PC30dwn Printing User Guide...
-
Page 60: Copying
Post-It™ notes that may come off during the scanning process and get stuck in the device. Misuse as described here will void your device’s warranty. Please go to www.visioneer.com, select your product, and then click the Warranty Program link to view the warranty terms and conditions for your device. -
Page 61: Unsupported Document Types
® Visioneer Rabbit™ PC30dwn Copying Extremely smooth, shiny, or highly textured paper may cause the paper feed rollers to slip across the ■ page and cause the device to report a paper jam. Carbonless copy paper may tear while being fed through the device and the pressure of the rollers ■... -
Page 62: Multiple Simplex Copies
® Copying Visioneer Rabbit™ PC30dwn 2. Load your document with the text side facing outward and align the paper to the right edge of the feeder. 3. The copying process will automatically begin. The paper will be guided through the feeder, once the scanning is complete the printing will begin. -
Page 63: Duplex Copy
® Visioneer Rabbit™ PC30dwn Copying 4. Press on the Power Button within 5 seconds after the printing is complete. The Status Light should still be flashing. Power Button Status Light 5. Another copy of your document will begin. Repeat the previous step for more copies of the same document. -
Page 64: Multiple Duplex Copies
® Copying Visioneer Rabbit™ PC30dwn 3. The copying process for the front side will automatically begin. The paper will be guided through the feeder. 4. Once the copy of the first side is complete, observe that the Status Light is flashing. Load your document with the back side facing outward and align the paper to the right edge of the feeder. - Page 65 ® Visioneer Rabbit™ PC30dwn Copying 2. Load your document with the front side facing outward and align the paper to the right edge of the feeder. 3. The copying process for the front side will automatically begin. The paper will be guided through the feeder.
-
Page 66: Id Card Copy
® Copying Visioneer Rabbit™ PC30dwn 7. Press on the Power Button within 5 seconds after the printing is complete. The Status Light should still be flashing. Power Button Status Light 8. Another copy of your document will begin. Repeat the previous step for more copies of the same document. -
Page 67: Multiple Id Card Copies
® Visioneer Rabbit™ PC30dwn Copying 3. The copying process for the front side will automatically begin. The ID card will be guided through the feeder. 4. Once the copy of the first side is complete, observe that the Status Light is flashing. Load your document with the back side facing outward and align the paper to the right edge of the feeder. - Page 68 ® Copying Visioneer Rabbit™ PC30dwn 2. Load your document with the front side facing outward and align the paper to the right edge of the feeder. 3. The copying process for the front side will automatically begin. The ID card will be guided through the feeder.
- Page 69 ® Visioneer Rabbit™ PC30dwn Copying 7. Another copy of your document will begin. Repeat the previous step for more copies of the same document. User Guide...
-
Page 70: Maintenance
■ installing or servicing. ® ® Move the Visioneer Rabbit™ PC30dwn to an area that has adequate room for opening the Visioneer ■ Rabbit™ PC30dwn. ® If your Visioneer Rabbit™ PC30dwn has a power cord and/or power switch, always turn off the ■... -
Page 71: Printer Status Monitor
Never service the Visioneer Rabbit™ PC30dwn in an area where there are open liquid containers. ■ ® Never pour or spill liquid on the Visioneer Rabbit™ PC30dwn or any of its components. ■ PRINTER STATUS MONITOR The Printer Status Monitor allows you to monitor your printer’s status, get information on consumable parts, and alerts you when printer errors occur. - Page 72 ® Maintenance Visioneer Rabbit™ PC30dwn Status Window 1. Printers — displays connected printers. 2. Enable=— check the box to enable accessing the status of a specified printer. 3. Port Name — port name for the specified printer. 4. Progress Bar — displays the connectivity status.
- Page 73 ® Visioneer Rabbit™ PC30dwn Maintenance 2. Show Pop-up Error Message — check this box to allow pop-up error messages to appear on your desktop 3. Show Pop-up Warning Message — check this box to allow pop-up warning messages to appear on your desktop.
-
Page 74: Troubleshooting
® Maintenance Visioneer Rabbit™ PC30dwn TROUBLESHOOTING Error Message Possible Causes and/or Solutions Service code: 100111 Restart printer. If this error persists, call service for help. I2C error (100112) Call service for further help. Printer module error (205000, An unexpected error from printer parts 205001, 205101) occurs. -
Page 75: System Errors
® Visioneer Rabbit™ PC30dwn Maintenance Error Message Possible Causes and/or Solutions PRINTER not ready. Printer is busy with current job. Wait until Try again later current job is completed. Buffer full Job abort There is not enough memory to process the scanned images. - Page 76 ® Maintenance Visioneer Rabbit™ PC30dwn Error # Cause Printer MB NVRAM : writing error 201702 201703 Printer MB NVRAM : reading error while comparing 201704 Printer MB NVRAM : comparing error 201711 Printer Drum Unit NVRAM : reading error 201712...
-
Page 77: Image Problem Troubleshooting
® Visioneer Rabbit™ PC30dwn Maintenance IMAGE PROBLEM TROUBLESHOOTING Problem Image Example Solution Paper curls 1. Use paper of standard weight: If you are using thin paper, try to use paper of standard weight (70 2. Use paper with less moisture: Load... - Page 78 ® Maintenance Visioneer Rabbit™ PC30dwn Problem Image Example Solution Vertical black lines Please clean the EP charger. Dirty background Check if toner is not leaked from the (partial page) toner cartridge. If so, replace the toner cartridge. Dirty background 1. The paper might not meet the (entire page) printer’s specifications (for...
-
Page 79: Clearing Paper Jams
® Visioneer Rabbit™ PC30dwn Maintenance CLEARING PAPER JAMS If your device stops scanning due to a paper jam, a warning opens after a few moments. Paper Jam Error Message Solution ADF paper jam (002013) 1. Open ADF cover and clear paper. -
Page 80: Locations Of Paper Jams
® Maintenance Visioneer Rabbit™ PC30dwn Locations of Paper Jams Front Cover Rear Cover Open the front cover by pulling the handles of Open the front cover by pulling the handles of the the front cover on both sides. front cover on both sides. -
Page 81: Cleaning The Device
® Visioneer Rabbit™ PC30dwn Maintenance Fuser The area around the fuser is hot. To avoid a burn injury, be careful not to touch the fuser until it cools down and follow these steps to remove the jammed paper: 1. Open the Front Cover and the Rear 2. -
Page 82: Cleaning The Outside Of The Device
® Maintenance Visioneer Rabbit™ PC30dwn Cleaning the Outside of the device Excessive dust accumulation around and on the device will pull into the device during the scanning process and clog the ventilation openings. You should clean the inside of the device at least once a week or as needed depending on how often the device is used. -
Page 83: Cleaning The Copier
® Visioneer Rabbit™ PC30dwn Maintenance WARNING: The roller cleaning paper is moistened with isopropyl rubbing alcohol. Please read and follow these precautions to ensure your safety. Cleaning the Copier Cleaning the Copier Roller 1. Place your thumbs on either side of the paper feed slot, firmly and pull the scanner lid down to release it from the body of the scanner. -
Page 84: Cleaning The Lph Unit
® Maintenance Visioneer Rabbit™ PC30dwn Cleaning the Copier Glass 1. Place your thumbs on either side of the paper feed slot, firmly and pull the scanner lid down to release it from the body of the copier. 2. Use a wet soft cloth with isopropyl rubbing alcohol (70%) to clean the copier glass. - Page 85 ® Visioneer Rabbit™ PC30dwn Maintenance 2. Remove the drum unit. 3. Use a wet soft cloth with isopropyl rubbing alcohol (70%) to clean the LPH unit, located at the back of inside the scanner. 4. Return the drum unit into the device. Push it in then down.
-
Page 86: Cleaning The Paper Path
® Maintenance Visioneer Rabbit™ PC30dwn Cleaning the Paper Path 1. Open the Front Cover. 2. Remove the drum unit. 3. Check to see if the paper path has any dust, if so, use a soft cloth to gently remove any excess dirt. -
Page 87: Cleaning The Ir Sensors
® Visioneer Rabbit™ PC30dwn Maintenance 4. Return the drum unit into the device. Push it in then down. 5. Close the front cover. Cleaning the IR Sensors If too much paper dust or dust accumulates on the IR sensors, it may cause the misjudgment of paper jam. -
Page 88: Cleaning The Paper Sensors
® Maintenance Visioneer Rabbit™ PC30dwn 3. Use a wet soft cloth with isopropyl rubbing alcohol (70%) wipe the area near the sensors. 4. Return the drum unit into the device. Push it in then down. 5. Close the front cover. -
Page 89: Cleaning The Sensor Board
® Visioneer Rabbit™ PC30dwn Maintenance Cleaning the Sensor Board 1. Remove the paper tray. 2. Use a soft cloth to wipe the area near the sensors and wipe the back of the sensor board. 3. Return the paper tray into the device. -
Page 90: Cleaning The Drum Unit
® Maintenance Visioneer Rabbit™ PC30dwn 2. Use a roller cleaning paper, or wet soft cloth with isopropyl rubbing alcohol (70%) wipe the pad. 3. Return the paper tray into the device. The roller cleaning WARNING: After cleaning the pad, ensure it is fully dried before returning the paper tray back to the device. - Page 91 ® Visioneer Rabbit™ PC30dwn Maintenance 3. Remove the drum unit. 4. Remove the toner cartridge. 5. Clean this area of the drum unit with a soft cloth. User Guide...
-
Page 92: Toner Cartridge Installation
® Maintenance Visioneer Rabbit™ PC30dwn 6. Return the toner cartridge into the drum unit. Tilt the toner cartridge upwards to insert it in the drum unit. Push down on the toner cartridge to snap it into place. 7. Return the paper tray into the device. - Page 93 ® Visioneer Rabbit™ PC30dwn Maintenance 2. Push down on the drum unit’s tab. Then, pull up on the tab to dislodge the drum unit. 3. Pull the drum unit out towards you. 4. Use scissors to carefully open the bag.
- Page 94 ® Maintenance Visioneer Rabbit™ PC30dwn 5. Remove the protective cover from the toner cartridge. 6. Remove tapes and protective packaging; start from the front of the toner cartridge, carefully pulling the tape around and off the back. 7. Tilt the toner cartridge upwards to insert it in the drum unit. Push down on the toner cartridge to snap it into place.
-
Page 95: Calibrating The Copier Module
® Visioneer Rabbit™ PC30dwn Maintenance 8. Clean drum unit corona wire each time you replace the toner cartridge. 9. Insert the drum unit loaded with the toner cartridge in the device. Push it in and then down. Note: For instructions on how to return your empty toner cartridge and/or drum unit for recycling, visit www.visioneer.com/tonerreturns. - Page 96 ® Maintenance Visioneer Rabbit™ PC30dwn 2. Press and hold the Mode Button until a solid light appears. Light Mode Button 3. Press the Power Button once. 4. The settings light will flash intermittently 3 times. 5. The device is now ready to be calibrated.
-
Page 97: Troubleshooting
■ camera, all-in-one printer, or another device, you may have selected another source for images. Make ® sure Visioneer Rabbit™ PC30dwn is selected as the device. Problem: Why does my device not function after performing a system restore on Windows? The system restore process may have corrupted some of the driver components. -
Page 98: Light Troubleshooting Codes
® Maintenance Visioneer Rabbit™ PC30dwn Problem: If the USB cable is disconnected during a print, the device does not reconnect when the USB cable is plugged back in. Unplug the power cable from the device, and then plug it back in. -
Page 99: Uninstalling Your Device
■ Uninstalling the device driver: ® 1. In the list of installed programs click on Visioneer Rabbit™ PC30dwn driver. 2. Click the Change/Remove or Uninstall button. 3. Click Yes when asked to confirm that you want to remove the driver. -
Page 100: Visioneer ® Rabbit™ Pc30Dwn Specifications
® Maintenance Visioneer Rabbit™ PC30dwn ® VISIONEER RABBIT™ PC30DWN SPECIFICATIONS Device Specifications Document Requirements Minimum Item 2.05 x 2.05 inches (52 x 52 mm) Size Maximum Item 8.5 x 14 inches (216 x 356 mm) Size Capacity 100 pages of 20 lbs printer paper (80 g/m Paper Thickness 7–110 lbs (27 –... - Page 101 ® Visioneer Rabbit™ PC30dwn Maintenance Device Specifications ≤ 972 Watts (during operation) Power consumption ≤ 23.2 Watts (ready) ≤ 3.23 Watts (power save after 15 minutes without scanning) ≤ 2.2 Watts (power save after 15 minutes without scanning, USB interface off) ≤...
-
Page 102: Rabbit™ Pc30Dwn Parts List
® Maintenance Visioneer Rabbit™ PC30dwn ® VISIONEER RABBIT™ PC30DWN PARTS LIST Part Name Part Number USB 3.0 Cable 35-0118-000 Power Cord 35-0269-000 Ethernet Cable 35-0270-000 Calibration Sheet Call technical support User Guide... - Page 103 ® Visioneer Rabbit™ PC30dwn Maintenance User Guide...
-
Page 104: The Scanner's Web Interface
C A N N E R ’ N T E R F A C E ACCESSING THE SCANNER’S WEB INTERFACE To access the Scanner’s Web Interface, you will first need to locate the IP Address. Finding the IP Address This is your scanner’s IP address. It is used to access the Scanner’s Web Interface. 1. - Page 105 ® Visioneer Rabbit™ PC30dwn The Scanner’s Web Interface 3. Open a browser and enter the IP address of your printer. 4. The scanner’s embedded web page appears. User Guide...
-
Page 106: Status
® The Scanner’s Web Interface Visioneer Rabbit™ PC30dwn STATUS Information Item Description Machine Status Displays the device’s status. Host Name Displays the product’s host name. Serial Number Displays the scanner’s serial number. System Version Displays the currently installed firmware version. -
Page 107: Report
® Visioneer Rabbit™ PC30dwn The Scanner’s Web Interface Report Click Download to download the System Usage Page (which can also be printed by pressing and holding the Cancel button). This contains the system usage information and the system settings. User Guide... -
Page 108: System Settings
® The Scanner’s Web Interface Visioneer Rabbit™ PC30dwn SYSTEM SETTINGS Item Description Options Language The language displayed on the web English page. Sleep Mode Choose if you wish to enter energy ECO mode ■ saving mode and how long to wait to 5Min ■... - Page 109 ® Visioneer Rabbit™ PC30dwn The Scanner’s Web Interface Item Description Options Schedule Set an automatic restart of the device On/Off + set the amount of days to Restart settings. schedule restart. Paper Size Specify the default paper size. ■ *LTR (Default) ■...
-
Page 110: Copy Settings
® The Scanner’s Web Interface Visioneer Rabbit™ PC30dwn COPY SETTINGS Item Description Copy Mode Select the copy mode that suit your original document (*Text, Mixed) Density Displays the default density level. Default: 4 (range 1 ~ 7) Toner Save Select On/Off. Selecting On will print documents in draft mode, saving you toner. -
Page 111: Ethernet Settings
® Visioneer Rabbit™ PC30dwn The Scanner’s Web Interface Ethernet Settings Item Description Obtain an IP address *Off/On automatically IP Address Enter your specified IP address of the product. Subnet Mask Enter your specified IP address for the subnet mask. Default Gateway Enter your specified IP address for the the gateway. -
Page 112: Network Security Setup
® The Scanner’s Web Interface Visioneer Rabbit™ PC30dwn Network Security Setup Item Description Security Configuration Specify if you wish to enable or disable the filter configuration (*Disable/ Filter Enable). Filter Configuration Specify your filter mode to allow some IPs to access the device or deny some IPs from accessing the device (Allow/Deny). - Page 113 ® Visioneer Rabbit™ PC30dwn The Scanner’s Web Interface To update the product’s firmware 1. Click Browse to find the firmware file on your computer. 2. Click Update to begin the updating process for your product. User Guide...
-
Page 114: Appendix A: Regulatory Information
P P E N D I X E G U L A T O R Y N F O R M A T I O N BASIC REGULATIONS United States (FCC Regulations) This equipment has been tested and found to comply with the limits for a Class B digital device, pursuant to Part 15 of the FCC Rules. -
Page 115: European Union
® Visioneer Rabbit™ PC30dwn Appendix A: Regulatory Information European Union The CE mark applied to this product, symbolizes our declaration of conformity with the following applicable European Union Directives, as of the dates indicated: September 8, 2017: Council Directive 2014/35/EU as amended. Approximation of the laws of the member states related to low voltage equipment. - Page 116 ® Appendix A: Regulatory Information Visioneer Rabbit™ PC30dwn 1. Obligations or Securities of the United States Government, such as: Certificates of National Bank Currency Coupons from Bonds Indebtedness Federal Reserve Bank Notes Silver Certificates Gold Certificates United States Bonds Treasury Notes...
-
Page 117: Canada
® Visioneer Rabbit™ PC30dwn Appendix A: Regulatory Information 11. Reproducing the following is also prohibited in certain states: Automobile Licenses — Drivers’ Licenses — Automobile Certificates of Title. The above list is not all inclusive, and no liability is assumed for its completeness or accuracy. In case of doubt, consult your attorney. - Page 118 ® Appendix A: Regulatory Information Visioneer Rabbit™ PC30dwn Note: This list is not inclusive and no liability is assumed for either its completeness or accuracy. In case of doubt, contact your legal counsel. Software User Guide...
- Page 119 ® Visioneer Rabbit™ PC30dwn Appendix A: Regulatory Information User Guide...
-
Page 120: Appendix B: Compliance Information
PRODUCT RECYCLING & DISPOSAL USA & Canada ® If you are managing the disposal of your Visioneer Product, please note that the product may contain lead, mercury, Perchlorate, and other materials whose disposal may be regulated due to environmental considerations. The presence of these materials is fully consistent with global regulations applicable at the time that the product was placed on the market. - Page 121 ® Visioneer Rabbit™ PC30dwn Appendix B: Compliance Information User Guide...
Need help?
Do you have a question about the Rabbit PC30dwn and is the answer not in the manual?
Questions and answers