Table of Contents
Advertisement
Quick Links
Period Telephone
user manual v1
contents
1. WHAT IS THE PERIOD TELEPHONE?.......................................
2. OPERATION....................................................................................
3. IN THE BOX.....................................................................................
4. SETUP INSTRUCTIONS................................................................
5. PROGRAMMING...........................................................................
5.1 ADDING CONTENT....................................................
5.2 CHOOSE SETTINGS...................................................
6. USING PIR ......................................................................................
7. STATUS LED....................................................................................
8. SPECIFICATIONS...........................................................................
1
1
1
1
2
2
4
4
5
5
Advertisement
Table of Contents

Related Manuals for blackbox-av Period Telephone

Summary of Contents for blackbox-av Period Telephone
-
Page 1: Table Of Contents
Period Telephone user manual v1 contents 1. WHAT IS THE PERIOD TELEPHONE?........2. OPERATION..................3. IN THE BOX..................4. SETUP INSTRUCTIONS..............5. PROGRAMMING................5.1 ADDING CONTENT............ 5.2 CHOOSE SETTINGS........... 6. USING PIR ..................7. STATUS LED..................8. SPECIFICATIONS................ -
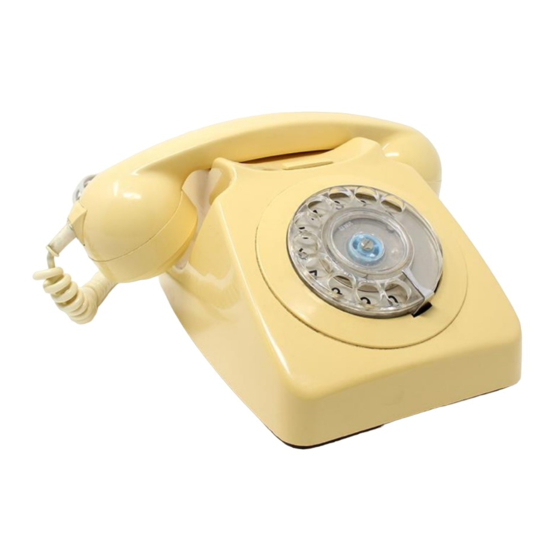
Page 2: What Is The Period Telephone
It consists of two parts; Control Box 1) The control box 2) The period telephone Note that the period telephone can be any compatible model, we are able to supply a range of phones from different eras (included in price). 4.SETUP INSTRUCTIONS 2.OPERATION Connecting your PT is simple and straight forward. -
Page 3: Programming
1) Add content to the MicroSD Card 2) Choose settings via .txt mode file (this must be on the MicroSD Card) 5.1 ADDING CONTENT The Period Telephone plays files from a MicroSD card that is slotted into the RJ11 - Control Status LED Control Box, as pictured on page 1. - Page 4 Page 3 File name Activation # Mode 1 Activation # Mode 2 Cards with more than 10 messages (not including the pickup and dial tone) will operate in Mode 2 (dial 01, 02, 03 etc.). The maximum number of messages is 97, with the pickup message and dial tone making the total 99.
-
Page 5: Choose Settings
Rings = 8 and Dial tone. Delay = 1 minute Config end 5.2 CHOOSE SETTINGS VIA CONFIG FILE Settings for the Period Telephone are edited via a .txt config file. Settings include; Volume - Set message volume Ring Type - Choose ring type (currently only 1 option) -
Page 6: Status Led
PIR this means the set delay is over and it is ready to be triggered again. As standard the Period Telephone Control Box will power a 5v PIR, however this can be changed to 12v should you require by moving a jumper located on the board.
Need help?
Do you have a question about the Period Telephone and is the answer not in the manual?
Questions and answers