
Subscribe to Our Youtube Channel
Summary of Contents for Happy Flyers Wipeout
- Page 1 Construction manual Rev. 0.93 17.07.2015 Construction manual - Wipeout © 2014 happy-flyers.ch - 1 / 142 -...
-
Page 2: Table Of Contents
Drawing CG at bottom ..................... 28 Preparation ........................29 6.2.1 Foam negative ......................29 6.2.2 Kit parts ........................31 6.2.3 Electronics ....................... 46 6.2.4 Other stuff ........................ 50 Cut-outs .......................... 51 Construction manual - Wipeout © 2014 happy-flyers.ch - 2 / 142 -... - Page 3 Motor and ESC ...................... 110 6.10 Determine CG ....................... 111 6.10.1 Draw CG (if not done yet) ..................111 6.10.2 Positioning battery bay ................... 112 6.10.3 Cut-out ........................113 Construction manual - Wipeout © 2014 happy-flyers.ch - 3 / 142 -...
- Page 4 6.12 Impressions ........................118 Settings and configuration ....................122 Rudder linkage......................122 Setting “Rookie” ..................... 123 7.1.1 Setting “Common” ....................124 7.1.2 Setting “Wipeout” ....................125 7.1.3 RC Control ........................127 ESC ..........................129 7.3.1 Throttle ........................129 First flight ..........................133 Preparations .........................
-
Page 5: Summary
(durability, flight times etc.). Enjoy planning and building your Wipeout wing! Disclaimer This is a RC model kit which has many fields of application. In any case, always take care of the security and privacy of other peoples. -
Page 6: Specifications
Speed max (8x7 aeronaut fold prop) (*) ~140 km/h Range max Depends on used RC / FPV equipment Altitude max Same as above (*) – With our recommended electronic package and building methods! Construction manual - Wipeout © 2014 happy-flyers.ch - 6 / 142 -... -
Page 7: Center Of Gravity (Cog)
3.1.1 Center of gravity (COG) Measured from top 175mm Measured from the back 143mm COG Range + / - 2.5mm from this point (green dot) Construction manual - Wipeout © 2014 happy-flyers.ch - 7 / 142 -... -
Page 8: Servo Cut-Outs
3.1.2 Servo cut-outs Servo max width 32 mm Servo max length 33.5 mm Servo max height 16 mm Construction manual - Wipeout © 2014 happy-flyers.ch - 8 / 142 -... -
Page 9: Battery Plate
Battery plate Material Plywood (extreme stable) Thickness Motor mount Material Plywood (extreme stable) Thickness 4mm motor mount, 3mm side and bottom part Construction manual - Wipeout © 2014 happy-flyers.ch - 9 / 142 -... -
Page 10: Package Content
Package content 1x EPP Foam in two parts with negative 1x Plywood motormound in four parts 2x EPP servohole covers 1x Plywood Battery plate, 1x Velcrostrap Construction manual - Wipeout © 2014 happy-flyers.ch - 10 / 142 -... - Page 11 2x Rudder linkage in seven parts 2x Elevons balsa wood (pre-cut) 2x Rudder horn 2mm GFK 2x Winglets coroplast 4mm Construction manual - Wipeout © 2014 happy-flyers.ch - 11 / 142 -...
- Page 12 2x Wing stiffening 3mm (470, 500 and 230mm) 1x 2m laminating foil 80 micron 1x Cross-bracing 6/4mm, 8/6mm and 3mm 2x Oracover for Winglets 32x12mm Construction manual - Wipeout © 2014 happy-flyers.ch - 12 / 142 -...
- Page 13 1x Sticker „Wipeout – by Happy Flyers“ 2x Sticker “Happy-Flyers.ch” Construction manual - Wipeout © 2014 happy-flyers.ch - 13 / 142 -...
-
Page 14: Before We Start
(marked with ”(optional)”). The “Wipeout – by Happy Flyers” is an open platform, which will be usable for any kind of environment. You can user your full FPV gear with GoPro, or you can go without any FPV equipment at all and fly it classically. -
Page 15: Required Tools
10. 2.0 mm Inbus / Allen key (for Scorpion Motor) 11. Solder station (if you don’t use a plug and play solution) 12. Scissors 13. Small screwdriver (stuffing rods and tubes into the foam) Construction manual - Wipeout © 2014 happy-flyers.ch - 15 / 142 -... -
Page 16: Required Building Materials
7. Hot glue (for example for optional FPV camera) 8. UHU hard (“UHU hart”) or similar slow drying hard glue 9. Fibre tape 10. Super glue activator spray Construction manual - Wipeout © 2014 happy-flyers.ch - 16 / 142 -... -
Page 17: Electronics
Don’t save money buying cheap parts from which your control to the plane depends (RC / FPV equipment)! 5.5.2 Philosophies Let’s think about all the important things, which can cause some serious problems, affecting your range or causing some RF interference. Construction manual - Wipeout © 2014 happy-flyers.ch - 17 / 142 -... - Page 18 Of course it is also better to keep these wires as short as possible in consideration of the previous chapter. A very important part is the next chapter! Construction manual - Wipeout © 2014 happy-flyers.ch - 18 / 142 -...
- Page 19 Signal wires. Possible wires for example are Network cables (CAT 6 or higher), highly shielded multimedia cables or USB cables. Highly shielded multimedia Cable CAT 6 Network cable Construction manual - Wipeout © 2014 happy-flyers.ch - 19 / 142 -...
- Page 20 But also pay attention not to cross these electronics any way. These can cause some serious RF interference and reduce your range! Construction manual - Wipeout © 2014 happy-flyers.ch - 20 / 142 -...
- Page 21 Ground loops can result in serious problems! So pay attention and try to avoid them! Ground loop No Ground loop There is more than one return point! Grounds are separated! Construction manual - Wipeout © 2014 happy-flyers.ch - 21 / 142 -...
-
Page 22: Esc Settings
Ensure your ESC has the correct Setting and Firmware if applicable. When you glued it in it will be hard to reach it again. If you have buyed our recommended Electronic Package for the Wipeout, your ESC is already programmed. -
Page 23: Building Tutorial
Building tutorial Construction manual - Wipeout © 2014 happy-flyers.ch - 23 / 142 -... -
Page 24: Planning And Drawing
Planning and drawing Plan everything carefully before you start building! Construction manual - Wipeout © 2014 happy-flyers.ch - 24 / 142 -... -
Page 25: Planning Your Installation
Attention! Centre of gravity is difficult or near impossible to reach later, if you are placing your RC, FPV and other electronics components too far at the back of the wing! Construction manual - Wipeout © 2014 happy-flyers.ch - 25 / 142 -... - Page 26 Cables at the upside bottom Cables at the upside This is only a crude example! You can follow your own recommendations here of course! Construction manual - Wipeout © 2014 happy-flyers.ch - 26 / 142 -...
-
Page 27: Drawing Borders
It’s time now to draw your plan on the wing! Simple take some painters tape (optional) and draw the borders of your electronics and wires on the wing. This will result in great looking cut-outs which will fit perfectly! Construction manual - Wipeout © 2014 happy-flyers.ch - 27 / 142 -... -
Page 28: Drawing Cg At Bottom
If you wish, you can draw the centre of gravity at this time. You also can do this step later in this tutorial (when you need to determine the CG). Completely up to you! You find the correct specifications in chapter 3.1.1! Construction manual - Wipeout © 2014 happy-flyers.ch - 28 / 142 -... -
Page 29: Preparation
1. Cut your two foam negatives in two pieces. You can use a ruler ore make it by hand. Its not that important… 2. Tape both top and both bottom foam negatives together (we recommend to do this on both sides, inner and outer). Construction manual - Wipeout © 2014 happy-flyers.ch - 29 / 142 -... - Page 30 5. Also make large cuts in the top sided foam negative, where the rudder linkage will be located later. Your foam negative should now be prepared! Construction manual - Wipeout © 2014 happy-flyers.ch - 30 / 142 -...
-
Page 31: Kit Parts
1. Glue the four parts together (we recommend to use super glue) and let it dry! 2. Insert the 8mm fibre tube and be sure it is centred (measure 145mm from the outside of the motor mount to the end of the tube). Construction manual - Wipeout © 2014 happy-flyers.ch - 31 / 142 -... - Page 32 3. Insert the 3mm fibre and also be sure it is centred (measure 80mm from the outside of the motor mount to the end of the tube). Construction manual - Wipeout © 2014 happy-flyers.ch - 32 / 142 -...
- Page 33 4. Verify everything fits into the foam before you continue! Construction manual - Wipeout © 2014 happy-flyers.ch - 33 / 142 -...
- Page 34 The matt side contains the glue so this side will be on the wood! 2. Start laminating at the upside of the Elevon (without making any cuts). Construction manual - Wipeout © 2014 happy-flyers.ch - 34 / 142 -...
- Page 35 7. Make some cuts in the Oracover where the cut-outs for the rudder horns are located. You can easily locate them when pushing a bit around on the Elevon. Construction manual - Wipeout © 2014 happy-flyers.ch - 35 / 142 -...
- Page 36 9. Take the mixed glue and let it drop into the cut-out in the Elevon (use enough glue)! 10. Push the glue into the cut! 11. Take the Rudder horn and also push it with force into the Elevon till it fits correctly! Construction manual - Wipeout © 2014 happy-flyers.ch - 36 / 142 -...
- Page 37 12. Apply some glue around the Rudder horn. 13. Let it dry! This is extremely important since the Rudder horn otherwise can move. Your Elevons should now be ready! Construction manual - Wipeout © 2014 happy-flyers.ch - 37 / 142 -...
- Page 38 Wheter or not which glue or method you choose here, be sure it will hold! After your work here is done and all glues are dry, test it by trying to pulling the Rudder linkage apart. Prepare all the parts and the glue! Construction manual - Wipeout © 2014 happy-flyers.ch - 38 / 142 -...
- Page 39 2. Be fast now! Take the short 105mm fibre rod and push it against the stop into the threaded couple. 3. Add a little super glue (or if you choose another glue take that one) and add it around the fibre rod. Construction manual - Wipeout © 2014 happy-flyers.ch - 39 / 142 -...
- Page 40 We recommend to centre the Nut at the thread and tighten screw it to the clevice. 8. The two ends on the Servo side should now be at exactly the same position. Construction manual - Wipeout © 2014 happy-flyers.ch - 40 / 142 -...
- Page 41 9. Add the other two clevices to the other side of the Rudder linkage. 10. Your Rudder linkage should now look like this. Construction manual - Wipeout © 2014 happy-flyers.ch - 41 / 142 -...
- Page 42 The parallel line should be long enough! It’s not that critical you can draw the line from the top to near the back of the foam. 3. Repeat step 2 for the other foam. Construction manual - Wipeout © 2014 happy-flyers.ch - 42 / 142 -...
- Page 43 6. Make now a horizontal cut along your marked border in the foam. Be sure it is straight! 7. Repeat step 6 for the other foam. 8. The pre-cuts should now be done. Don’t worry about stability! That doesn’t matter later. Construction manual - Wipeout © 2014 happy-flyers.ch - 43 / 142 -...
- Page 44 You can use different glues to stick our GoPro case together. We recommend Super glue with low viscosity. Be sure to add enough glue especially at the borders. Your GoPro mount should look like this. Construction manual - Wipeout © 2014 happy-flyers.ch - 44 / 142 -...
- Page 45 Your GoPro mount should look like this. Construction manual - Wipeout © 2014 happy-flyers.ch - 45 / 142 -...
-
Page 46: Electronics
There is not much to do here. If you have another Motor than we recommend you maybe have to solder the gold connectors to it. Be sure your chosen Motor will fit into the motor mount! Construction manual - Wipeout © 2014 happy-flyers.ch - 46 / 142 -... - Page 47 This example show a Castle Talon 35 ESC with gold connectors soldered to it and a unboxed TBS PNP Pro current sensor with some short wires with Deans connectors. This is the setup, we are using in our wings at the moment. Construction manual - Wipeout © 2014 happy-flyers.ch - 47 / 142 -...
- Page 48 3. Cut the top of the servo horn so you only have the lowest hole left and fit it as well as possible! Repeat step 2 – 3 for the other servo horn too. Construction manual - Wipeout © 2014 happy-flyers.ch - 48 / 142 -...
- Page 49 8. Screw on again the servo horns (not extremely hard). 9. Turn off your RC equipment Your servos should now be correctly prepared! Construction manual - Wipeout © 2014 happy-flyers.ch - 49 / 142 -...
-
Page 50: Other Stuff
It is always hard if you find something out later in this tutorial, which you better have done at the beginning. So be sure you have everything done and are ready for the next chapter! Construction manual - Wipeout © 2014 happy-flyers.ch... -
Page 51: Cut-Outs
Will look great and aerodynamics are better as well. See here some impressions about this topic. Video transmitters are cooling critical. They always should be installed flat in the foam. Construction manual - Wipeout © 2014 happy-flyers.ch - 51 / 142 -... - Page 52 Cut-out perfectly matched to the surface of the wing. Go like this with your Stuff as well! Construction manual - Wipeout © 2014 happy-flyers.ch - 52 / 142 -...
- Page 53 Some empty cut-outs for GPS and RC receiver in the background. Construction manual - Wipeout © 2014 happy-flyers.ch - 53 / 142 -...
- Page 54 6.3.1.2 FPV Camera This is one of the secrets at our Wipeout wing kit! Take a look at the pictures below and you will see that the camera fits perfectly into the foam! This will improve flight times and flight characteristics compared to other installation methods.
- Page 55 Example for the FPV Camera cut-out when using a GoPro mount. Construction manual - Wipeout © 2014 happy-flyers.ch - 55 / 142 -...
- Page 56 Example for the FPV camera cut-out when not using a GoPro mount. Construction manual - Wipeout © 2014 happy-flyers.ch - 56 / 142 -...
-
Page 57: Wires
Try fitting your cable(s) into the conduit. If these looking out at the top side, cut a little bit deeper! See here some impressions about this topic. Example for a cable conduit which fits perfectly to the top surface of the wing. Construction manual - Wipeout © 2014 happy-flyers.ch - 57 / 142 -... - Page 58 Another example viewing from the top. Some small wires like servo wires can fit directly in to one single vertical cut! Construction manual - Wipeout © 2014 happy-flyers.ch - 58 / 142 -...
-
Page 59: Gopro Mount (Optional)
GoPro mount to the highest possible position on your wing (it will raise out of the wing at the top). But that is not a problem as long as you glue it in correctly. Construction manual - Wipeout © 2014 happy-flyers.ch... - Page 60 Construction manual - Wipeout © 2014 happy-flyers.ch - 60 / 142 -...
-
Page 61: Checking And Testing
Remove all the parts again from your wing (except servos and servo wires and, if you want, the FPV camera). You are now ready for the next steps! Construction manual - Wipeout © 2014 happy-flyers.ch - 61 / 142 -... -
Page 62: Glue
Use any other slow drying glue! 1. Add the glue in premade cut-outs for the long fibre rods at the top. You can glue the top side of the other Foam right after! Construction manual - Wipeout © 2014 happy-flyers.ch - 62 / 142 -... - Page 63 3. Insert the short fibre rod (470mm) at the top of the wing. 4. Push it carefully into the foam so it will perfectly fit with the surface of the wing. Construction manual - Wipeout © 2014 happy-flyers.ch - 63 / 142 -...
- Page 64 8. The rods for the bottom side will be installed later, since they cross the fibre tubes at the bottom. 9. You are now finished with the top side. Construction manual - Wipeout © 2014 happy-flyers.ch - 64 / 142 -...
-
Page 65: Check Straightness
You can add temporary add the motor mount of course for simplify this step. It is very important that the bottom of the foam (1.) and the back side (2.) are completely straight! Construction manual - Wipeout © 2014 happy-flyers.ch - 65 / 142 -... - Page 66 If one of the two wings is bent or not completely straight, you can correct this now by bending by hand (needs a bit power). But still be careful not to break anything! Do not continue until your two foam parts are completely straight! Construction manual - Wipeout © 2014 happy-flyers.ch - 66 / 142 -...
-
Page 67: Foam And Motor Mount
1. Add some Gorilla glue in the inner part of the foam. Don’t use too much glue! 2. Roll the glue evenly with a cable tie or something similar. Only left a thin layer of the glue! Construction manual - Wipeout © 2014 happy-flyers.ch... - Page 68 6. Add some Gorilla glue into the premade cut-outs for the 8mm and the 6mm fibre tube. Add not too much glue! It will expand during drying! Construction manual - Wipeout © 2014 happy-flyers.ch - 68 / 142 -...
- Page 69 8. You can add some water to the cut-outs, where you just appended some glue. This is also optional. 9. Push the two foam parts together by hand. 10. Push the 6mm fibre tube at the top of the foam into the cut-out. Construction manual - Wipeout © 2014 happy-flyers.ch - 69 / 142 -...
- Page 70 12. Add again some glue at the cut-out where now also the fibre tube is locatet in (water again optional). 13. Spread the glue again and also mix the water into it. Construction manual - Wipeout © 2014 happy-flyers.ch - 70 / 142 -...
- Page 71 14. Now take the two 500mm fibre rods and glue it exactly the same way into the foam like described in the last chapter 6.5.2 (Wing stiffening). Pay attention! These two rods will cross the 6mm fibre tube we just glued in! Construction manual - Wipeout © 2014 happy-flyers.ch - 71 / 142 -...
- Page 72 15. You can cover the cut-out with some painters tape. Better cover the cut-outs with the glue inside with some painters tape. This will help keep the glue inside the cut-out when it expands during drying! Construction manual - Wipeout © 2014 happy-flyers.ch - 72 / 142 -...
- Page 73 16. You can also cover the cut-out with some EPP material from your foam negative. It is only recommended for advanced users to cover it with some EPP since you need to sand much more later! Construction manual - Wipeout © 2014 happy-flyers.ch - 73 / 142 -...
- Page 74 17. Add some slow drying glue (like UHU hard) to the bottom pre-made 3mm cut out. Here the motor mount will fit later. 18. Add some Gorilla glue at the cut-out for the motor mount 19. Roll the glue there evenly with a cable tier. Construction manual - Wipeout © 2014 happy-flyers.ch - 74 / 142 -...
- Page 75 21. Push it at the borders carefully. Do not use excessive force here to prevent the wing bending. 22. Level the motor mount to the bottom surface of the foam. Construction manual - Wipeout © 2014 happy-flyers.ch - 75 / 142 -...
- Page 76 You can use a little bit force here. We will stretch up the other side later. 25. Add again some slow drying glue (like UHU hard) to the two short fibre rods at the bottom of the wing. Construction manual - Wipeout © 2014 happy-flyers.ch - 76 / 142 -...
- Page 77 28. Add a little Gorilla glue into the cut-out where now the 8mm fibre tube is located in. You can add a little water also. 29. Take the other foam negative because we turn around the wing now. Construction manual - Wipeout © 2014 happy-flyers.ch - 77 / 142 -...
- Page 78 31. Add some painters tape also along the middle part of the foam. This will prevent the glue a bit from expanding. 32. You should now be ready for weighting and drying your wing. Construction manual - Wipeout © 2014 happy-flyers.ch - 78 / 142 -...
-
Page 79: Weighting And Drying
Let it dry for approx. 3 – 6 hours (depends on how much water you used). After the glue is dry (hard), you can carefully remove the weights and the negative foam and continue with the next step! Construction manual - Wipeout © 2014 happy-flyers.ch - 79 / 142 -... -
Page 80: Servos
3. Use super glue with low viscosity, and add a few drops at the borders of the servo. 4. Repeat step 1 – 3 for the other servo. 5. Let the glue dry! Construction manual - Wipeout © 2014 happy-flyers.ch - 80 / 142 -... -
Page 81: Glueing In Gopro Mount (Optional)
You can use the bottom surface again for levelling the direction of your GoPro mount. After you’re done, let the glue dry before continue! Construction manual - Wipeout © 2014 happy-flyers.ch - 81 / 142 -... -
Page 82: Remove Surplus Glue
On the surface itself, especially at the bottom where the fibre tubes were glued in, you can use a cutter to remove the expanded glue. Be careful not to damage your foam when removing surplus glue on it! Construction manual - Wipeout © 2014 happy-flyers.ch - 82 / 142 -... -
Page 83: Installation
If you want you can use super glue to fix your electronic components like your RC Receiver, your ESC or your Video Transmitter. Don’t use too much glue anyway! Glue = weight! And we can safe weight here as well. Construction manual - Wipeout © 2014 happy-flyers.ch - 83 / 142 -... - Page 84 There is definitely no better method! Add some serious glue at the top AND the bottom side. Super glue is needed here since the FPV camera at the front is a very critical part. Construction manual - Wipeout © 2014 happy-flyers.ch...
-
Page 85: Covering And Sanding
3. Use your fingers to make the cover perfectly level with the surface of the wing. Start at the big part of the cover. 4. Continue fast with the small part of the cover. Construction manual - Wipeout © 2014 happy-flyers.ch - 85 / 142 -... - Page 86 6. Repeat the steps 1- 5 for the other servo cover. If something from the cover raise out a bit, don’t worry! You can use the cutter or sanding paper to correct this! Construction manual - Wipeout © 2014 happy-flyers.ch - 86 / 142 -...
-
Page 87: Covering Cut-Outs (Optional)
Next to the absolutely nice looking result, this will also optimize airflow and increase your flight times! See here some impressions about this topic. Top view on the wing where mostly all cut-outs were covered. Construction manual - Wipeout © 2014 happy-flyers.ch - 87 / 142 -... - Page 88 Bottom view on the wing where mostly all cut outs were covered. Construction manual - Wipeout © 2014 happy-flyers.ch - 88 / 142 -...
- Page 89 Construction manual - Wipeout © 2014 happy-flyers.ch - 89 / 142 -...
- Page 90 Near invisible: There is a GPS module under this cut out! Construction manual - Wipeout © 2014 happy-flyers.ch - 90 / 142 -...
-
Page 91: Sanding (Recommended)
Sand your wing until everything is soft and smooth. See here some impressions about this topic. A perfect sanded surface. You will be rewarded with great flight times! Construction manual - Wipeout © 2014 happy-flyers.ch - 91 / 142 -... - Page 92 A closer look the one of the fibre rods. You also can see a servo cover in the back. Construction manual - Wipeout © 2014 happy-flyers.ch - 92 / 142 -...
-
Page 93: Laminating
So we are going to spray some glue on our wing. Before we can do that you need to cover every part which is not made from EPP with some painters tape. A completely with painters tape covered wing – ready for the spraying glue. Construction manual - Wipeout © 2014 happy-flyers.ch - 93 / 142 -... -
Page 94: Spray Glue
Attention! Do not add some glue inside the outer profile, where the winglets are located later! Leave them clean! 3. Be sure to add glue at the front border. 4. Add glue also at the back borders of the wing. Construction manual - Wipeout © 2014 happy-flyers.ch - 94 / 142 -... - Page 95 Construction manual - Wipeout © 2014 happy-flyers.ch - 95 / 142 -...
- Page 96 6. Also don’t forget the top borders. 7. Add some glue at the back borders too. 8. Your wing should now be covered well and evenly with spray glue. Construction manual - Wipeout © 2014 happy-flyers.ch - 96 / 142 -...
- Page 97 9. Lay down your wing upside down on a clean surface and let the spray glue dry for about 15 – 20 minutes. Construction manual - Wipeout © 2014 happy-flyers.ch - 97 / 142 -...
-
Page 98: Laminating
(not only the nose for example). 3. Make some circular motions when laminating in a direction. Adjust these motions to the same directory you are laminating to. Construction manual - Wipeout © 2014 happy-flyers.ch - 98 / 142 -... - Page 99 9. Make some cuts at any edge at the front and at the back. This is very tricky at the front side in the middle part and, if you are using one, at the FPV camera. Be patient there! Construction manual - Wipeout © 2014 happy-flyers.ch...
- Page 100 Here you also can see the cutted foil with the cuts at every edge. Construction manual - Wipeout © 2014 happy-flyers.ch - 100 / 142 -...
- Page 101 Another view to the cutted foil. This should look near the same at the front of the wing! 10. Laminating at the borders is a bit more difficult. You can work with a bit pressure here and tighten the foil around the border. Construction manual - Wipeout © 2014 happy-flyers.ch - 101 / 142 -...
- Page 102 13. You need to laminate over several parts (ESC, RC Controller etc.). That’s normal! Don’t use any pressure when laminating over these parts! 14. When you’re done your wing should now look like this. Construction manual - Wipeout © 2014 happy-flyers.ch - 102 / 142 -...
- Page 103 If it has bend, you can correct it a bit with your laminating tool. You need to apply your laminating tool on the other side, which has bend upward! Push against it with your other hand and try to bend it straight. Construction manual - Wipeout © 2014 happy-flyers.ch - 103 / 142 -...
-
Page 104: Cutting Surplus Foil
Some foil around the motor mount can also be cutted so it will look nicer Free any other components you want (of course not the covered ones if you have done this) Construction manual - Wipeout © 2014 happy-flyers.ch - 104 / 142 -... -
Page 105: Assembling Parts
(2.). Glue your winglets on the foam with super glue. Check the correct alignment with a ruler. Construction manual - Wipeout © 2014 happy-flyers.ch - 105 / 142 -... - Page 106 You can add a little bit extra super glue along the border at the top and bottom side. Construction manual - Wipeout © 2014 happy-flyers.ch - 106 / 142 -...
-
Page 107: Elevons
Attention! This is a bit tricky at the Rudder horn! You can add a little peace of transparent tape separately at the small part between the Horn and the end of the Elevon. 4. Check if your Elevons will move correctly at both directions. Construction manual - Wipeout © 2014 happy-flyers.ch - 107 / 142 -... - Page 108 8. Take your tiny screwdriver and start fitting the tape into the notch between foam and Elevon. Try to stick it evenly along the border until you are right at the bottom. Construction manual - Wipeout © 2014 happy-flyers.ch - 108 / 142 -...
- Page 109 11. We recommend to use your laminating tool (set it to about 100°) and smooth the tape a bit - especially along the borders. It will also stick much better on the laminating foil and the Oracover! Construction manual - Wipeout © 2014 happy-flyers.ch - 109 / 142 -...
-
Page 110: Motor And Esc
You can remove it again later of course. Check here, if the Motor will spin in the correct direction! If not, correct it by exchanging two of the tree wires to the ESC! Construction manual - Wipeout © 2014 happy-flyers.ch - 110 / 142 -... -
Page 111: Determine Cg
Use your ruler to draw the CG at the correct point. Check chapter 3.1.1 (centre of gravity) for specifications. We have given a little tolerance of + / - 2.5mm for the centre of gravity. You can experiment with this. Construction manual - Wipeout © 2014 happy-flyers.ch - 111 / 142 -... -
Page 112: Positioning Battery Bay
If your right side goes down, you need to move the Battery plate on the left side. 5. If you have found the ideal position for your Battery bay, you can mark the borders with a pen and then remove the Battery plate again. Construction manual - Wipeout © 2014 happy-flyers.ch - 112 / 142 -... -
Page 113: Cut-Out
Your cut-out should now look like this. In this example we haven’t use a GoPro mount since it is not included in the kit. Construction manual - Wipeout © 2014 happy-flyers.ch - 113 / 142 -... -
Page 114: Gluing Battery Plate
You can use the same methods as already done in chapter 6.5.4 (Glue - Foam and motor mount) here. Also let it dry! After that remove the surplus glue and check if your Batteries will fit into the Battery bay. Construction manual - Wipeout © 2014 happy-flyers.ch - 114 / 142 -... -
Page 115: Taping Borders (Optional)
Battery bay. This will prevent the laminating foil for become detached. You also can use again your laminating tool (setting it to about 100°) for smoothing the tape. Construction manual - Wipeout © 2014 happy-flyers.ch - 115 / 142 -... -
Page 116: Finalize
You also can do this on other critical parts like the FPV Camera or Winglets. But don’t use too much tape! We want the wing as light as possible! Construction manual - Wipeout © 2014 happy-flyers.ch - 116 / 142 -... -
Page 117: Check Straightness
6.11.3 Testing electronics Do a last functionally test of your RC and FPV equipment. Test everything now! If you have any problems here, fix it now before continue! Construction manual - Wipeout © 2014 happy-flyers.ch - 117 / 142 -... -
Page 118: Impressions
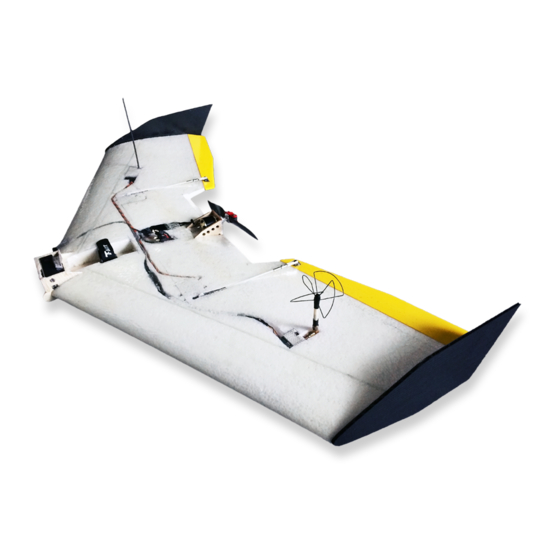
6.12 Impressions Enjoy some impressions of finished Wipeout wings! Construction manual - Wipeout © 2014 happy-flyers.ch - 118 / 142 -... - Page 119 Construction manual - Wipeout © 2014 happy-flyers.ch - 119 / 142 -...
- Page 120 Construction manual - Wipeout © 2014 happy-flyers.ch - 120 / 142 -...
- Page 121 Construction manual - Wipeout © 2014 happy-flyers.ch - 121 / 142 -...
-
Page 122: Settings And Configuration
You need to try a bit here. Screw your clevice forward and backward and hook it up to the Rudder horn until it fits to the initial Rudder level (2.). Repeat this for the other Elevon. Construction manual - Wipeout © 2014 happy-flyers.ch... -
Page 123: Setting "Rookie
Setting “Rookie” 7.1.1 DUAL EXPO Aileron Elevator Construction manual - Wipeout © 2014 happy-flyers.ch - 123 / 142 -... -
Page 124: Setting "Common
Setting “Common” 7.1.2 DUAL EXPO Aileron Elevator Construction manual - Wipeout © 2014 happy-flyers.ch - 124 / 142 -... -
Page 125: Setting "Wipeout
Setting “Wipeout” 7.1.3 DUAL EXPO Aileron Elevator Construction manual - Wipeout © 2014 happy-flyers.ch - 125 / 142 -... - Page 126 Later, after you have tested your settings under real conditions, you can also add some supe glue here if you want. Your Rudders should now properly been configured! Construction manual - Wipeout © 2014 happy-flyers.ch - 126 / 142 -...
-
Page 127: Rc Control
RC Control Take your RC Control, power it up and also power your wing. Ensure your Elevons act like the following when moving your stick on the RC Control. Construction manual - Wipeout © 2014 happy-flyers.ch - 127 / 142 -... - Page 128 Construction manual - Wipeout © 2014 happy-flyers.ch - 128 / 142 -...
-
Page 129: Esc
Motor with 9x5 or 8x7 folding prop with 38mm middle part), since otherwise you will not reach the specified flight times. You need the Castle Link programming adapter for these steps! 7.3.1 Throttle Vehicle Type Airplane Throttle Type Auto-Calibrate Endpoint Throttle Response Medium (5) Construction manual - Wipeout © 2014 happy-flyers.ch - 129 / 142 -... - Page 130 7.3.1.1 Brake Brake Strength 100% (Hard) Brake Delay .6 sec (Delayed) Brake Ramp Medium Construction manual - Wipeout © 2014 happy-flyers.ch - 130 / 142 -...
- Page 131 7.3.1.2 Cutoffs Cutoff Voltage Auto Li-Po Auto-Lipo Volts/Cell 3.0 Volts/Cell Voltage Cutoff Type Soft Cutoff Current Limiting Disabled Current Cutoff Type Soft Cutoff Construction manual - Wipeout © 2014 happy-flyers.ch - 131 / 142 -...
- Page 132 7.3.1.3 Motor Motor Start Power High (100) Motor Timing Normal (5) PWM Rate 8 Khz Construction manual - Wipeout © 2014 happy-flyers.ch - 132 / 142 -...
-
Page 133: First Flight
4. It is wise to trim your Pitch axis a bit upward (push the Pitch trimmer downside 2- 3 times). We do that because if your Elevons are too low your wing can fly straight into the ground. 5. Fasten your seatbelt and be ready for your first flight with your own Wipeout! Launch This is our recommendation and launching method. - Page 134 Construction manual - Wipeout © 2014 happy-flyers.ch - 134 / 142 -...
- Page 135 Construction manual - Wipeout © 2014 happy-flyers.ch - 135 / 142 -...
- Page 136 Construction manual - Wipeout © 2014 happy-flyers.ch - 136 / 142 -...
-
Page 137: Recommended Electronics
Recommended Electronics Motor (variety 1) Scorpion HKII-2221-1630kV Motor (variety 2) AXi 2217/12 1380kV Construction manual - Wipeout © 2014 happy-flyers.ch - 137 / 142 -... -
Page 138: Esc
Castle Talon-35 Servos Graupner DES 658 BB MG Construction manual - Wipeout © 2014 happy-flyers.ch - 138 / 142 -... -
Page 139: Prop Setup
9x5 aeronaut CAM carbon fold prop for endurance flying 8x7 aeronaut CAM carbon fold prop for for speed flying 9.5.2 Middle part aeronaut 38mm length / 0° adj. / 8mm drilling Construction manual - Wipeout © 2014 happy-flyers.ch - 139 / 142 -... -
Page 140: Prop Mount
9.5.3 Prop mount aeronaut prop mount for 8mm drilling / 3.17mm (motor shaft) / M2.5 9.5.4 Prop stopper Custom made Prop stopper made of thin fibre plate Construction manual - Wipeout © 2014 happy-flyers.ch - 140 / 142 -... -
Page 141: Batteries (Variety 1)
2x 3s parallel 2400mAh – 2800mAh 20C LiPo (endurance) 2x 3s serial 2400mAh – 2800mAh 20C LiPo (speed) Example: 3s 2400mAh Hacker TopFuel Eco 20C Batteries (variety 2) 1x 3s 5600 30C LiPo (endurance) Construction manual - Wipeout © 2014 happy-flyers.ch - 141 / 142 -... -
Page 142: Glossary
Electronic speed controller Drives your Motor Remote control / Remote controlled You need it to control your RC plane Expanded polypropylene The white material which the Wipeout is made from Pulse wide modulation A Signal type Pulse pause modulation Another Signal type...
Need help?
Do you have a question about the Wipeout and is the answer not in the manual?
Questions and answers