Advertisement
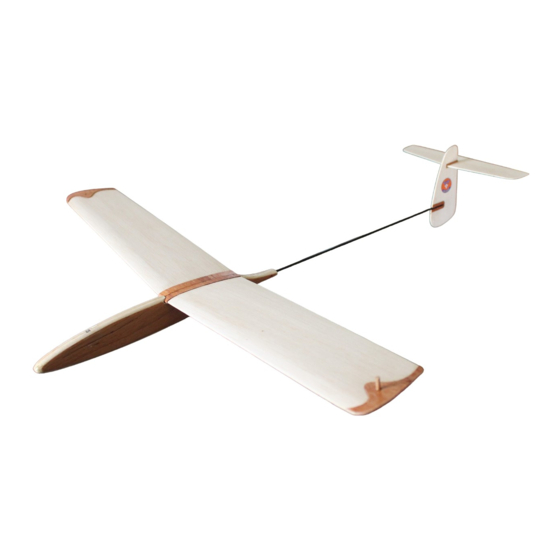
HAWK
GLIDER BUILDING INSTRUCTIONS
Thank you for purchasing this HAWK model glider kit. The kit has been manufactured using the latest
CNC laser technology and all parts have been clearly labelled and can be cross referenced to the plans.
The Hawk model is designed as a simple multi-purpose, easy-build glider. It can be built in several
configurations including a free-flight chuck glider with a choice of two different wing styles or RC model
with micro servos (not included).
You can quickly and easily test the effect of adjusting ailerons, flaps, rudder and elevator on the flight
characteristics of the model. This is facilitated using flexible wire hinges on each of the control surfaces.
To start construction, you will need a straight, flat worktop, modelling pins, sandpaper, glue (we
recommend using thin Cyanoacrylate (CA) glue or Super 'Phatic adhesive, available from Deluxe
Materials in the UK at www.deluxematerials.co.uk). Your choice of paint can also be applied to
customise the model but use sparingly as this will add weight to your model.
In these instructions we describe the basic building steps required to complete the model. If necessary,
please consult the help and advice of someone who has the acquired skills required to complete the
model.
The nose section of the fuselage, comprising parts 5,6,7 & 8, has been taped together in the correct
sequence of assembly. Carefully remove the tape keeping the parts in the same sequence for gluing
together.
Next, cut two 12mm lengths of dowel and chamfer the ends. These dowels (part 4) are inserted into the
predrilled holes in the nose sections, parts 5,6 & 7 to align the parts whilst gluing together.
Note: Due to possible variations in the diameter of the dowel material, it may be necessary to lightly
sand the outside diameter to reduce their size to accurately fit the holes.
Do NOT stick the 14mm dowels in place.
Once assembled and glued, allow the nose section to fully set on a flat surface. Secure with pins if
necessary.
Advertisement
Table of Contents

Summary of Contents for Hiesbok Hawk
- Page 1 HAWK GLIDER BUILDING INSTRUCTIONS Thank you for purchasing this HAWK model glider kit. The kit has been manufactured using the latest CNC laser technology and all parts have been clearly labelled and can be cross referenced to the plans. The Hawk model is designed as a simple multi-purpose, easy-build glider. It can be built in several configurations including a free-flight chuck glider with a choice of two different wing styles or RC model with micro servos (not included).
- Page 2 Before gluing the veneer sidewalls (part 8) in place, sand the nose according to the plan (top view). Ensure that the rear of the front section tapers down to the fuselage carbon tube as shown in the plan. Now glue the outer veneer parts 8 onto each side of the nose assembly ensuring that they are centered. If desired, apply several light coats of varnish or paint to the completed nose section and sand between coats.
- Page 3 After adjusting the model, gradually increase the throwing force to the required level for longer flight duration. The HAWK model is not a toy. It is important to take great care in constructing the model and in its safe operation.
Need help?
Do you have a question about the Hawk and is the answer not in the manual?
Questions and answers