Table of Contents
Advertisement
Quick Links
Advertisement
Table of Contents

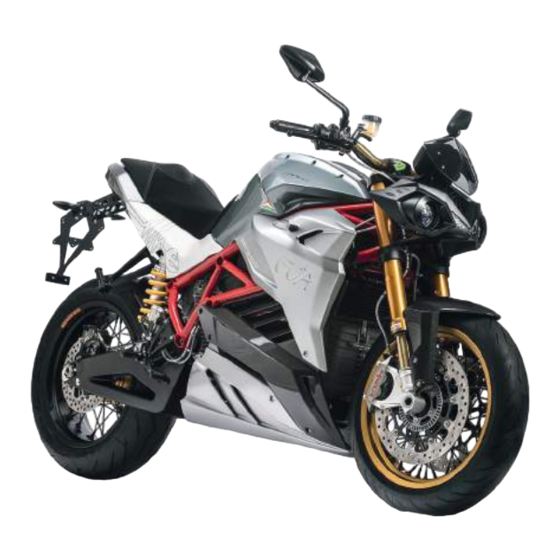
Summary of Contents for Energica Eva 2018
- Page 1 https://www.motomanuals.net/...
- Page 2 The hard work and passion of out team of experts have created a pioneering motorcycle that you can now ride, which embodies the perfect balance between innovation, power, technology, design and safety. This your Energica: a potent electric bike which combines an environmentally friendly powertrain with extraordinary performance, state of the art technology and a traditional passion for speed.
- Page 3 Owner Manual - Translated version Rev. 02 (02/2018) Cod. ENF003100 https://www.motomanuals.net/...
-
Page 4: Table Of Contents
Contents INTRODUCTION ......6 DRIVING CONTROLS ....18 DISPLAY ........33 Update ............6 Location of controls ........18 Display overview ........33 Copying and disclosure ..... 6 Front brake lever........19 Pop-up ............39 Information concerning trade Rear brake pedal ........19 Display modes ......... 40 marks ............ - Page 5 MAIN PARTS ........52 TECHNICAL INSTRUCTIONS FOR USE ..84 SPECIFICATIONS ......62 Location of parts ........52 Checks before start-up ......84 Dimensions ..........62 Rear-view mirrors ........53 ABS system ..........85 Weights ............62 Front fork adjusters .......53 Starting the motor ........87 Motor ............63 Kickstand ............55 Moving off ..........88 Performance ..........63...
- Page 6 MAINTENANCE ......104 MAINTENANCE OPERATIONS ......110 Regular maintenance intervals ..104 Checking the transmission oil level ............110 Checking the front brake fluid level ............ 111 Checking the rear brake fluid level ........... 112 Checking brake pad wear ....113 General inspection of the braking system ........
-
Page 7: Introduction
Keep this manual carefully: If the quality of the booklet deteriorates or the booklet is lost, request a new The Energica sales and service network will be happy to copy from an Energica dealer or authorized workshop give you detailed information on any updates available. -
Page 8: Warning Symbols
All motorcycles sold by Energica Motor Company come Environmental notice with a "Warranty Card". Failure to observe this instruction may seriously During the warranty period, all rights pertaining to the harm the environment. -
Page 9: Notice Concerning The Right To Repair Or Refund (Lemon Law) For Usa Market
Lemon Law. In all WARNING! Riding under the influence of alcohol other states, Energica requires the customer to give due and/or drugs is illegal and punishable by law. notification in writing of any problems or service issues encountered. -
Page 10: What To Do In The Event Of An Accident
What to do in the event of an accident WARNING! Safety is also dependent on the mechanical condition of the motorcycle. Observe Energica Motor Company has always taken the safety of the maintenance schedule and adjustment its customers and of its motorcycles very seriously, and requirements contained in this manual exactly. -
Page 11: General Safety Information
High-voltage cables can be recognized by their orange color. IMPORTANT! Energica Motor Company shall not be held liable for death, personal injury or material damage resulting from the use or installation of non-approved accessories. The manufacturer can... - Page 12 This battery is an intelligent device equipped While Energica does not have a used battery with dozens of sensors and electromechanical devices collection program in place at the present time,...
- Page 13 WARNING! Some liquids used in vehicles, such Warning required by California relative to as brake fluid and coolant, are toxic. Care should perchlorate therefore be taken not to inhale or swallow them, CAUTION: Certain components of this motorcycle, or allow them to come into contact with wounds. such as the lithium batteries, may contain For safety reasons, read and follow the health perchlorate.
-
Page 14: Reporting Safety Defects
For Canadian customers For USA customers In addition to contacting the Defect Investigations and Recalls department of Energica Motor Company Inc., If you believe that your vehicle has a defects which may Canadian customers also wishing to report safety defects... -
Page 15: Motorcycle Identification
Motorcycle identification Every motorcycle can be identified by a set of unique codes. The pictures below show where these are located on the motorcycle. Identification plate (Europe) Identification plate (USA) EPA plate (USA) Identification plate (Canada) Electric motor code (ID) EN0001 https://www.motomanuals.net/... - Page 16 ENERGICA MOTOR COMPANY SRL MFD by GVWR: 426 kg (940 lb) DATE OF MFR:04/15 GAWR FRONT: 181 kg (400 lb) WITH 120/70ZR17M/C(58W)TIRE VEHICLE EMISSION RIM: 17XMT 3.50 AT 290 kPa (42 psi) COLD CONTROL INFORMATION GAWR REAR: 245 kg (540 lb) WITH 180/55ZR17M/C(73W)TIRE RIM: 17XMT 5.50 AT 290 kPa (42 psi) COLD...
-
Page 17: Safety Stickers
Safety stickers * Label applied to models sold in the United States and EN0003 Canada https://www.motomanuals.net/... - Page 18 EN0004 https://www.motomanuals.net/...
-
Page 19: Driving Controls
DRIVING CONTROLS Location of controls Front Brake Lever Rear Brake Pedal Keys Left control switch Dashboard Ignition Switch and Steering Wheel Lock with Key Right control switch Throttle twist grip EN0005 https://www.motomanuals.net/... -
Page 20: Front Brake Lever
Front brake lever Rear brake pedal To apply the motorcycle's front brake, press the lever (2) To apply the rear brake, depress the pedal (1) with your towards the grip (1). The brake is hydraulic and therefore foot. The control system is hydraulic. requires very little manual force to actuate it. -
Page 21: Adjusting The Position Of The Footpegs (Models Fitted With Adjustable Footpegs)
Adjusting the position of the footpegs (models fitted with adjustable footpegs) To change the position of the footpegs on the right (2) and left (3), unscrew the screws (4) and reposition them to suit you using the holes (5) in the plate. EN0009 Refer to the routine maintenance table for information on tightening the screws (4) correctly. -
Page 22: Adjusting Rear Brake Pedal Position (Versions With Adjustable Pedal)
Adjusting rear brake pedal position (versions with Adjusting the stroke of the rear brake pedal adjustable pedal) To change the stroke of the rear brake pedal: To change the position of the pedal to suit you, loosen the Loosen the cam (8) on the back of the lever by undoing screw (6) on the back of the support pin (7). -
Page 23: Keys
• Loosen the adjustment nuts (10) to adjust the brake Keys lever. The EVA comes with a MASTER key (orange or gray) in • Find the optimum position and then retighten the two addition to the two ignition keys (green). nuts (10). -
Page 24: Encoding The Spare Key
Encoding the spare key: Left control switch • Put the MASTER key in the ignition switch and turn it to ON: the display and the immobilizer light will switch on ( • Turn the MASTER key to OFF and remove it: the display will switch off but the immobilizer light ( ) will remain on. - Page 25 "MODE" control The controls given above are represented in this booklet by the following symbols: This enables you to navigate the menus in the display. The main controls are: • "ENTER" (press once) = to confirm the item you have ENTER = press and hold selected.
- Page 26 Control Light controls Three-position turn indicator: This control has three positions: • Position = to turn left • Left position (X) = high beam flashing. • Mid position (Y) = low beams on. • Position = to turn right • Right position (Z) = high beams on. •...
- Page 27 "SET" control This enables you to access the profile screen. See the paragraph "Display modes" (Profile screen) for more information. https://www.motomanuals.net/...
-
Page 28: Dashboard
Dashboard High-beam headlights (blue light) Left turn indicator (green light) “Electrical Anti Blocking System” indicators (red) Motor current indicator Right turn indicator (green light) ABS (amber light) MIL (amber light) Charge indicator (green light) Display Immobilizer (red light) GO (green light) General alarm (red light) EN0017 https://www.motomanuals.net/... - Page 29 Explanation: General alarm (FAULT) • Green light on: The motor is on and ready to go. If the red light is on: • Flashing green light: the motorcycle is in Park Assistance mode. • Battery completely drained. Charge the motorcycle as soon as possible.
- Page 30 MIL LIGHT “Electrical Anti Blocking System” Indicators The MIL light (Malfunction Indicator Light) illuminates in The eABS prevents the rear wheel from losing its grip the event of certain faults or malfunctions detected by the of the road when the accelerator is released with the self-diagnosis system of the motorcycle and listed in the simultaneous intervention of the battery regeneration Diagnostic Code list.
-
Page 31: Ignition Switch And Steering Wheel Lock With Key
Ignition Switch and Steering Wheel Lock with Key IMPORTANT! Turn the key clockwise to put it into position (3). From this position, turn the key This is located below the dashboard and has three modes: counter-clockwise to position (2). The key can be removed from here. -
Page 32: Right Control Switch
Right control switch Emergency switch The emergency switch has two positions: • Position = motorcycle ready to move off. • Position = switches off the motor If the event of a breakdown or accident, cut off the power to the motorcycle immediately by: •... -
Page 33: Throttle Twist Grip
Start motor Throttle twist grip The grip (1) on the right-hand side of the handlebar Control for starting the motor. When the green GO symbol controls the power supply to the rear wheel of the ) is lit, the motorcycle is ready to move off. motorcycle. -
Page 34: Display
DISPLAY Display overview Tachometer Air temperature Chronometer function enabled Multifunction icon Clock Tachometer Current indicator Diagnostic indicator Battery temperature Total odometer Battery power left Battery range left Active regeneration profile Trip odometer Active power profile / LIMP mode Connectivity EN0021 https://www.motomanuals.net/... - Page 35 Tachometer Clock This indicates the motor speed in revolutions per minute. This function shows the time. See the "Display modes" (menu screens) section Air temperature for more information. This function shows the temperature of the outside air and is expressed in °C or °F depending on the measurement Tachometer system chosen.
- Page 36 See the "Diagnostics codes" section for more See the "Display modes" (menu screens) section information about identification codes. for more information. If there is an unidentifiable fault or the motorcycle is exhibiting unwanted behavior, please report it to an Energica dealer or authorized workshop. https://www.motomanuals.net/...
- Page 37 Battery temperature Battery power left This function shows the temperature of the battery. This function shows the battery's state of charge expressed as a percentage using the various graphics given below: Low temperature BLUE symbol ≤ 5°C / 41°F 0 % - 19 % (red background) GREEN Operating temperature symbol...
- Page 38 12. Battery range left • usage of electrical accessories; • state of charge of motorcycle. This function shows the estimated distance that you can travel based on the battery's state of charge. In ECO mode, the motorcycle automatically controls all factors concerning power consumption (motor The distance is expressed in kilometers or miles depending power, heating etc.) to minimize consumption.
- Page 39 15. Active power profile WARNING! The motorcycle exits LIMP mode and the indicator lamp light extinguishes automatically This shows the power profile that is currently active. when the fault is resolved.- See the "Display modes" (profile screen) section for Example of active LIMP mode on vehicle: more information on setting the profile type.
-
Page 40: Pop-Up
16. Connectivity Pop-up The pop-up screen is activated automatically whenever the dashboard needs to inform the user of any messages • Position calculated correctly (green) from the motorcycle, e.g. faults or warnings. An example is given below: • No GPS signal (off) •... -
Page 41: Display Modes
Display modes Check screen The display has a number of different display modes, each of which has a number of sub-screens: • Check screen • Guide screens • Profile screen • Menu screens • Battery charge screens • Points of interest screen - Charging stations EN0029 The check screen will be displayed until the system check condition is activated. -
Page 42: Guide Screens
Guide screens • Consumption screen Push the "MODE" button on the left control switch to the right and left to access the four guide screens. See the "Left control switch" section for more information. • Main screen EN0031 This screen enables you to view your motorcycle's current consumption and average consumption. - Page 43 • Consumption screen with graph EN0031 From the top: • Motor torque indicator • Current power indicator • Current consumption indicator • Average consumption indicator EN0032 The average consumption value may be reset in this This screen enables you to check your motorcycle's screen by: average consumption like on the previous page.
- Page 44 • Chronometer screen The trip odometer can be reset in the first three screens (main/consumption/consumption with This screen enables you to time a journey. graph) by: You can view this page by enabling the function in the menu screens. See the "Display modes" (menu •...
-
Page 45: Profile Screen
Profile screen Every time you press the button, the Pressing the "SET" button on the left control switch takes chronometer will save the time and start again from zero. you to the profile screen. See the "Left control switch" section for more To stop the chronometer: information. - Page 46 Press to navigate the four power profiles: The different regeneration profiles enable you to recover energy during deceleration and then inject this into the • ECO battery as current. The motorcycle produces a different engine brake effect depending on which of the four •...
-
Page 47: Menu Screens
Menu screens In the sub-menus: • Select "SET" to confirm any settings you have entered. Pressing the button on the left control switch takes you to the menu screens. • Select "Back" to exit the item selected. The menu can only be accessed when the motorcycle is stationary. - Page 48 Display Used to set the screen backlight level and select display mode (day/night). • Backlight % (sets brightness of the display backlight). • Backlight when charging (backlight ON/OFF when charging). • Display mode (selects day or night display modes, or sets automatic day/night mode switching controlled by light sensor integrated in dashboard).
- Page 49 Apple® or Android™ devices via a Bluetooth® connection. Delete The My Energica app may be downloaded from the Apple Store® for Apple devices or from Google Play™ Store for This enables you to delete all the laps timed by the Android™...
-
Page 50: Battery Charge Screens
Battery charge screens These values are given for indicative purposes only; the recharging times may vary depending on the These screens cannot be selected using the outside temperature and the state of balance of the button; they are activated automatically when the individual cells in the battery pack. -
Page 51: Points Of Interest Screen - Charging Stations
Bluetooth ® (icon displayed). The My Energica app may be downloaded from the Apple Store® for Apple devices or from Google Play™ Store for Android™ devices. EN0042... - Page 52 Visit the Energica website for instructions for pairing your to scroll through the stations device correctly with you motorcycle. found. Key information for each charging station is displayed in larger format. GPS signal reception usually takes just a few seconds to establish. However, large buildings or...
-
Page 53: Main Parts
MAIN PARTS Location of parts Rear-view mirrors Front fork adjusters Kickstand Battery charging socket Rear shock absorber adjusters Seat lock EN0044 https://www.motomanuals.net/... -
Page 54: Rear-View Mirrors
Rear-view mirrors Front fork adjusters Press on the points (1) to adjust the rear-view mirrors. To change the preload on the spring inside each fork tube, turn the hexagonal end of the adjuster with a hex wrench. EN0045 EN0046 • Turning clockwise increases the preload on the spring. •... - Page 55 To adjust the compression damping action (left hand Note of the number of rotations and set both forks fork), turn the adjustment screw clockwise (+) to increase to the same preload. damping action or counterclockwise (-) to reduce damping action. The factory setting is seven complete rotations from the starting position (fully loosened).
-
Page 56: Kickstand
Kickstand To return the kickstand to its "resting" position (3), tilt the motorcycle to the right while lifting the toe loop with the Do not remain seated on the motorcycle when it is top of your foot (1). being supported by the kickstand. Parking on soft or yielding ground could cause the motorcycle to tip over and suffer serious damage. -
Page 57: Battery Charging Socket
Battery charging socket AC TYPE 2 The battery charging socket (1) is located underneath the seat, and may be of a number of different standard (Max. current 14 A - Voltage 120 V / 240 V) types: check that the correct charging plug is used for the socket, referring to the following. -
Page 58: Rear Shock Absorber Adjusters
Rear shock absorber adjusters To stop charging before the process is complete, turn the ignition switch to ON, press Standard shock absorber and follow the instructions on the dashboard. WARNING! The rear spring preload must be set correctly for the load carried by the motorcycle. If the power supply cuts out, the EVA will stop A higher preload setting is necessary for heavier charging and switch off. -
Page 59: Optional Shock Absorber
• Turn counterclockwise (looking from above damper) to Optional shock absorber reduce spring preload. WARNING! The rear spring preload must be set To adjust the extension damping action, turn the ring nut correctly for the load carried by the motorcycle. A (2) at the bottom of the damper. - Page 60 • Turn counterclockwise (looking from above damper) to The factory setting is 14 clicks from the starting reduce spring preload. position (fully closed). Once at the required setting, tighten the upper ring nut (3) with the special tools. To adjust the extension damping action, turn the ring nut (5) at the bottom of the damper.
-
Page 61: Seat Lock
Seat lock Insert the ignition key into the designated lock (1) and turn it to open the seat. This gives you access to the battery charging socket. EN0055 See the paragraph "Charging the battery" for information on how to charge the battery correctly. https://www.motomanuals.net/... - Page 62 PAGE INTENTIONALLY LEFT BLANK https://www.motomanuals.net/...
-
Page 63: Technical Specifications
TECHNICAL SPECIFICATIONS EN0056 Dimensions Weights a Maximum width 935 mm 36.8 in. Motorcycle weight: 282 Kg (621.7 lbs) b Wheelbase 1491 mm 58.7 in. Weight at full load: 458 Kg (1009.7 lbs) c Overall length 2133 mm 84 in. Maximum number of riders: d Height 1085 mm 42.7 in. -
Page 64: Motor
(1) In accordance with EU regulation 168 / 2013 parked using a specific cable, but also receives charge (2) Distance measured in “SPORT MODE” and with ENERGY RECOVERY during use from the regenerative braking system. Energica SYSTEM PROFILE “OFF” motorcycles feature a quick charge system. However, the... -
Page 65: Suspension And Running Gear
Suspension and running gear Rear brake • Hydraulic control using the pedal on the right-hand Frame side. • Steel tubular trellis • Single 240 mm (9.4 in.) Brembo disc Swingarm • 2-piston caliper • Cast aluminum Front rim Tires • 3.5" x 17" Front tire Rear rim •... -
Page 66: Repairing And Replacing Tires
The tread depth is checked by inspecting the wear indicators in the main grooves of the tread. Take your bike to an Energica dealer or authorized All tires have wear indicators incorporated in the main service center to have your tires replaced, to be tread grooves. -
Page 67: Minimum Depth Of The Tread
Check to see if there any cuts or cracks on the tire, especially at the sides; replace the tire if it is seriously damaged. Visit an Energica dealer or authorized workshop to have your turn indicators or headlamps replaced. This will guarantee that they are removed and refitted correctly. - Page 68 PAGE INTENTIONALLY LEFT BLANK https://www.motomanuals.net/...
-
Page 69: Fuses
Fuses The fuse box is located to the right of the motor. EN0061 EN0060 To carry out any checks or replace the fuses: • Open the seat lock using the ignition key. • Remove the right hand lateral cover, undoing the screws in the positions indicated, then release the indicated pin (1). - Page 70 EN0063 EN0065 • Open the fuse box by pulling the two rubber tabs on the cover. EN0064 https://www.motomanuals.net/...
- Page 71 A fuse that has blown will have a broken internal conductive filament. Intact Blown EN0066 EN0067 Fuse box key Item Value Description To prevent the risk of short circuiting, replace the fuses with the ignition key in the "OFF" position. VCU (Vehicle Control Unit) Drive (Power Train Controller) WARNING! Never use fuses with a different rating...
- Page 72 The replacement fuses used must have the same current rating as the original fuses. If fuses blow repeatedly, have the electrical system checked by an Energica dealer. https://www.motomanuals.net/...
-
Page 73: Liquids
Liquids Type (liters) fl oz Gear-driven cams ATF UNIVERSAL DEXRON VI Front/rear braking circuit DOT 4 Observe the indicated Min / Max levels Chain Chain grease spray Motor oil ATF UNIVERSAL DEXRON VI 60,9 Inverter coolant 50% WATER–50% glycol Observe the indicated Min / Max levels Tightening torque values Thread Nm (tolerance... -
Page 74: User Messages
User messages User messages appear on the display automatically whenever the dashboard needs to inform the user of any messages from the motorcycle, e.g. faults or warnings. EN0028 The possible user messages displayed are shown in the following table. https://www.motomanuals.net/... - Page 75 Message Description Clearance* CONTACT SERVICE DEPARTMENT: UNKNOWN FAULT. LEFT SIDE INDICATOR FAULT. RIGHT SIDE INDICATOR FAULT. HEADLIGHT FAULT. STOP LIGHT FAULT. SIDE LIGHT FAULT. CHARGING INITIALIZATION FAILURE: REMOVE THE CABLE AND TRY AGAIN. CM MODULE NOT RESPONDING. SOCKET NOT LOCKED OR CHARGING NOT POSSIBLE. CONTACT SERVICE.
- Page 76 Message Description Clearance* LIMP MODE ON: MOTOR TEMPERATURE TOO HIGH. LIMP MODE ON: BATTERY LEVEL TOO LOW. RECHARGE THE BATTERY. LIMP MODE ON: BATTERY CURRENT LOW. LIMP MODE ON: CELL VOLTAGE LOW. RECHARGE THE BATTERY. LIMP MODE ON: CELL VOLTAGE LOW (D). RECHARGE THE BATTERY. LIMP MODE ON: BATTERY COLD.
- Page 77 Message Description Clearance* IMMOBILIZER REGISTRATION ERROR. INVALID KEY. DC FAST CHARGE NON PRESENT. Contact service to purchase optional accessory. UNLOCK THE CHARGING CABLE? PRESS: MODE TO CONFIRM OR LEFT TO SKIP. REMOVE THE CHARGING CABLE. ABS COMMAND FAILED. FAST CHARGE CYCLE COMPLETE. *Message Clearance A = automatic message clearance M = manual message clearance (...
-
Page 78: Diagnostic Codes
Diagnostic codes In the event of a fault detected by the motorcycle electronic system, a yellow "Diagnostic warning" icon will appear at the bottom right of the display. EN0023 Below is a table of possible diagnostic codes. EN0068 To identify faults, the "Diagnostics screen", accessed from the "menu screen", displays an image of the motorcycle with the affected area highlighted, together with the relative diagnostic code. - Page 79 Label (DTC) Description P0562 VCU MAIN SUPPLY UNDERVOLTAGE P0563 VCU MAIN SUPPLY OVERVOLTAGE P1010 HV+ CONTACTOR SHORT CIRCUIT P1011 HV+ CONTACTOR OPEN CIRCUIT P1013 HV+ CONTACTOR ERROR P1018 HV- CONTACTOR SHORT CIRCUIT P1019 HV- CONTACTOR OPEN CIRCUIT P1021 HV- CONTACTOR ERROR P1025 PRECHARGE SEQUENCE FAILED P0A08...
- Page 80 Label (DTC) Description P1039 TRANSFORMER FAILURE. UNABLE TO PROVIDE POWER. P1040 CHARGER FAN OPEN CIRCUIT FAULT P1041 CHARGER FAN SHORT CIRCUIT FAULT P1042 CHARGER FAN LOCKED B1000 POSITION LIGHTS OPEN CIRCUIT FAULT B1001 POSITION LIGHTS SHORT CIRCUIT FAULT B1002 STOP LIGHTS OPEN CIRCUIT FAULT B1003 STOP LIGHTS SHORT CIRCUIT FAULT B1004...
- Page 81 Label (DTC) Description P0A05 WATER PUMP LOCKED C1005 LOCKING DEVICE PROBLEM C1006 CM-VEHICLE COMMUNICATION ERROR C1007 CM INTERNAL ERROR C1008 EVSE EMERGENCY SHUTDOWN C1009 QCA ERROR C1010 PROTOCOL ERROR C1011 CM APPLICATION LAYER ERROR C1012 SLAC PROCESS ERROR P0500 FRONT WHEEL SPEED SENSOR FAILURE P2158 REAR WHEEL SPEED SENSOR FAILURE P2158 + P0500...
- Page 82 Label (DTC) Description P1026 PRECHARGE SEQUENCE FAILED – PRECHARGE CONTACTOR SHORT CIRCUIT P1027 PRECHARGE SEQUENCE FAILED – PRECHARGE CONTACTOR OPEN CIRCUIT C1003 UNSPECIFIED CM ERROR C1004 CP LINE PROBLEM OR EVSE NOT COMPATIBLE C1013 AC LINE ERROR C1014 UNCLASSIFIED CM ERROR C1015 FAST CHARGE NOT PRESENT C1017...
- Page 83 Label (DTC) Description U0110 DRIVE GENERIC ERROR U0111 BMS INTERNAL COMMUNICATION PROBLEM U0112 BMS BCMU LMU COMMUNICATION PROBLEM P1032 CHARGER CONTROL TIMEOUT SHUTDOWN. NO CONTROL FRAME RECEIVED WITHIN 1000ms. U1000 LOW LEVEL SAFETY ERROR P2637 TORQUE FEEDBACK ERROR U0028 VDB BUS OFF U0037 DTB BUS OFF U0031...
- Page 84 Label (DTC) Description P1053 LOW LEVEL SAFETY ERROR P0610 LOW LEVEL SAFETY ERROR (uC Parameter error) P1054 LOW LEVEL SAFETY ERROR (uS Parameter error) P0601 LOW LEVEL SAFETY ERROR P1055 LOW LEVEL SAFETY ERROR P1063 LOW LEVEL SAFETY ERROR P1056 LOW LEVEL SAFETY ERROR P0603 LOW LEVEL SAFETY ERROR (watchdog error)
-
Page 85: Instructions For Use
• Check tire wear and integrity. Refer to the section components on the motorcycle without prior “Minimum tire tread”. approval from Energica. Certain electrical • Check the condition of the chain. Adjust the accessories may damage the motorcycle, interfere chain tension and lubricate if necessary. For more with the functions of other devices on the information, refer to the sections "Adjusting the chain... -
Page 86: Abs System
ABS system In order to ensure the effectiveness of the full braking capacity of the motorcycle in emergency situations and under adverse road or weather conditions, it has been equipped with an ABS anti-lock braking system. EN0035 This is a hydraulic-electronic device which reduces the pressure within the braking circuit when a sensor installed •... - Page 87 It is important to check that the front (1) and rear (2) tone WARNING! Obstruction of the reading windows will wheels are perfectly clean. prevent correct operation of the ABS system. If you are riding on very muddy ground, it is advisable to disable the ABS system as these conditions can cause unexpected malfunctions of the system.
-
Page 88: Starting The Motor
WARNING! The ABS control unit measures and Starting the motor compares the front and rear wheel speeds. Using tires other than the types indicated by Energica Before starting the motor, make yourself familiar Motor Company may compromise the functionality with the driving controls of the motorcycle. If... -
Page 89: Moving Off
• Raise the kickstand. WARNING! When the motorcycle is stationary and the GO symbol is lit, unintentional rotation (1) located on the right control • Press the control of the throttle by the rider or third parties will set switch. the motorcycle in motion. -
Page 90: Stopping The Motorcycle
Stopping the motorcycle In an emergency, press the emergency cut-off switch (1). See the paragraph "Right control • Reduce speed, and release the throttle grip. switch" (emergency cut-off switch) for more • Apply the brakes and stop the motorcycle. information. •... -
Page 91: Park Assistance Mode
PARK ASSISTANCE mode PARK ASSISTANCE mode can be engaged only with the motorcycle stationary. Reverse gear can be engaged by pressing the "START MOTOR" button, on the right control switch, for 2 seconds. EN0075 By pressing on "START MOTOR", you can switch from slow forward to reverse as often as you want depending on the maneuvers you want to perform. -
Page 92: Parking
If you are unable to recharge it, • Turn the handlebar fully to the left. contact an Energica dealer or authorized workshop • Using the key, turn the ignition switch to “LOCK” to immediately. -
Page 93: Lpr Function (Long Period Rest)
LPR is a function which may be activated by the user to technician who is not authorized by Energica. Do protect the battery against deterioration during prolonged not open the battery or tamper with it. Always periods with the motorcycle not in use (over 30 days). - Page 94 How to activate LPR mode • When the message “LPR MODE ACTIVE” is displayed, switch off the motorcycle and connect the cable to the Activate the function as follows: charging socket. • Check that the battery charge level is below 87%; •...
-
Page 95: General Warnings Concerning Battery Charging Devices
How to deactivate LPR mode General warnings concerning battery charging devices Deactivate the function as follows: WARNING! The incorrect usage of electric power • Press “MODE” to access the “Menu Screens”; may cause injury or damage due, for example, to electric shock or fire. -
Page 96: Charging Cable
WARNING! When using the standard charging Charging cable cable, never set the charge current higher than the maximum permitted continuous current value of WARNING! Using a non-approved charging cable or charging station may cause personal injury or the wall socket. damage to property resulting, for example, from Set the charge current appropriately for the mains the cable igniting. -
Page 97: Charging The Battery
Charging the battery The type of charge that can be performed depends on the type of socket fitted to your motorcycle: Before performing any charging operation, you • AC charging: performs a normal charge cycle (battery must read the sections on Safety warnings and 0% -95% in 3.5 hours with a mains voltage of 240V, or Recommendations on correct battery maintenance. - Page 98 AC socket With this type of socket it is only possible to perform AC charging operations, using a specific cable to connect to a domestic power outlet, or using external charging stations. To carry out AC charging using standard domestic power outlets, the user must purchase a charging cable with the necessary specifications.
- Page 99 DC socket Once the battery charging cycle has started, do not disconnect the plug until it is complete. If you want to With this type of socket you can perform AC and DC stop charging the battery, you must insert the key into the charging operations as required.
-
Page 100: Headlamp Adjustment
Headlamp adjustment Left-side headlamp Standing on the steering side of the motorcycle, turn the Check the headlamp alignment, and then place the screws (1) to adjust the height of the light beam. motorcycle in a perfectly upright position in a darkened area, with the tires inflated to the correct pressure, with one person seated in the saddle, and facing a wall or screen at a distance of 10 meters (32.8 ft). -
Page 101: Replacing Turn Signal Bulbs (Usa Type Approval)
Right-side headlamp Replacing turn signal bulbs (USA type approval) Standing on the steering side of the motorcycle, turn the To replace the incandescent bulbs, undo the screw (1) and screws (3) to adjust the height of the light beam. remove the cover (2). EN0081 EN0080 After removing the cover, replace the old bulb with a new... -
Page 102: Lifting And Transport
Lifting and transport Sling a strap round the chassis on each side, at point (1). To perform lifting or transport operations, straps of sufficient capacity for the weight to be supported must be used. The straps should be soft to avoid scratches or other damage to the motorcycle. - Page 103 At the front, sling a belt round the steering column, at Transport point (2). Transport the motorcycle on trailers, trucks or trolleys that have a flat surface and are suitable for the transport of motorcycles. Hoist the motorcycle at the points shown below. EN0084 WARNING! Before the motorcycle is entirely lifted, EN0085...
- Page 104 Sling a strap round the chassis on each side, at point (3). At the front, sling a strap round the chassis on each side, above the fork lower plates at point (4). EN0086 EN0087 After anchoring the straps in the four points shown (two per side), tighten them to compress the front and rear shock absorbers slightly and increase the stability of the motorcycle.
-
Page 105: Maintenance
Authorized Energica dealers have the technical information and expertise necessary to perform all repair work correctly and reliably on Energica motorcycles. See the Energica website to find your nearest Energica dealer. The maintenance procedures necessary for the vehicle are indicated in the following service schedule:... - Page 106 LIST OF OPERATIONS AND ODOMETER READING/TIME INTERVALS* (km/mi) TYPES OF INTERVENTION 1,000 km 10,000 km 20,000 km 30,000 km 40,000 km 50,000 km 60,000 km On each 600 mi 6,000 mi 12,000 mi 18,000 mi 24,000 mi 31,000 mi 37,000 mi 12 months 24 months 36 months...
- Page 107 LIST OF OPERATIONS AND ODOMETER READING/TIME INTERVALS* (km/mi) TYPES OF INTERVENTION 1,000 km 10,000 km 20,000 km 30,000 km 40,000 km 50,000 km 60,000 km On each 600 mi 6,000 mi 12,000 mi 18,000 mi 24,000 mi 31,000 mi 37,000 mi 12 months 24 months 36 months...
- Page 108 LIST OF OPERATIONS AND ODOMETER READING/TIME INTERVALS* (km/mi) TYPES OF INTERVENTION 1,000 km 10,000 km 20,000 km 30,000 km 40,000 km 50,000 km 60,000 km On each 600 mi 6,000 mi 12,000 mi 18,000 mi 24,000 mi 31,000 mi 37,000 mi 12 months 24 months 36 months...
- Page 109 LIST OF OPERATIONS AND ODOMETER READING/TIME INTERVALS* (km/mi) TYPES OF INTERVENTION 1,000 km 10,000 km 20,000 km 30,000 km 40,000 km 50,000 km 60,000 km On each 600 mi 6,000 mi 12,000 mi 18,000 mi 24,000 mi 31,000 mi 37,000 mi 12 months 24 months 36 months...
- Page 110 LIST OF OPERATIONS AND ODOMETER READING/TIME INTERVALS* (km/mi) TYPES OF INTERVENTION 1,000 km 10,000 km 20,000 km 30,000 km 40,000 km 50,000 km 60,000 km On each 600 mi 6,000 mi 12,000 mi 18,000 mi 24,000 mi 31,000 mi 37,000 mi 12 months 24 months 36 months...
-
Page 111: Maintenance Operations
The transmission oil level is visible through the sight glass an Energica dealer or authorized workshop. (1) on the right side of the transmission casing. For the type of oil to be used refer to the section "Liquids". -
Page 112: Checking The Front Brake Fluid Level
Energica dealer or to a specialized service center to EN0089 have the fault corrected. Take your motorcycle to an Energica dealer or to a Brake fluid is harmful to paintwork and plastic specialized service center to have the fluid topped up or parts;... -
Page 113: Checking The Rear Brake Fluid Level
Energica dealer or to a specialized service center to have the fault corrected. EN0090 Take your motorcycle to an Energica dealer or to a specialized service center to have the fluid topped up or Brake fluid is harmful to paintwork and plastic changed at the intervals specified in the service schedule parts;... -
Page 114: Checking Brake Pad Wear
If the thickness of the friction material on either pad is approximately 2 mm (0.1 in) or less, replace both pads. Take your motorcycle to an Energica dealer or to a specialized service center to have the pads replaced. EN0092... -
Page 115: General Inspection Of The Braking System
Energica dealer or to a specialized • Open the seat lock using the ignition key. service center to have the system inspected and bled. - Page 116 EN0094 EN0096 EN0095 EN0097 https://www.motomanuals.net/...
- Page 117 After removing the tank cover (3), check the coolant level If the level is lower than the minimum mark, perform a by referring to the label (6) on the reservoir (7). The level top-up. must be between the minimum and maximum marks. WARNING! The coolant may become very hot (up to 80°C / 176°F).
-
Page 118: Adjusting The Chain Tension
Adjusting the chain tension Undo the three screws (1) and remove the chain guard (2). EN0100 EN0099 Stand with the meter rule at the end of the upper guard pad (3). Pressing the chain slightly downwards, obtain the minimum value. Then repeat the operation, pulling the chain upwards to obtain the maximum value. - Page 119 Slacken the rear wheel nut (4) to allow the wheel to slide. EN0103 EN0102 After loosening the two check nuts (5): Undo the check nuts (5) on the left hand side, restraining • Undo the adjusters (6) to increase chain tension the adjuster (6).
- Page 120 Check the free play of the chain, keeping the wheel Insert an Allen key between the chain and the sprocket. pressed fully forward, so that the axle bearings (7) are in Tighten the axle nut (4) to 80 Nm (59 dft. lb) while contact with the chain adjusters (6).
-
Page 121: Chain Lubrication
Chain lubrication General cleaning Before lubricating the chain, it must be cleaned. Use Depending on the roads you will be riding on, special solvents and do not use steam jet cleaners which the motorcycle must be washed and cleaned are too powerful. Dry the chain using compressed air or periodically to preserve the brilliance of the metal absorbent material, then lubricate it. -
Page 122: Prolonged Periods With Vehicle Not In Use
Prolonged periods with vehicle not in use to ensure its perfect efficiency. Do not use harsh products, Energica strongly recommends that the motorcycle which could damage the tone wheels and sensors. is left connected to the charger when not in use. - Page 123 NOTES https://www.motomanuals.net/...
- Page 124 NOTES https://www.motomanuals.net/...
- Page 125 NOTES https://www.motomanuals.net/...
- Page 126 Energica Motor Company S.p.A. www.energicamotor.com – info@energicamotor.com Cod. ENF003100 – Rev.02 - 02/2018 https://www.motomanuals.net/...
Need help?
Do you have a question about the Eva 2018 and is the answer not in the manual?
Questions and answers