Table of Contents
Advertisement
Quick Links
Advertisement
Table of Contents

Related Manuals for NovaStar ET2000

Summary of Contents for NovaStar ET2000
- Page 1 ET2000 Multimedia Control System User Manual...
-
Page 2: Preface
Preface Statement You are welcome to use the product of Xi’an NovaStar Tech Co., Ltd. (hereinafter referred to as NovaStar). This document is intended to help you understand and use the product. For accuracy and reliability, NovaStar may make improvements and/or changes to this document at any time and without notice. -
Page 3: Table Of Contents
1 Overview ..................................1 Introduction ................................1 Features ..................................1 Appearance ................................2 2 Applications ..................................4 3 ET2000 Settings ................................5 Set Main Display ................................ 5 Change Resolutions..............................6 3.2.1 Set Standard Resolutions ..........................6 3.2.2 Set Custom Resolutions ........................... 8 EDID Management .............................. - Page 4 ET2000 Multimedia Control System User Manual Output Settings ................................ 47 Multiple Displays ..............................48 External Control ............................... 48 6.4.1 Control via Network ............................48 6.4.2 Control via Serial Port ............................ 49 6.4.3 Control via App ............................... 49 Audio Settings ................................51 7 Help ....................................
-
Page 5: Overview
Overview Introduction The ET2000 is a new multimedia control system developed by NovaStar, which is specifically designed for multimedia exhibition halls, banquet halls and other small and medium fixed installation scenarios. The ET2000 provides an excellent pixel-to-pixel display with ultra-high definition, diversified mosaic creativity and outstanding media arrangements for professional stage performances. -
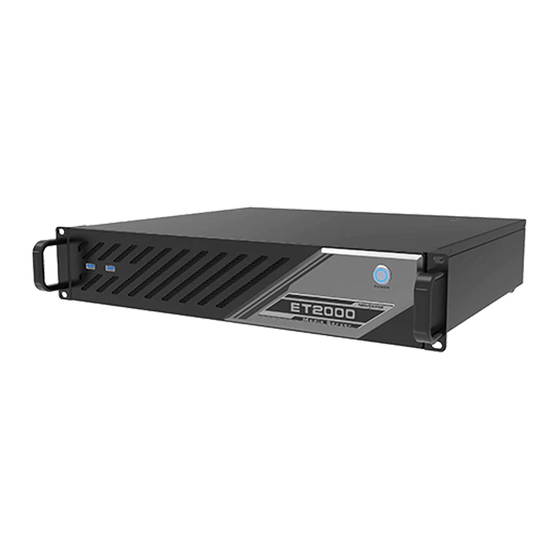
Page 6: Appearance
ET2000 Multimedia Control System User Manual Appearance Front Panel Area Description Power button Power on or power off the device. USB ports 2x USB3.0 Connect to a mouse and keyboard. Insert a USB drive for importing media files. - Page 7 ET2000 Multimedia Control System User Manual Memory: 2 GB Type: GDDR6 Bit width: 64 bit Notes The graphics card does not support irregular mosaic layouts. The mosaic layout must be 1×2, 1×3, 2×1 or 3×1. ...
-
Page 8: Applications
ET2000 Multimedia Control System User Manual Applications Notes: This product can only be placed horizontally. Do not mount vertically or upside-down. The product can be mounted in a standard 19-inch rack capable of withstanding at least four times the total weight of the mounted equipment. -
Page 9: Et2000 Settings
ET2000 Multimedia Control System User Manual ET2000 Settings Set Main Display Step 1 Right click on your desktop and select Display settings. Figure 3-1 Display settings Step 2 Select a display to set it as the main display. Figure 3-2 Multiple displays-1... -
Page 10: Change Resolutions
ET2000 Multimedia Control System User Manual Step 3 For the Multiple displays item, select Extend these displays. Figure 3-3 Multiple displays-2 Step 4 On the window that appears, select Keep changes. Figure 3-4 Confirmation Step 5 Check the box next to Make this my main display. - Page 11 ET2000 Multimedia Control System User Manual Figure 3-5 Display settings Step 2 Select a display to set it as the main display. Figure 3-6 Multiple displays-1 Note: When multiple displays are connected, you can click Identify to show the number at the bottom left corner on each display.
-
Page 12: Set Custom Resolutions
ET2000 Multimedia Control System User Manual Step 3 For the Display resolution item, select the desired output resolution. Figure 3-7 Multiple displays-2 Step 4 On the window that appears, select Keep changes. Figure 3-8 Confirmation Step 5 Repeat Step 2 to Step 4 to complete the resolution settings for other displays. - Page 13 ET2000 Multimedia Control System User Manual Step 2 On the NVIDIA Control Panel interface, go to Display > Change resolution. Figure 3-10 Change resolutions Step 3 Select the desired display. Step 4 Click Customize to show the customize window. Figure 3-11 Custom resolution-1...
- Page 14 ET2000 Multimedia Control System User Manual Step 5 Click Create Custom Resolution. Step 6 Read the disclaimer information carefully and click Accept to show the Create Custom Resolution window. Step 7 Select the desired display. Figure 3-12 Custom resolution-2 Step 8 Set the horizontal pixels, vertical lines, refresh rate and scan type.
- Page 15 ET2000 Multimedia Control System User Manual Figure 3-14 Custom resolution-3 Step 10 Click OK to complete the custom resolution settings. After a custom resolution is created successfully, it will appear in the custom area as shown in the figure below.
-
Page 16: Edid Management
ET2000 Multimedia Control System User Manual EDID Management After the display resolution settings, you need to manage the EDID for precise identification of display properties and to avoid the on-site screen display disorder. Load EDID The procedure of how to load the EDID is as follows. - Page 17 ET2000 Multimedia Control System User Manual Step 3 Click EDID (Monitor) next to a desired output connector of the current graphics card to show the EDID management window. Figure 3-18 EDID (Monitor) Figure 3-19 Manage EDID Step 4 Click Export EDID and then name the exported EDID file in the window that appears.
- Page 18 ET2000 Multimedia Control System User Manual Step 7 In the Select Connector to force EDID area, select the desired connector. Figure 3-20 Load EDID Step 8 Click Load EDID. Step 9 On the dialog box that appears, click OK to complete loading the EDID.
- Page 19 ET2000 Multimedia Control System User Manual Step 10 Go back to Workstation > View system topology to check the EDID status. If the original EDID (Monitor) changes to EDID (File), the EDID is loaded successfully. Figure 3-22 EDID loaded successfully Unload EDID The procedure of how to unload the EDID is as follows.
- Page 20 ET2000 Multimedia Control System User Manual Figure 3-23 EDID (File) Step 3 Select the Unload tab and then select the desired connectors. Figure 3-24 Unload EDID www.novastar.tech...
-
Page 21: Output Mosaic
ET2000 Multimedia Control System User Manual Step 4 Click Unload EDID. Step 5 After the EDID is unloaded successfully, click OK on the dialog box that appears. Figure 3-25 EDID unloaded successfully Step 6 Go back to Workstation > View system topology to check the EDID status. If the EDID (File) changes to EDID (Monitor), the EDID is unloaded successfully. - Page 22 ET2000 Multimedia Control System User Manual Step 2 On the NVIDIA Control Panel interface, go to Workstation > Set up Mosaic. Figure 3-27 Set up mosaic Step 3 Click Create new configuration to show the mosaic settings window. Figure 3-28 Mosaic settings...
- Page 23 ET2000 Multimedia Control System User Manual Step 4 Select the screen number from the drop-down list of Number of displays. Step 5 Select the screen mosaic layout from the drop-down list of Topology (rows x columns). Step 6 Select the screen orientation from the drop-down list of Orientation of displays.
- Page 24 ET2000 Multimedia Control System User Manual Figure 3-30 Arrange displays Step 10 Arrange the displays according to the screen arrangement and structure by dragging the available displays to the corresponding topology areas. Figure 3-31 Arrange displays www.novastar.tech...
- Page 25 ET2000 Multimedia Control System User Manual Step 11 Click Apply and then click Yes on the confirmation window. Step 12 Click Next to proceed. Figure 3-32 Adjust overlap and bezel correction You can perform overlapping adjustment or bezel correction to the vertical or horizontal edges of the display as needed.
-
Page 26: Software Operations
Software Licensing After the ET2000 is started, Trial is displayed at the top right of the user interface, indicating the software is a trial version. If you want to obtain the license, please get in touch with NovaStar sales engineer to purchase the dongle or registration code. -
Page 27: User Interface Introduction
ET2000 Multimedia Control System User Manual When the dongle is inserted and recognized normally, the above window and the Kompass FX2 text on the output will disappear automatically. User Interface Introduction After the software is started, the main user interface is shown in Figure 4-2. - Page 28 ET2000 Multimedia Control System User Manual Area Item Description the screen. : Disable the output screen. : Close the test pattern and display the playback content. : Open and display the test pattern. : Disable the FTB function and display the playback content.
-
Page 29: Project
ET2000 Multimedia Control System User Manual Area Item Description Set the media properties, including the layer basic info, opacity, quality, cropping and transition effect. Program Program n View the program name. management Layer and Layer n with/without audio: Displays the layer name and indicates... -
Page 30: Add Outputs
ET2000 Multimedia Control System User Manual Figure 5-1 Edit output 5.2.1 Add Outputs Add and bind outputs automatically After startup, Kompass FX2 will automatically detect the graphics card connectors and then complete the adding and binding of those detected connectors. All the connectors are displayed in the output list on the left. -
Page 31: Configure Screens
ET2000 Multimedia Control System User Manual Connector: Select the desired output connector from the drop-down list or change the connector binding relation. Resolution: Set the desired output width and height. 5.2.2 Configure Screens Step 1 Click to pop up the Edit Output window. -
Page 32: Add Media Files
ET2000 Multimedia Control System User Manual Audio: mp3, aac, flac, amr, ape, wav, wma Microsoft Office files: PowerPoint (1080p) Note: Recommended video coding formats: 4K < resolutions ≤ 8K, width ≤ 8192 pixels and height ≤ 4320 pixels: H.265 (HEVC) or VP9 recommended ... - Page 33 ET2000 Multimedia Control System User Manual Note: The computers running the NDI Sender and Kompass FX2 must be on the same network segment. Configurations in NDI Sender Step 1 Double click the NDI Sender shortcut on the desktop to open the NDI Sender software.
-
Page 34: Add Sources From Acquisition Device
ET2000 Multimedia Control System User Manual Figure 5-6 Add NDI media Step 3 Select the NDI sources from the NDI list. Step 4 Click OK to complete NDI source adding. Note: After adding NDI sources, you can right click an NDI source and select Edit to change the NDI source name. -
Page 35: Add Website Input Sources
ET2000 Multimedia Control System User Manual Figure 5-8 Add acquisition equipment Step 2 On the displayed window, enter the capture device name next to Name. Step 3 Select a data acquisition card name next to Device Name. Step 4 The system will automatically read the resolution and frame rate. -
Page 36: Add Streaming Media
ET2000 Multimedia Control System User Manual Figure 5-10 Entered the added website Step 5 Click the drop-down list on the top right to change the resolution of the web page. Step 6 On the opened website, select the content you want to play. -
Page 37: Manage Media Files
ET2000 Multimedia Control System User Manual Note: The PowerPoint files, NDI sources, websites and streaming media cannot be added to the media collection. Step 1 Right click the blank area of Media Library and select Add Media Collection. Figure 5-12 Add media collection... -
Page 38: Management
ET2000 Multimedia Control System User Manual Select the desired media file and click Right click the media file and select Delete. Click the media file and press the Delete key. 5.3.2.3 Management You can create folders to classify the added media files. - Page 39 ET2000 Multimedia Control System User Manual Figure 5-14 Adjusting layers Position adjustment: Drag and move the layer to adjust the layer position quickly, or fill in the values for the following parameters to precisely adjust the layer position. −...
-
Page 40: Set Program Properties
ET2000 Multimedia Control System User Manual Figure 5-15 Layer group Step 5 Lock the layer media. After a layer is edited, you can lock the layer to avoid unexpected changes to the layer caused by misoperation. In the stage editing area, right click the target media to open the context menu. - Page 41 ET2000 Multimedia Control System User Manual Figure 5-17 Set program properties Rename: Give the program a new name for better management. Delete: Delete the current program. All the layers, layer settings and media properties will be deleted. ...
-
Page 42: Play Programs
ET2000 Multimedia Control System User Manual As shown below, the program starts to play at the 10th second, pauses the playback at the 30th second, continues the playback at the 40th second and stops the playback at the 50th second. -
Page 43: Set Layer Opacity
ET2000 Multimedia Control System User Manual Volume adjustment: Adjust the output volume of the program media. Stop Playing: Set the status or action when the playback of the current media ends. − Hold on Last Frame: After the playback of the current media ends, the output displays the last frame of the playback media. -
Page 44: Crop Layers
ET2000 Multimedia Control System User Manual Table 5-1 Color parameters Parameter Description Adjust the brightness or darkness of the image. Brightness The value ranges from 0 to 100 and defaults to 50. Adjust the difference in brightness between light and dark areas of the image. -
Page 45: Set Layer Effects
ET2000 Multimedia Control System User Manual Figure 5-23 Cropping 5.4.8 Set Layer Effects Layer effect settings include blurring, keying, mask and inverting colors. Step 1 Click the playing media in the Program Management area or the Output area to select the media. -
Page 46: Set Sound Channel Mapping
ET2000 Multimedia Control System User Manual Step 2 Pick the desired color. After the color is selected, the picked color, the color Hex and RGB values are displayed next to , or you can also set the Hex and RGB values to specify the color. -
Page 47: Set Scheduled Programs
ET2000 Multimedia Control System User Manual 5.4.10 Set Scheduled Programs After the program editing, you can realize automatic playback of the programs according to the scheduled time and times. Step 1 Click at the bottom of the main user interface to open the Scheduled Playback window. - Page 48 ET2000 Multimedia Control System User Manual Figure 5-28 Set playback tasks Step 5 Click next to Plan to select the programs to be scheduled. Figure 5-29 Set scheduled programs Select the desired programs in the Program List area on the left.
-
Page 49: Save Projects
ET2000 Multimedia Control System User Manual Click the number next to Times to activate the times setting function. Enter the desired times and then the program will be played automatically according to the set times. When the playback mode is set to Time, the playback times of the program is 1 by default and cannot be changed. -
Page 50: Package Projects
ET2000 Multimedia Control System User Manual Programs and all layers in the programs Package Projects You can save the edited project and the imported media files as an independent project file for easy and convenient use on any computer in the future. -
Page 51: Output Settings
ET2000 Multimedia Control System User Manual − Selected: Kompass FX2 will be started automatically when OS starts. − Deselected: Kompass FX2 will not be started when OS starts. Open recent project after startup: − Selected: The recently-opened project will be opened when Kompass FX2 starts. -
Page 52: Multiple Displays
FX2 conveniently. For details on the commands and command writing rules of remote controlling and controlling via a control device, please see Control Protocol of NovaStar Multimedia Playback Software. Go to Settings > External Control to open the External Control window. -
Page 53: Control Via Serial Port
ET2000 Multimedia Control System User Manual Not occupied: The TCP/IP control settings are completed. 6.4.2 Control via Serial Port To control Kompass FX2 via serial port, use a serial cable to connect the control device to the computer where Kompass FX2 is installed. - Page 54 ET2000 Multimedia Control System User Manual Figure 6-5 Connections for App control Connection Requirements The media server, H series device and Pad device with VCCP installed must be on the same network segment. Media Server Configuration Obtain the IP address of the media server.
-
Page 55: Audio Settings
ET2000 Multimedia Control System User Manual Run Kompass FX2 and then go to Settings > External Control to open the external control settings window. Select the Network tab. Check the box in front of TCP/IP to enable the TCP/IP control. -
Page 56: Help
The drop-down list shows all the sound card devices of the device. ET2000 supports hot plugging of sound card devices without the need to restart the software. Configure the sound channel count for the mapping. The supported options include Default, 2, 4, 6 and 8. -
Page 57: Play Log
ET2000 Multimedia Control System User Manual Step 2 Click Add at the bottom to open the local folder where you can select the desired file. You can also add multiple files by pressing the Ctrl key and selecting the files simultaneously. -
Page 58: User Manual
ET2000 Multimedia Control System User Manual Figure 7-2 Play log Step 2 Click Date and select the desired time. The supported options include Today, Recent 7 Days, Recent 1 Month and Recent 3 Months. Note: Before you use this function, please set the value range of Log Storage greater than the time range you set here. -
Page 59: Specifications
ET2000 Multimedia Control System User Manual Specifications Power 100-240VAC 47-63Hz Electrical connector Specifications Power 400 W consumption Temperature 0° C to 45° C Operating Environment Humidity 0% RH to 80% RH, non-condensing –10° C to +60° C Temperature Storage Environment...
Need help?
Do you have a question about the ET2000 and is the answer not in the manual?
Questions and answers