Table of Contents
Advertisement
Quick Links
Advertisement
Table of Contents

Summary of Contents for MANTAFOILS VOLT 2 REMOTE
- Page 1 V O L T R E M O T E U S E R M A N U A L...
- Page 2 Warranty Warranty The product is subject to a warranty that is limited to a period of 12 months from the shipping date of the related product order. For full details about the warranty, please visit https://ww- w.mantafoils.com/tofs...
-
Page 3: Table Of Contents
Content List Getting to know your remote Features Homescreen Second Page Third Page Settings Page Connecting to your Efoil Unlocking the remote Trigger Calibration Setting the Power Limit Setting the Units Metric Settings Navigation Customizing Display Cell Display Color Settings Throttle Start Setting Throttle Ramp Setting Downloading Firmware Update... -
Page 4: Features
Features Configurable Display Waterproof GPS Positioning Technology Sunlight Readable Safety Lock Cruise Control Wireless Charging Ride Logging... -
Page 5: Homescreen
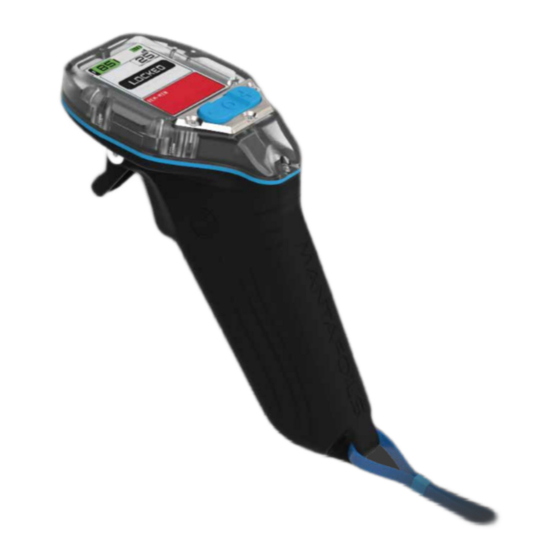
Homescreen Power ON the remote by long pressing the ‘O’ button. When remote is powered ON, the homescreen will display the following: 1. The voltage of your E-foil 2. The GPS 3. The Remote Battery Voltage 4. Maximum power output. The Default is set to 25. 5. -
Page 6: Second Page
Second Page The second page records: 1. Elapsed minutes: The time covered since the start of your ride. 2. Elapsed Kilometers: The kilometers covered since the start of your ride 3. Remaning Minutes: Time remaining for your ride depending on the battery charge. -
Page 7: Third Page
Third Page The third page records: 1. E-Foil Power: The wattage power of the e-foil. 2. Efficiency: The peak level of your foil performance in real time 3. Battery current: The battery current of the e-foil. 4. E-Foil temperature: The temperature of the e-foil POWER-W POWER EFF-W/KM... - Page 8 Settings Menu Hold the ‘-’ and ‘+’ together for 3 seconds to enter the settings menu and to exit hold the ‘-’ button for 3 seconds or until you arrive on the homescreen page. In the menu: 1. The first page is used for pairing the remote with the efoil board. Connect Efoil To pair Receiver 1>...
-
Page 9: Connecting To Your Efoil
Connecting to the Efoil To connect your remote to the E-foil follow the instructions as shown on the screen. Press the ‘O’ button to enter into pairing mode. This will take you to the screen shown below: Connect Efoil pairing... Power ON the efoil When on this page, close down the lid of your board to power on the E-foil. - Page 10 Connecting to the Efoil Restart the remote by long pressing the ‘O’ button. When the remote restarts, you should read ‘LOCKED’ on the home screen page. On pairing, the GPS is also activated. The bars indicate signal strength between the remote and the receiver.
-
Page 11: Unlocking The Remote
Unlocking the Remote To begin using the remote, unlock the safety lock by pressing the ‘-’ button. The five second timeout will appear. Press the trigger before the countdown ends to start your ride. Note: This safety lock feature is in place to lock the trigger and prevent any accidental E-foil activation. -
Page 12: Trigger Calibration
Trigger Calibration From the settings page, navigate to the trigger calibration page by pressing the ‘+ ’ button. On this page, Release the throttle and press the ‘O’ button on the screen to begin sensor calibration. Trigger Cal.. 1. On this page, ensure the trigger is not pressed release trigger... -
Page 13: Setting The Power Limit
Setting the Power Limit From the settings page, navigate to the power limit page by pressing the ‘+ ’ button. Press the ‘O’ button to set the power limit to the desired value. The values change in increments of 10. Once set, navigate to a different page by using ‘-’... -
Page 14: Setting The Units
Setting the Units From the settings page, navigate to the units page by pressing the ‘+ ’ button. The available Units are: 1. The SI units : kilometer/hour 2. The US units : miles/ hour 3. The nautical units: knots/hour Keep pressing the ‘O’... - Page 15 Metrics Settings From the settings page, navigate to the metrics page by pressing the ‘+ ’ button. Metrics setting gives you numerous options to personalize the remote display interface and colors. Metrics Select a page Main page Second page Third page COLOR Back...
-
Page 16: Metric Settings
Metric Settings - Navigation Navigating the Metrics menu It is important to understand the navigation controls in the metrics settings. Metrics On this page, press the ‘O’ button to select options. Select a page Use the ‘-’ and ‘+’ buttons to scroll through the Main page page options. -
Page 17: Customizing Display Cell
Metric Settings - Customizing Display Cells Customizing the Display Cells Each page setting shows the cells available on that screen. The information in each cell can be customized as per preferance. Altenatively it can also be left empty. The Main page can hold a maximum of 4 cells. The Second and Third page can hold a maximum of 10 cells each. - Page 18 Metric Settings - Customizing Display Cells If all the cells on a page are left empty, the page will be Metrics BACK omitted from being displayed. REM-MIN REM-MIN If an even number of cells consecutively contain the same REM-MIN REM-MIN data, it will regroup as one single cell.
-
Page 19: Display Color Settings
Metric Settings - Color Settings Changing the display colors Scroll down to the fourth option. The default is set to ‘color’. Metrics Press the ‘O’ button to scroll through the colors. Select a page You can choose between three options: Main page COLOR Second page... -
Page 20: Throttle Start Setting
Throttle Start Setting From the settings page, navigate to the throttle start page by pressing the ‘+ ’ button. Throttle start is the power of the foil when the trigger is pressed at the startup. This feature is included to avoid unexpected power bursts when starting the ride. -
Page 21: Throttle Ramp Setting
Throttle Ramp Setting From the settings page, navigate to the throttle ramp page by pressing the ‘+ ’ button. Throttle ramp is sensitivity of the acceleration of the foil. This value controls how quickly the power output ramps up or down between different power levels. -
Page 22: Downloading Firmware Update
Downloading Firmware Update From the settings page, navigate to the firmware update page by pressing the ‘+ ’ button. Make sure the remote is paired to your efoil. (For this, read the instructions on pairing your remote with the board) Click on the Remote Wait for the Click on the latest... -
Page 23: Installing Firmware Update
Installing Firmware Update After the firmware update is downloaded on your mobile application, navigate to the firmware update page by pressing the ‘+’ button from the settings menu. Press the ‘O’ button on the remote to activate the MantaFoil wifi network. Your remote will read ‘Foil connected’... -
Page 24: Resetting Your Remote
Resetting Your Remote From the settings page, navigate to the reset system page by pressing the ‘+ ’ button. Press the ‘O’ button on the remote to reset the system. Your remote will automatically restart after the resetting is done. Reset System To Reset Press O button... -
Page 25: Logs Access
Logs Access From the settings page, navigate to the logs access page by pressing the ‘+ ’ button. Press the ‘O’ button to toggle the system On and Off. All travel logs are recorded by default. Setting it to ‘ON’ will activate transfer the logs data to the application. - Page 26 ‘show old logs’. Once the logs access is Clicking on any of the data enabled, open the Mantafoils presented will open application and click on the expanded window view of all ride logs icon to replay your the available ride information.
-
Page 27: Charging Your Remote
Charging the Remote The MantaFoil remote is charged wirelessly. The wireless charger and cable are provided in your Efoil Kit. To charge the remote, plug in the wireless charger. Place the remote on the wireless charging pad. The blue light on the remote and the pad indicate charging in progress. The blue light on the remote will turn off once fully charged. -
Page 28: Hardware Reset
Hardware Reset To hardware reset your remote, place a magnet on the side of the bottom right corner of the remote screen. The remote will power off. You can then restart your remote. This feature is useful in the unlikely event of a software hang or frozen screen. -
Page 29: Troubleshooting
- Contact Mantafoil Support team. Water inside Remote - In the unlikely event of water inside the remote, discontinue use of the remote and contact Mantafoil Support team. If any issues persist with your remote, contact mantafoils support team at sales@mantafoils.com.
Need help?
Do you have a question about the VOLT 2 REMOTE and is the answer not in the manual?
Questions and answers