Advertisement
Quick Links
www.flojak.com
Instruction & Assembly
Flojak F-50 thru F-150
UNDERSTAND THOROUGHLY PRIOR TO INSTALLATION
INSTALLING FLOJAK INTO THE WELL
The FloJak is easier to install with two or three extra people...one to lift the center
of the arch, and the others to guide and lower the pump into the well. The drop-
line is a critical safety measure that may be used to help you lower your FloJak
into the well while reducing the risk of dropping it. The ring-end must be anchored
securely to a point close to the well head.
1. Carefully guide the FloJak into the well. DO NOT FORCE IT. I you
encounter resistance, lift it a few feet and try a different route.
2. When FloJak is fully inserted, secure the hanger over the top edge of your
well casing by tightening the 4 bolts with a 9/16" wrench. BE CAREFUL-
DO NOT OVER TIGHTEN or you could crack the well casing.
3. Pull the lowering rope up until tight and secure it to the metal loop welded
to the side of the hanger bracket. The rope can assist you if you decide to
remove the pump in the future for any reason.
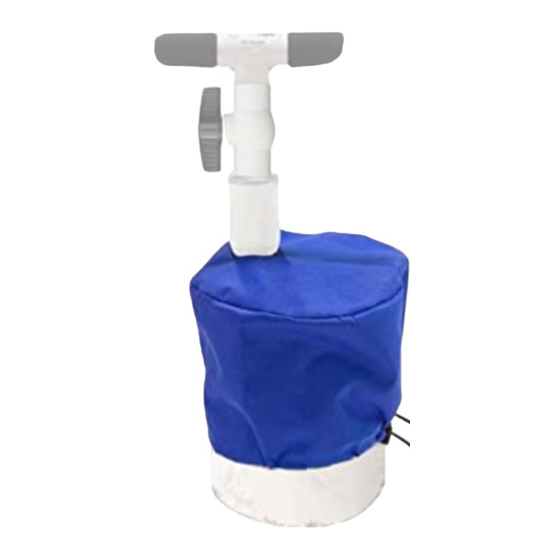
4. If using a Well-Bonnet, slip it over the well-cap or any wires, and close up
the gaps using the Velcro fastener. Cinch the base of your bonnet in place
around the well casing using the drawstring.
If you are using a PowerJak or MiniJak lift-assist, follow the installation directions
included with your PowerJak handle kit.
© copyright 2012 Flojak™ | a division of Bal-Cor Industries, LLC
www.flojak.com
PUMP OPERATION
Prior to regular use, it is recommended that you decontaminate your well and
newly installed pump by pouring a half gallon of clear, unscented bleach into the
well opening. Wait an hour or so and then pump several gallons of chlorinated
water through your FloJak and any piping or hoses used to transport water.
Within a day or two, fresh water will replace the chlorinated water in your well,
and the smell will dissipate. If you need to use the water immediately, use smaller
quantities of bleach until you can just begin to smell it in the pumped water. You
can filter chlorine with the right filters, and bleach dissipates in air. A large surface
area container for storage will help.
Operating FloJak is simple. Lift the Tee-handle to a comfortable pumping height
and stroke up and down to produce water through the handle, on the down
stroke. Initial priming from 50 feet below the surface (for example) will require
about ten 22-24" strokes. If you are using an assist handle, the strokes will be
shorter (but will require much less effort). Without the Jak assist handles, it takes
about 7 average strokes to produce a gallon of water.
FloJak is equipped with a ball-valve below the handle which allows you to keep
an uphill-prime if you are pumping up an incline to a tank, garden or into your
home through an exterior faucet.
FloJak comes with a PVC hose fitting on the handle. You may attach an optional
6-foot or 50-foot "GatorHyde" hose capable of 200 PSI pumping pressures. The
longer hose can be attached to any unrestricted outdoor faucet for supplying
water into your house for sinks, tubs or flushing.
The "prime" in the top of your pump will leak down to at least the "weep hole"
level which is approximately 4 feet below the surface (marked by the yellow label).
This will help avoid freezing in colder temperatures.
Thank you for purchasing the FloJak™. Although capable of greater lift, this pump
is warranted and recommended for general, non-commercial use at pumping
depths requiring up to 150 feet of lift. It is guaranteed to be free of material
and workmanship defects impacting operation for two years from the date of
purchase. If you have questions, please feel free to contact us online at www.
flojak.com, or call our helpful customer care line toll free at 1-855-435-6525, M-F,
8:30-4:30 CST.
1
www.flojak.com
BEGINNING
Please take 10 minutes or so to familiarize yourself these instructions thoroughly
before you assemble and install your FloJak. You may also want to watch a
short assembly video on the "Installation" page at FloJak.com. FloJak is easy to
assemble but requires that you follow specific steps and pay close attention to
detail.
ASSEMBLY REQUIRES A FEW ADDITIONAL ITEMS:
1. PVC cleaner, primer and medium bodied PVC glue (any hardware store or
home-center)
2. Clean, disposable rag for glue clean up
3. Tape measure for determining depth to static water
4. 9/16" wrench for the hanging bracket
5. Standard hacksaw
6. Additional rope as needed for lowering deeper than 50 feet
7. Coated rubber grip gloves for lowering the system into the well, plus two
or three friends to help with the weight of lowering longer systems.
ATTENTION-The directions provided by your PVC cleaner, primer glue maker
must be followed strictly, particularly if you are attempting to glue your FloJak
in extreme heat or cold. Your pump must be glued 24 hours prior to handling or
exposure water and weight. To ensure good glue joints plan your well installation
for the day after glue-up. Failed glue joints are avoidable with care, and are your
responsibility. For more information on glue application, go to www.oatey.com and
click on the "How to Use" link to helpful YouTube Videos.
WARNING-When lowering the FloJak into your well, the pump and piping
assembly weighs approximately 41 lbs per 50 feet. You must lower the unit into
your well utilizing a firm grip in the piping, plus the lowering rope. Rubber gripping
gloves are highly recommended.
NOTE:Your FloJak comes from the factory with about 60 feet of lowering cord.
If you are lowering the pump more than 50 feet, you will need additional rope or
cable with a working load rating of at least three times the weight of your pump
assembly.
FloJak must be assembled in 5-foot sections to an "ideal length". The ideal length
of an assembled FloJak, will reach from the surface, to a depth of 10-20 feet
below the "static water level" while staying at least 10 feet from the bottom of
the well. Static water level is the distance from the surface to water. It is usually
much less than the drilled depth of the well itself. Prior to
assembly, determine the "ideal length" by gathering some
information about the well.
NOTE-to avoid the possibility of electrical shock
ensure that all power to the existing pump and well
area, has been disconnected at the main distribution
panel, and the pump breaker. It is recommended
that you use a qualified, licensed electrician who
is a certified well technician! It is your responsibility
to ensure that all applicable local and state regulations,
requirements and codes are adhered to.
2
3
CONT . PAGE 4
Advertisement

Summary of Contents for FloJak F-50
- Page 1 7. Coated rubber grip gloves for lowering the system into the well, plus two The FloJak is easier to install with two or three extra people...one to lift the center shorter (but will require much less effort). Without the Jak assist handles, it takes or three friends to help with the weight of lowering longer systems.
- Page 2 These two sections are paired, and must remain together always. 2. To make assembly easier, pull the To use the cord, tear it through the blue FloJak label (which MUST be removed small (3/4”) pump rod section out of prior to pump installation).
Need help?
Do you have a question about the F-50 and is the answer not in the manual?
Questions and answers