
Related Manuals for Ninja BL663


Summary of Contents for Ninja BL663
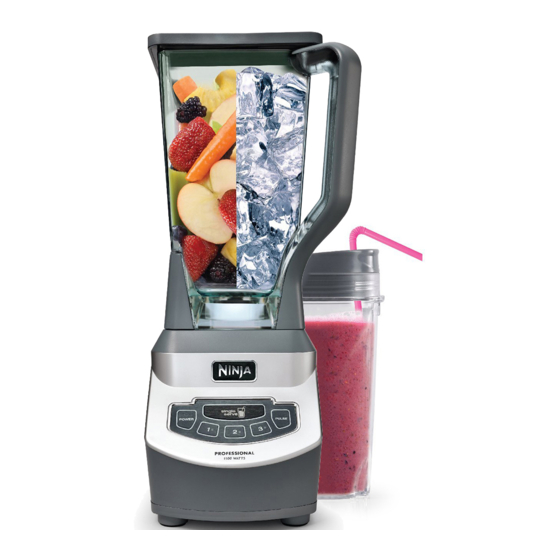
- Page 1 ® Professional Blender BL663 OWNER’S GUIDE ® HELP LINE 1 877 646-5288 www.ninjakitchen.com BL663_30_IB_ENG_120626_1.indd 1 12-06-26 9:23 AM...
- Page 2 1. To protect against electrical shock, do FOLLOWING: not submerge the appliance or allow the READ ALL INSTRUCTIONS BEFORE power cord to come into contact with USING YOUR NINJA PROFESSIONAL ® water or any other liquid. BLENDER. 2. DO NOT allow young children to operate the appliance or use as a toy.
- Page 3 22. DO NOT overfill. 9. Keep hands, hair, clothing, as well as utensils out of container while processing 23. Extreme caution must be used when to reduce the risk of severe injury to moving an appliance containing hot persons or damage to the appliance. A food, water or other liquids.
- Page 4 THIS BOOK COVERS MODEL NUMBERS: BL663 30 TECHNICAL SPECIFICATIONS Voltage: 120V., 60Hz. Power: 1100 Watts TOLL FREE: 1-877-646-5288 BL663_30_IB_ENG_120626_1.indd 3 12-06-26 9:23 AM...
-
Page 5: Table Of Contents
Contents Thank you for Getting to Know Your Ninja Professional Blender ......5 ® purchasing Assembling the Ninja Professional Blender ........7 ® the Ninja ® Assembly and Use of the Single Serve Cup ..........8 Professional Assembly and Use of the 72-oz. Pitcher ............9 Blender. -
Page 6: Getting To Know Your Ninja ® Professional Blender
Getting To Know Your Ninja Professional Blender ® a 6-Blade Assembly f Drive Gear b To-Go Single Server Lids (x3) g Single Serve Blade h Motor Base c Pitcher Lid with Locking Handle d Single Serve Drink Cup (x3) i Control Panel... - Page 7 The Ninja Professional Blender is a high powered innovative tool with a compact design and outstanding ® performance. It is perfect for ice crushing, chopping, blending, and complete juicing. FEATURES: • Ninja Blade Technology ® • 72 oz. Pitcher and Single Serve Drink Cups - BPA Free • Cord Storage • L ock-On Lid, Featuring Pour Spout • E asy-to-Clean Electronic Control Panel...
-
Page 8: Assembling The Ninja ® Professional Blender
Assembling the Ninja Professional Blender ® PLEASE KEEP THESE IMPORTANT SAFEGUARDS IN MIND WHEN USING THE APPLIANCE: IMPORTANT: Always place the attachment in the pitcher before adding any ingredients. IMPORTANT: Attachments are not interchangeable. CAUTION: Blades are sharp! Use extreme caution when handling the blade assemblies. - Page 9 Assembly and Use for the Single Serve Cup ASSEMBLY PULSE REMOVAL Fig. 1 Fig. 2 Fig. 5 Fig. 4 Fig. 3 For best results, use short “PULSES”... Practice makes perfect!! 6 When you have reached your desired IMPORTANT: Make sure that the motor consistency, stop the appliance by removing base is plugged in for use.
-
Page 10: Assembly And Use Of The 72-Oz. Pitcher
Assembly and Use for the 72-oz. Pitcher ASSEMBLY Fig. 3a Fig. 4 Fig. 3b Fig. 2 Fig. 5 Fig. 1 It’s best to add the liquid ingredients first and then the dry ingredients. NOTE: The blade will fit loosely on the drive IMPORTANT: Make sure that the motor gear. - Page 11 REMOVAL Fig. 6 Fig. 7 Fig. 8 8 Select the speed that best suits your needs. 11 Depending on the consistency of the contents (Fig. 6) in the container, open the pouring spout cap NOTE: Pulse ingredients for even chopping by and use the spout to empty liquid contents.
-
Page 12: The Ninja
CAUTION: DO NOT immerse the motor base into water or any other liquid. HOW TO STORE 1 Separate/remove all parts from each other. 1 Store the Ninja Professional Blender upright ® 2 Clean the motor base with a damp cloth and with the pitcher on the motor base, 6-Blade wipe dry. -
Page 13: Speed Chart
Speed Chart BUTTON FUNCTION On/Off Always turn appliance 'Off' when not in use. POWER Use to mix thin batters, gravies and marinades, scramble Processing & eggs, puree cooked foods and uncooked fruits and chop Mixing vegetables for dips and salsa. Use to grate hard cheeses, cream soups, beat dips, grind Blending nuts, thorough chopping, blend sauces and spreads. - Page 14 Notes TOLL FREE: 1-877-646-5288 BL663_30_IB_ENG_120626_1.indd 13 12-06-26 9:23 AM...
-
Page 15: Warranty & Registration
Limited Warranty). Mark the outside of your package “ATTENTION CUSTOMER SERVICE”. We are constantly striving to improve our products, therefore the specifications contained herein are subject to change without notice. Product Registration Please visit www.ninjakitchen.com or call 1-877-646-5288 to register your new Ninja ® product within ten (10) days of purchase. You will be asked to provide the store name, date of purchase and model number along with your name and address. - Page 16 Euro-Pro Operating LLC US: Newton, MA 02459 CAN: Ville St-Laurent, QC H4S 1A7 1-877-646-5288 www.ninjakitchen.com Copyright © 2012 Euro-Pro Operating LLC Printed in China Illustrations may differ from actual product. BL663.E.120626.1 BL663_30_IB_ENG_120626_1.indd 15 12-06-26 9:23 AM...
Need help?
Do you have a question about the BL663 and is the answer not in the manual?
Questions and answers