Smartwares DIC-211 Series Instruction Manual
Hide thumbs
Also See for DIC-211 Series:
- Instruction manual (51 pages) ,
- Instruction manual (99 pages) ,
- Instruction manual (68 pages)

Subscribe to Our Youtube Channel
Related Manuals for Smartwares DIC-211 Series


Summary of Contents for Smartwares DIC-211 Series
- Page 1 Door entry 2 - way speech Melody options Door release Touch buttons DIC-211 intercom series Instruction manual...
- Page 2 DIC-211 Series Instruction manual ......................4 Bedienungsanleitung ....................12 Name Mode d’emploi ......................20 Gebruiksaanwijzing ......................28 Manual de usuario ......................36 Manuele utente ......................44...
-
Page 4: Installation Safety
WARNING 1. Please read these instructions carefully before installing and using the product. 2. Do not cut the power supply cable to extend it; the device (transformer) will not work with a longer cable. Do not plug in the device until all the wiring has been finished. INSTALLATION SAFETY 1. -
Page 5: Product Overview
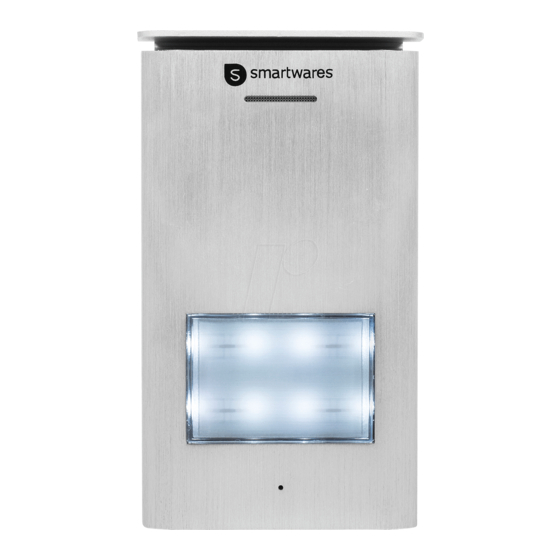
PRODUCT OVERVIEW INDOOR UNIT Speaker Unlock button Internal call button Intercom button Mute indicator Power indicator Select ringtone button Mute Button Adjust ring volume button Microphone WHAT’S IN THE BOX? OUTDOOR UNIT Speaker Call button/ Name card Microphone Unlock time switch... - Page 6 INSTALLATION - OUTDOOR UNIT When installing the outdoor unit, make sure that the location you wish to install it is dry. It is important that the electronics do not get wet. 1. Drill holes in the wall, insert the wall plugs in the holes. Place the bracket and tighten the screws.
-
Page 7: Installation - Indoor Unit
INSTALLATION - INDOOR UNIT 1.Select a suitable location for installation. 2. Drill holes in the wall, insert the wall plugs in the holes. Place the bracket and tighten the screws. 3. Connect the wires. Please pay attention to the color markings 4. - Page 8 WIRING When running the wires, please make sure that they are not placed directly next to electrical wiring, This could cause interference in your connection. Testing the unit When testing the unit, please make sure that the indoor unit and the outdoor unit are at least 10 meters apart.
- Page 9 Intercom function: When in standby, when a visitor presses the call button on the outdoor unit, the indoor unit will chime. Press the intercom button to speak to the visitor. Internal Intercom: When in standby, press and hold the intercom button to activate the internal intercom function.
-
Page 10: Installation
INSTALLATION Extra indoor-monitors are optional, depending on how many indoor units you intend to use. Outdoor unit black Indoor unit black Indoor unit black Indoor unit black... -
Page 11: Technical Specification
TECHNICAL SPECIFICATION INDOOR UNIT Consumption current 150mA±10mA Operation temperature -10˚C - +50˚C Operation Humidity 85%(Max) OUTDOOR UNIT Supply Voltage 15V 1A Consumption Current 60mA±10mA Operating temperature -10˚C - +50˚C Storage temperature -20˚C - +60˚C Operating humidity ≤85%RH SAFETY INFORMATION Precaution Do not cover the ventilation openings with objects such as newspaper, table cloths, curtains etc. - Page 12 ! WARNUNG 1. Bitte lesen Sie vor der Montage und Inbetriebnahme des Produkts die Bedienungsanweisungen aufmerksam durch. 2. Zerschneiden Sie nicht das Stromversorgungskabel, um es zu verlängern. Das Gerät (Trafo) funktioniert nicht mit einem längeren Kabel. Schließen Sie das Gerät erst dann an, wenn die Verkabelung abgeschlossen ist. INSTALLATIONSSICHERHEIT 1.
- Page 13 PRODUKTÜBERBLICK INNENEINHEIT Lautsprecher Entriegelungstaste Interne Ruftaste Sprechtaste Anzeige für Stummschaltung Betriebsanzeige Auswahltaste für Klingelton Stummschalttaste Taste für Lautstärkeregulierung Mikrofon WHAT’S IN THE BOX? AUßENEINHEIT Lautsprecher Ruftaste / Visitenkarte Mikrofon Zeitschaltuhr aktivieren...
-
Page 14: Montage
MONTAGE Sorgen Sie während der Montage der Außeneinheit dafür, dass der gewünschte Installationsort trocken ist. Es ist wichtig, dass die Elektronik nicht nass wird. 1. Bohren Sie Löcher in die Wand und setzen Sie die Dübel ein. Bringen Sie die Halterung an und ziehen Sie die Schrauben fest. 2. - Page 15 MONTAGE 1. Wählen Sie einen geeigneten Montageort. 2. Bohren Sie Löcher in die Wand und setzen Sie die Dübel ein. Bringen Sie die Halterung an und ziehen Sie die Schrauben fest. 3. Verbinden Sie die Kabel. Bitte achten Sie auf die farbigen Markierungen.
- Page 16 VERKABELUNG Achten Sie beim Verlegen der Kabel darauf, dass diese nicht direkt neben der elektrischen Verkabelung liegen. Dies könnte zu Störungen in Ihrer Verbindung führen. Testen des Geräts Achten Sie beim Testen des Geräts darauf, dass das Innen- und das Außengerät mindestens 10 Meter voneinander entfernt sind.
- Page 17 VERWENDUNG Sprechfunktion: Wenn ein Besucher die Ruftaste auf der Außeneinheit drückt, während sie sich in Standby befindet, klingelt die innere Einheit. Drücken Sie die Sprechtaste, um mit dem Besucher zu kommunizieren. Interne Gegensprechanlage: Halten Sie in Standby die Sprechtaste gedrückt, um die interne Gegensprechanlage zu aktivieren.
- Page 18 MONTAGE Zusätzliche Innenraum-Monitore sind optional erhältlich, je nachdem wie viele Innengeräte Sie verwenden möchten. Außen- einheit Schwarz Innen- einheit Schwarz Innen- einheit Schwarz Innen- einheit Schwarz...
-
Page 19: Technische Daten
TECHNISCHE DATEN INNENEINHEIT Stromaufnahme 150mA±10mA Betriebstemperatur -10˚C - +50˚C Betriebsfeuchtigkeit 85%(Max) AUSSENEINHEIT Netzspannung 15V 1A Stromaufnahme 60mA±10mA Betriebstemperatur -10˚C - +50˚C Lagertemperatur -20˚C - +60˚C Betriebsfeuchtigkeit ≤85%RH SICHERHEITSHINWEISE Vorsichtsmaßnahmen Bedecken Sie die Lüftungsöffnungen nicht mit Objekten wie Zeitungen, Tischdecken, Vorhängen usw. Lassen Sie dieses Produkt nicht in direkten Kontakt mit Wärmequellen oder offenen Flammen kommen. - Page 20 ! AVERTISSEMENT 1. Veuillez lire ces instructions attentivement avant d’installer et d’utiliser le produit. 2. Ne coupez pas le câble d’alimentation pour le rallonger ; l’appareil (transformateur) ne fonctionne pas avec un câble plus long. Ne branchez pas l’appareil tant que le câblage n’est pas terminé. SECURITE D’INSTALLATION 1.
-
Page 21: Presentation Du Produit
PRESENTATION DU PRODUIT UNITE INTERIEURE Haut-parleur Bouton de déverrouillage Bouton d’appel interne Bouton de l’interphone Indicateur de coupure du son Indicateur de mise sous tension Bouton de sélection de sonnerie Bouton de coupure du son Bouton de réglage de volume de sonnerie Microphone WHAT’S IN THE BOX? - Page 22 INSTALLATION Lors de l’installation de l’unité extérieure, assurez-vous que l’emplacement que vous souhaitez pour l’installation est sec. Il est important que les composants électroniques ne soient pas mouillés. 1. Percez les trous dans le mur, insérez les chevilles dans les trous. Placez le support et serrez les vis.
- Page 23 INSTALLATION 1. Sélectionnez un emplacement approprié pour l’installation. 2. Percez des trous dans le mur, insérez les chevilles dans les trous. Placez le support et serrez les vis. 3. Branchez les fils. Faites attention aux marquages de couleur. 4. Montez l’unité intérieure sur le support. Assurez-vous qu’elle est bien fixée.
- Page 24 CÂBLAGE Lorsque vous routez les câbles, assurez-vous qu’ils ne sont pas positionnés directement à côté d’un câblage électrique, car cela pourrait causer des interférences sur votre connexion. Tester l’unité Pour tester l’unité, veillez à ce que les unités intérieures et extérieures se trouvent éloignées d’au moins 10 mètres. Si les unités sont trop proches l’une de l’autre, vous pourriez créer un effet de boucle de son et d’échos très aigus.
- Page 25 POUŽITÍ Fonction interphone : En mode veille, lorsqu’un visiteur appuie sur le bouton d’appel sur l’unité extérieure, l’unité intérieure sonne. Appuyez sur le bouton de l’interphone pour parler au visiteur. Interphone interne : En mode veille, appuyez et maintenez le bouton de l’interphone enfoncé pour activer la fonction d’interphone interne.
- Page 26 INSTALLATION Les moniteurs intérieurs supplémentaires sont optionnels, selon le nombre d’unités intérieures que vous prévoyez d’utiliser. rouge Unité extérieure noir rouge Unité intérieure noir rouge Unité intérieure noir rouge Unité intérieure noir...
-
Page 27: Spécification Technique
SPÉCIFICATION TECHNIQUE UNITÉ INTÉRIEURE Courant de consommation 150mA±10mA Température de fonctionnement -10˚C - +50˚C Humidité de fonctionnement 85%(Max) UNITÉ EXTÉRIEURE Tension d’alimentation 15V 1A Courant de consommation 60mA±10mA Température de fonctionnement -10˚C - +50˚C Température de stockage -20˚C - +60˚C Humidité... -
Page 28: Veilige Bediening
WAARSCHUWING 1. Lees deze instructies a.u.b. zorgvuldig door voordat u het product installeert en gebruikt. 2. Snij het stroomsnoer niet door om het te verlengen; het apparaat (de transformator) werkt niet met een langere kabel. Steek de stekker niet in het stopcontact voordat alle bedrading is aangelegd. INSTALLATIE VEILIGHEID 1. - Page 29 PRODUCTOVERZICHT BINNENEENHEID Luidspreker Ontgrendeltoets Intern gesprek-toets Intercomtoets Demp indicatie Stroom indicatie Kies beltoon toets Dempen toets Volumeknop beltoon Microfoon WHAT’S IN THE BOX? BUITENEENHEID Luidspreker Beltoets/ Naamkaartje Microfoon Ontgrendel timerschakelaar...
- Page 30 INSTALLATIE Zorg dat de locatie waar de buiteneenheid wordt geïnstalleerd droog is. Het is belangrijk dat de elektronica niet nat wordt. 1. Boor gaten in de muur en doe de pluggen in de gaten. Plaats de beugel en draai de schroeven aan. 2.
- Page 31 INSTALLATIE 1. Kies een geschikte locatie voor de installatie. 2. Boor gaten in de muur, doe de pluggen in de gaten. Plaats de beugel en draai de schroeven aan. 3. Sluit de bedrading aan. Let a.u.b. op de kleurmarkeringen 4. Monteer de binneneenheid op de beugel. Zorg ervoor dat hij goed vast zit.
- Page 32 BEDRADING Bij het leggen van de bedrading dient u te zorgen dat deze niet meteen naast de elektrische bedrading ligt. Dit kan namelijk storing geven in uw aansluiting. De eenheid testen Zorg tijdens het testen van de eenheid dat de binnen- en buiteneenheid minimaal 10 meter uit elkaar staan. Als de eenheden te dicht bij elkaar staan, kunnen een hoge toon en echo te horen zijn.
- Page 33 GEBRUIK Intercomfunctie: Als een bezoeker de oproep-toets indrukt op de buiteneenheid terwijl die standby staat, dan klinkt de bel via de binneneenheid. Druk op de intercomtoets om met de bezoeker te praten. Interne intercom: Druk op de intercomtoets om de interne intercom te activeren, als deze standby staat.
- Page 34 INSTALLATIE Extra binnenmonitoren zijn optioneel, afhankelijk van hoeveel binneneenheden u wilt gebruiken. rood Buiten eenheid zwart rood Binnen eenheid zwart rood Binnen eenheid zwart rood Binnen eenheid zwart...
-
Page 35: Technische Specificaties
TECHNISCHE SPECIFICATIES BINNENEENHEID Stroomverbruik 150mA±10mA Bedrijfstemperatuur -10˚C - +50˚C Toelaatbare vochtigheid 85%(Max) BUITENEENHEID Bedrijfsspanning 15V 1A Stroomverbruik 60mA±10mA Bedrijfstemperatuur -10˚C - +50˚C Opslagtemperatuur -20˚C - +60˚C Toelaatbare vochtigheid ≤85%RH VEILIGHEIDSINFORMATIE Voorzichtig Blokkeer geen ventilatieopeningen met voorwerpen zoals kranten, tafelkleden, gordijnen, etc. Laat dit product niet in direct contact komen met hittebronnen of open vuur. -
Page 36: Seguridad De Funcionamiento
! ADVERTENCIA 1. Por favor, lea estas instrucciones detenidamente antes de instalar y usar el producto. 2. No corte el cable de alimentación para alargarlo; el aparato (transformador) no funcionará con un cable más largo. No enchufe el dispositivo hasta que haya finalizado la instalación del cableado. MEDIDAS DE SEGURIDAD DE INSTALACIÓN 1. -
Page 37: Descripción Del Producto
DESCRIPCIÓN DEL PRODUCTO UNIDAD INTERIOR Altavoz Botón de apertura de puerta Botón de llamada interna Botón de intercomunicación Indicador de silencio Indicador de encendido Botón de selección del tono de llamada Botón silencio Botón de ajuste de volumen del timbre Micrófono WHAT’S IN THE BOX? UNIDAD EXTERIOR... -
Page 38: Instalación
INSTALACIÓN Cuando instale la unidad exterior, asegúrese de que el lugar donde desea instalarla esté seco. Es importante que no se mojen las partes electrónicas. 1. Haga los agujeros en la pared e introduzca los tacos en los agujeros. Coloque el soporte y apriete los tornillos. 2. - Page 39 INSTALACIÓN 1. Elija el lugar adecuado para la instalación. 2. Haga los agujeros en la pared e introduzca los tacos en los agujeros. Coloque el soporte y apriete los tornillos. 3. Conecte los cables. Preste atención al color de las marcas.
- Page 40 CABLES Cuando instale los cables, asegúrese de que no estén colocados directamente junto a la instalación eléctrica. Esto podría causar interferencias en la conexión. Probar la unidad Al probar la unidad, asegúrese de que la unidad interior y la unidad exterior estén alejadas una de la otra, al menos, unos 10 metros.
- Page 41 Función de intercomunicación: Cuando está en modo de espera, si un visitante presiona el botón de llamada en la unidad exterior, sonará la unidad interior. Presione el botón de intercomunicación para hablar con el visitante. Intercomunicación interna: Cuando está en modo de espera, mantenga pulsado el botón de intercomunicación para activar la función de intercomunicación interna.
-
Page 42: Diagrama De Conexión
DIAGRAMA DE CONEXIÓN Los monitores interiores adicionales son opcionales, depende de cuántas unidades interiores se vayan a utilizar. rojo Unidad exterior negro rojo Unidad interior negro rojo Unidad interior negro rojo Unidad interior negro... -
Page 43: Especificaciones Técnicas
ESPECIFICACIONES TÉCNICAS UNIDAD INTERIOR Consumo eléctrico 150mA±10mA Temperatura de funcionamiento -10˚C - +50˚C Humedad de funcionamiento 85%(Max) UNIDAD EXTERIOR Tensión de alimentación 15V 1A Consumo eléctrico 60mA±10mA Temperatura de funcionamiento -10˚C - +50˚C Temperatura de almacenamiento -20˚C - +60˚C Humedad de funcionamiento ≤85%RH INFORMACIÓN DE SEGURIDADŤ... -
Page 44: Sicurezza Di Funzionamento
! AVVERTENZA 1. Leggere attentamente queste istruzioni prima di installare e utilizzare il prodotto. 2. Non tagliare il cavo di alimentazione per estenderlo; Il dispositivo (trasformatore) non funziona con un cavo più lungo. Non collegare il dispositivo finché non sia stato completato il cablaggio. SICUREZZA DELL’INSTALLAZIONE 1. -
Page 45: Panoramica Del Prodotto
PANORAMICA DEL PRODOTTO UNITÀ INTERNA Altoparlante Pulsante di sblocco Pulsante di chiamata interna Pulsante interfono Spia di disattivazione audio Spia di alimentazione Pulsante di selezione suoneria Pulsante di disattivazione suoneria Pulsante di regolazione suoneria Microfono WHAT’S IN THE BOX? UNITÀ ESTERNA Altoparlante Pulsante di chiamata/Targhetta nome... -
Page 46: Installazione
INSTALLAZIONE Quando si installa l’unità esterna, assicurarsi che la posizione in cui si desidera installarla sia all’asciutto. È importante che l’elettronica non si bagni. 1. Praticare i fori nel muro, inserire i tasselli nei fori. Posizionare la staffa e serrare le viti. 2. - Page 47 INSTALLAZIONE 1. Selezionare una posizione adatta per l’installazione. 2. Praticare i fori nel muro, inserire le staffe a muro nei fori. Posizionare la staffa e serrare le viti. 3. Collegare i cavi. Si prega di prestare attenzione ai codici colore 4.
- Page 48 CABLAGGIO Quando si esegue il cablaggio, assicurarsi che i fili non siano posizionati direttamente accanto al cablaggio elettrico. Questo potrebbe causare interferenze nella connessione. Testare l’unità Durante il test, assicurarsi che l’unità interna e l’unità esterna siano distanti almeno 10 metri l’una dall’altra. Se le unità sono troppo vicine, è...
- Page 49 UTILIZZO Funzione di interfono: in modalità standby, quando un visitatore preme il pulsante di chiamata sull’unità esterna, l‘unità interna emette un segnale acustico. Premere il pulsante dell’interfono per parlare con il visitatore. Interfono interno: in modalità standby, tenere premuto il pulsante dell’interfono per attivare la funzione interfonica interna.
- Page 50 DIAGRAMMA CONNESSIONE I monitor interni extra sono opzionali, secondo quanti monitor interni si intenda utilizzare. rosso Unità esterna nero rosso Unità interna nero rosso Unità interna nero rosso Unità interna nero...
-
Page 51: Specifiche Tecniche
SPECIFICHE TECNICHE UNITÀ INTERNA Corrente di consumo 150mA±10mA Temperatura di esercizio -10˚C - +50˚C Umidità di esercizio 85%(Max) UNITÀ ESTERNA Tensione di alimentazione 15V 1A Corrente di consumo 60mA±10mA Temperatura di esercizio -10˚C - +50˚C Temperatura di conservazione -20˚C - +60˚C Umidità...
Need help?
Do you have a question about the DIC-211 Series and is the answer not in the manual?
Questions and answers